

How to use AutoGraph in the web interface
Learn how to create, configure, and run a complete AutoGraph workflow in the web interface
Learn how to use AutoGraph Studio to build a Context Graph from your documents. AutoGraph analyzes your content, builds a Corpus Graph, and generates the strategies for a Knowledge Graph. AutoRAG then deploys the retrievers that answer questions from that Context Graph.
The workflow has two stages:
- AutoGraph: Builds your Context Graph. This can be your finish line.
- AutoRAG: Deploys retrievers so your agents and applications can answer questions from that Context Graph.
Open AutoGraph Studio
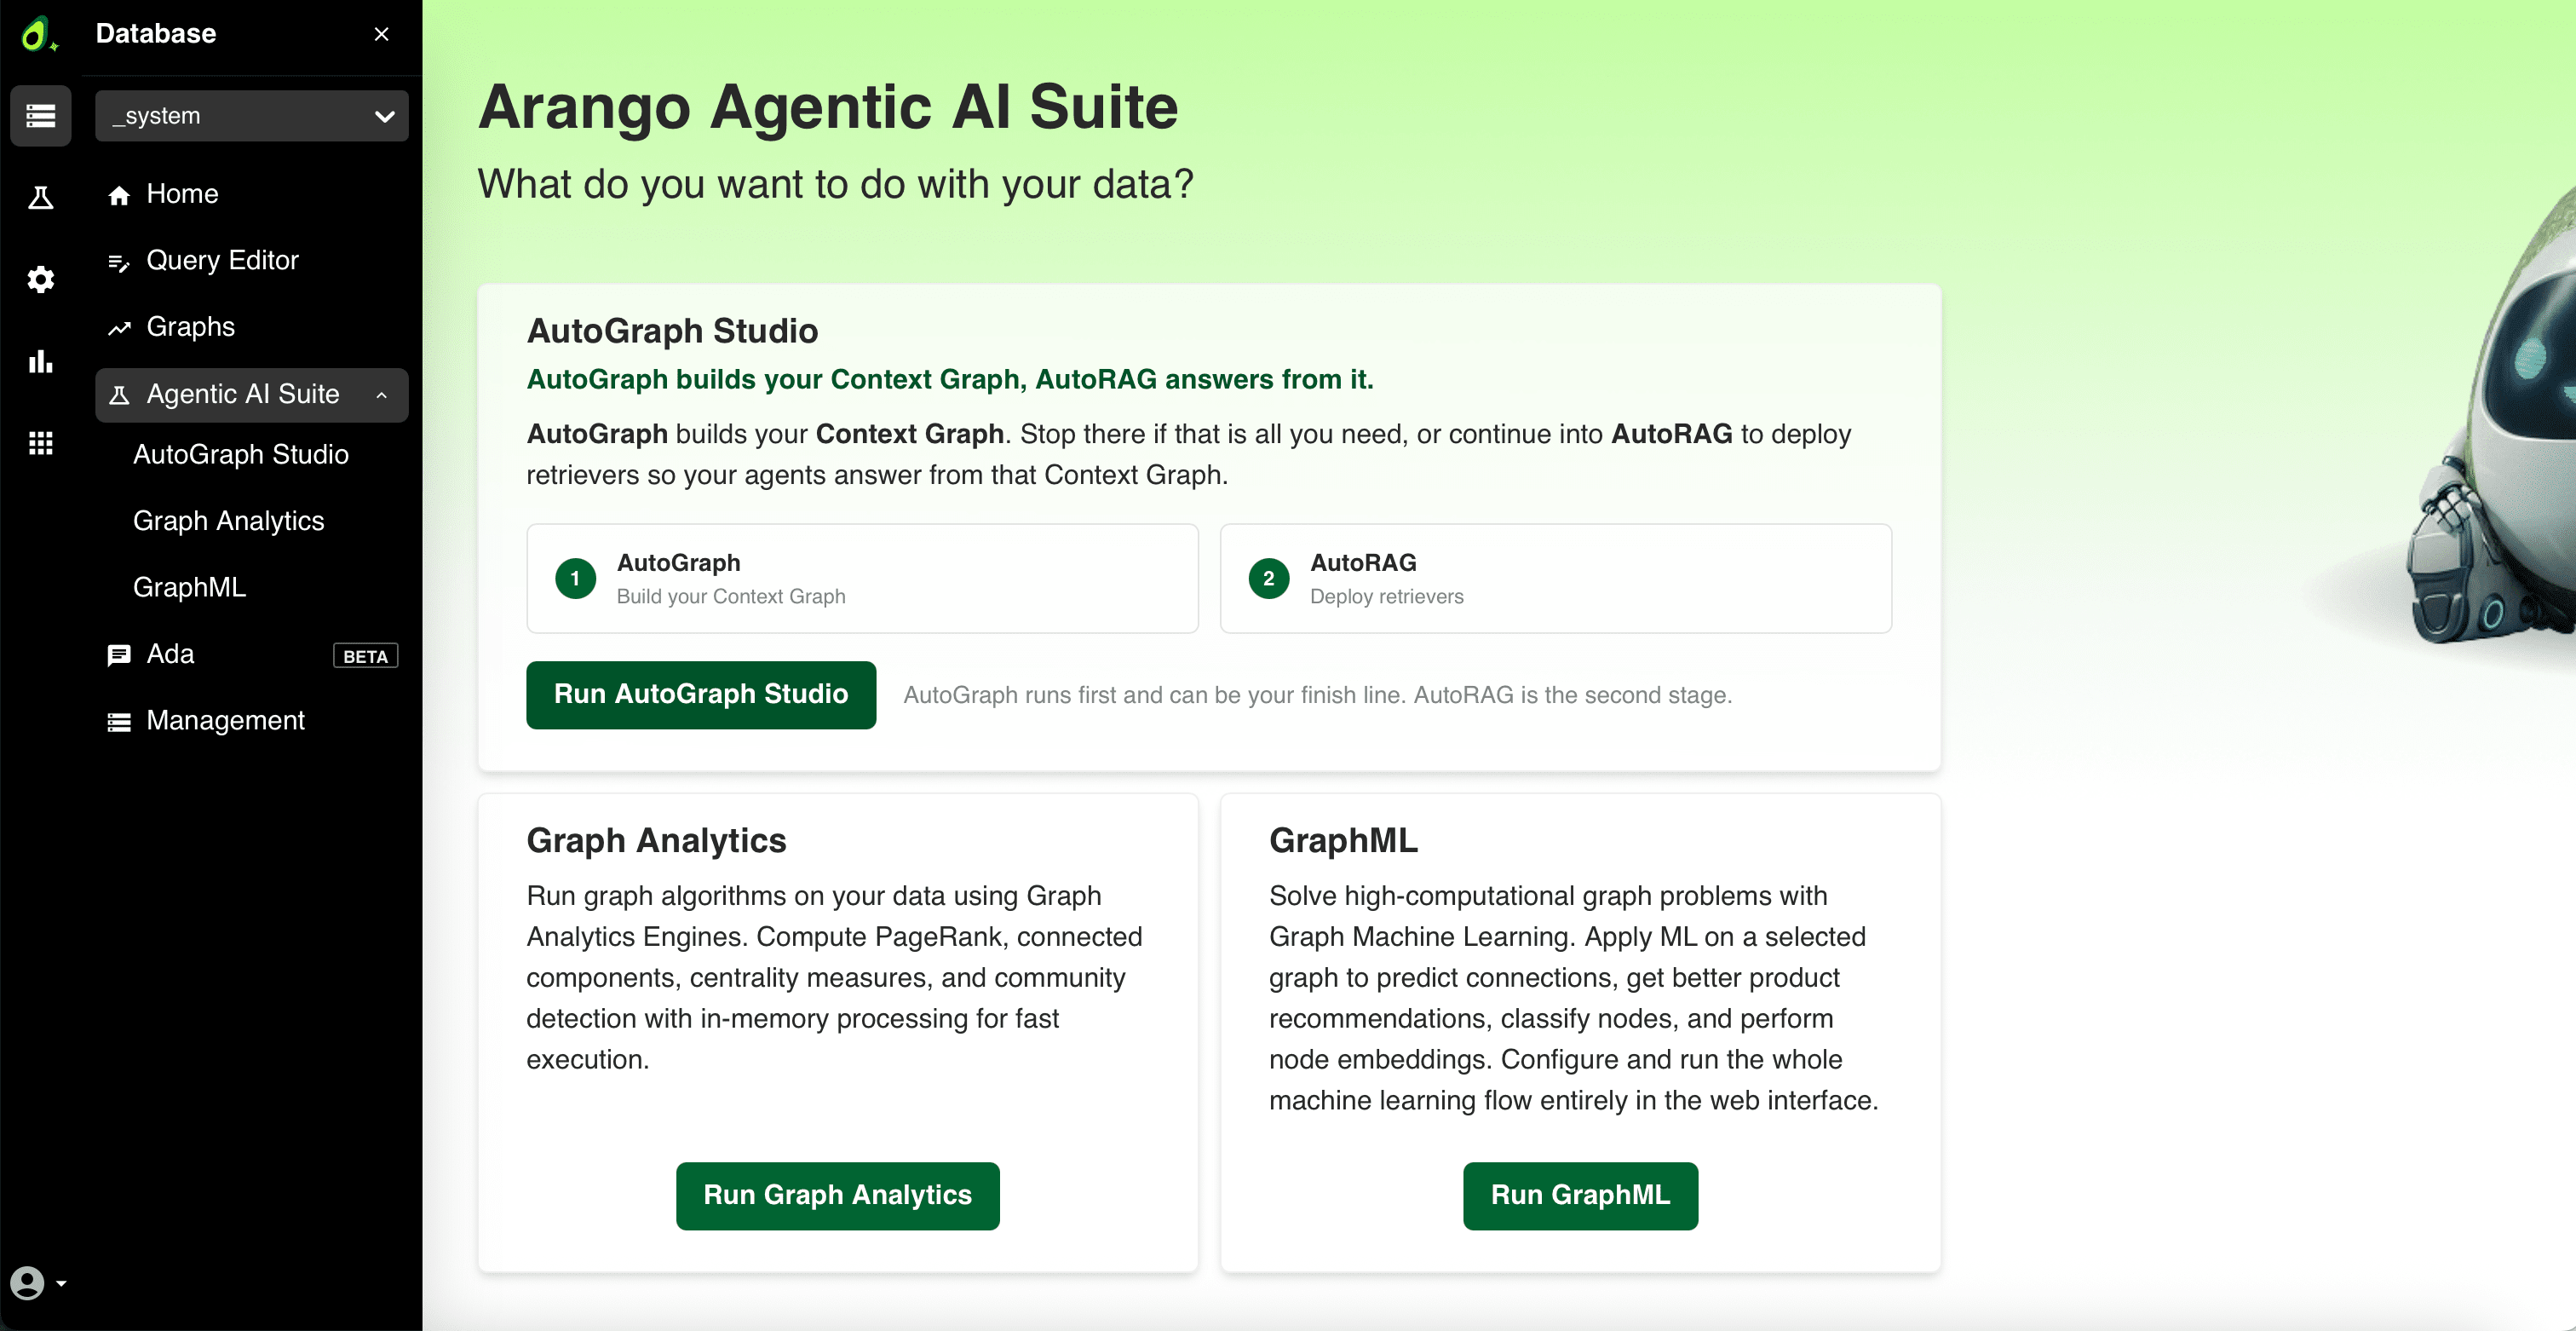
- From the left-hand sidebar, select the database where you want to create the project. You can switch to a different database at any time if you want to work elsewhere.
- In the left-hand sidebar, click Agentic AI Suite, then click AutoGraph Studio. You can also open the Agentic AI Suite overview and click Run AutoGraph Studio.
Create an AutoGraph project
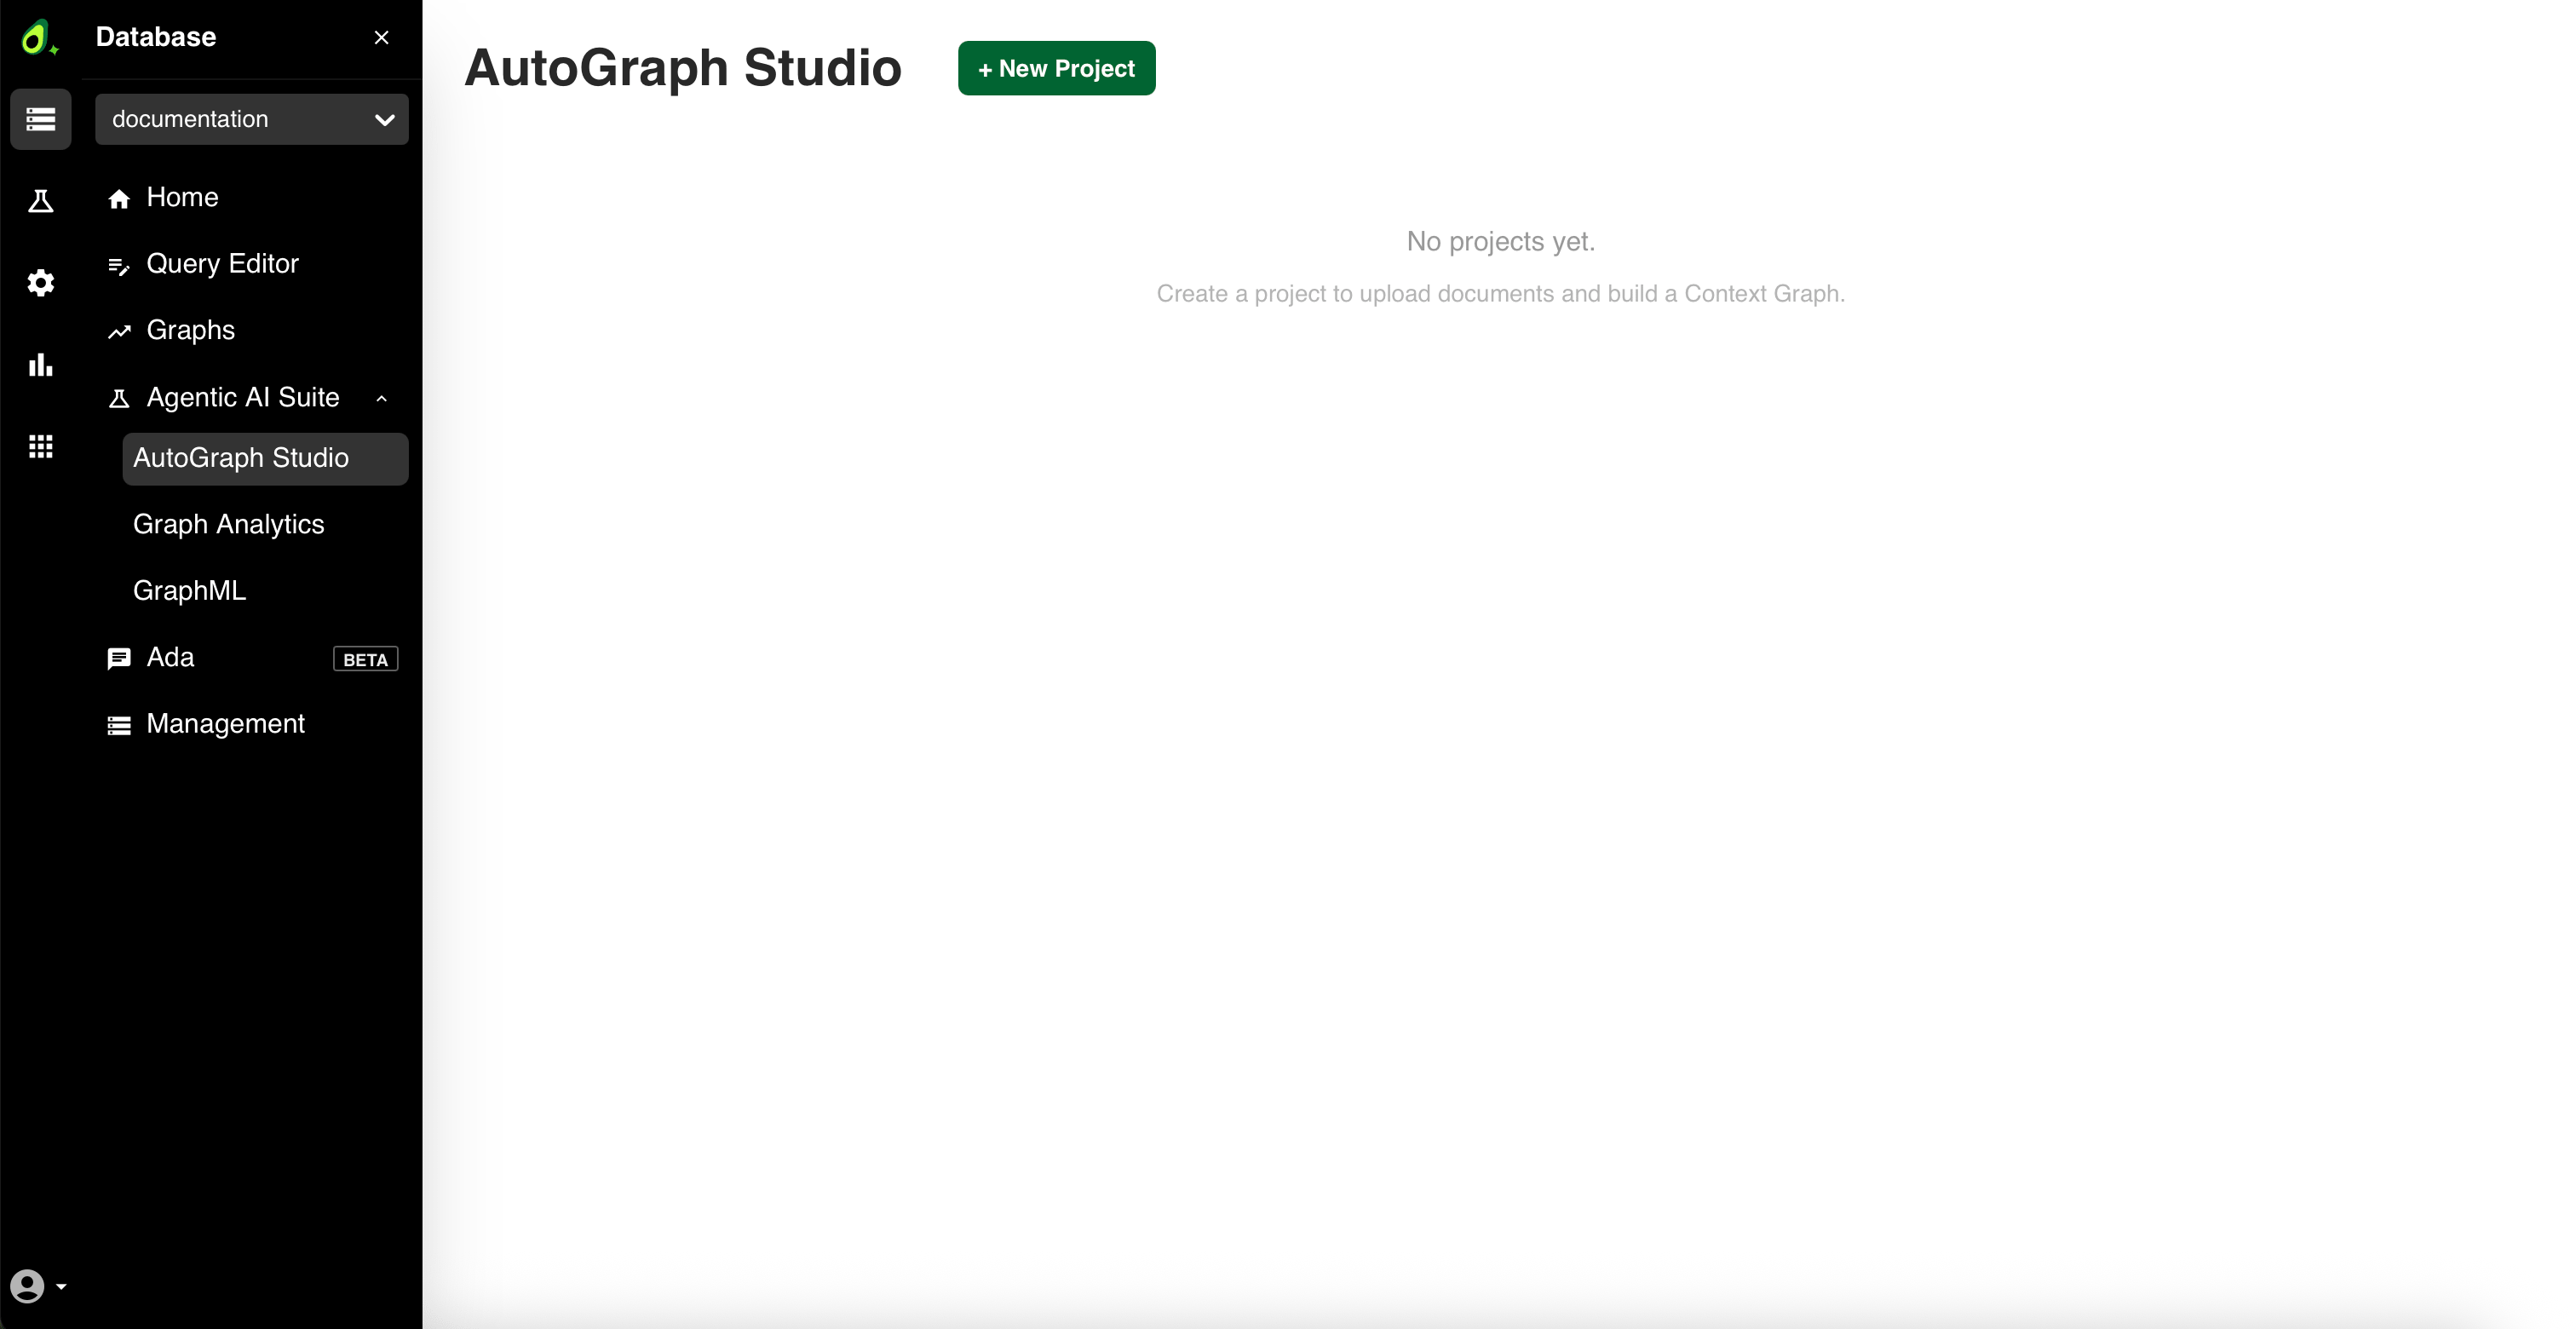
In the AutoGraph Studio view, click + New Project. A database without any projects reports No projects yet.
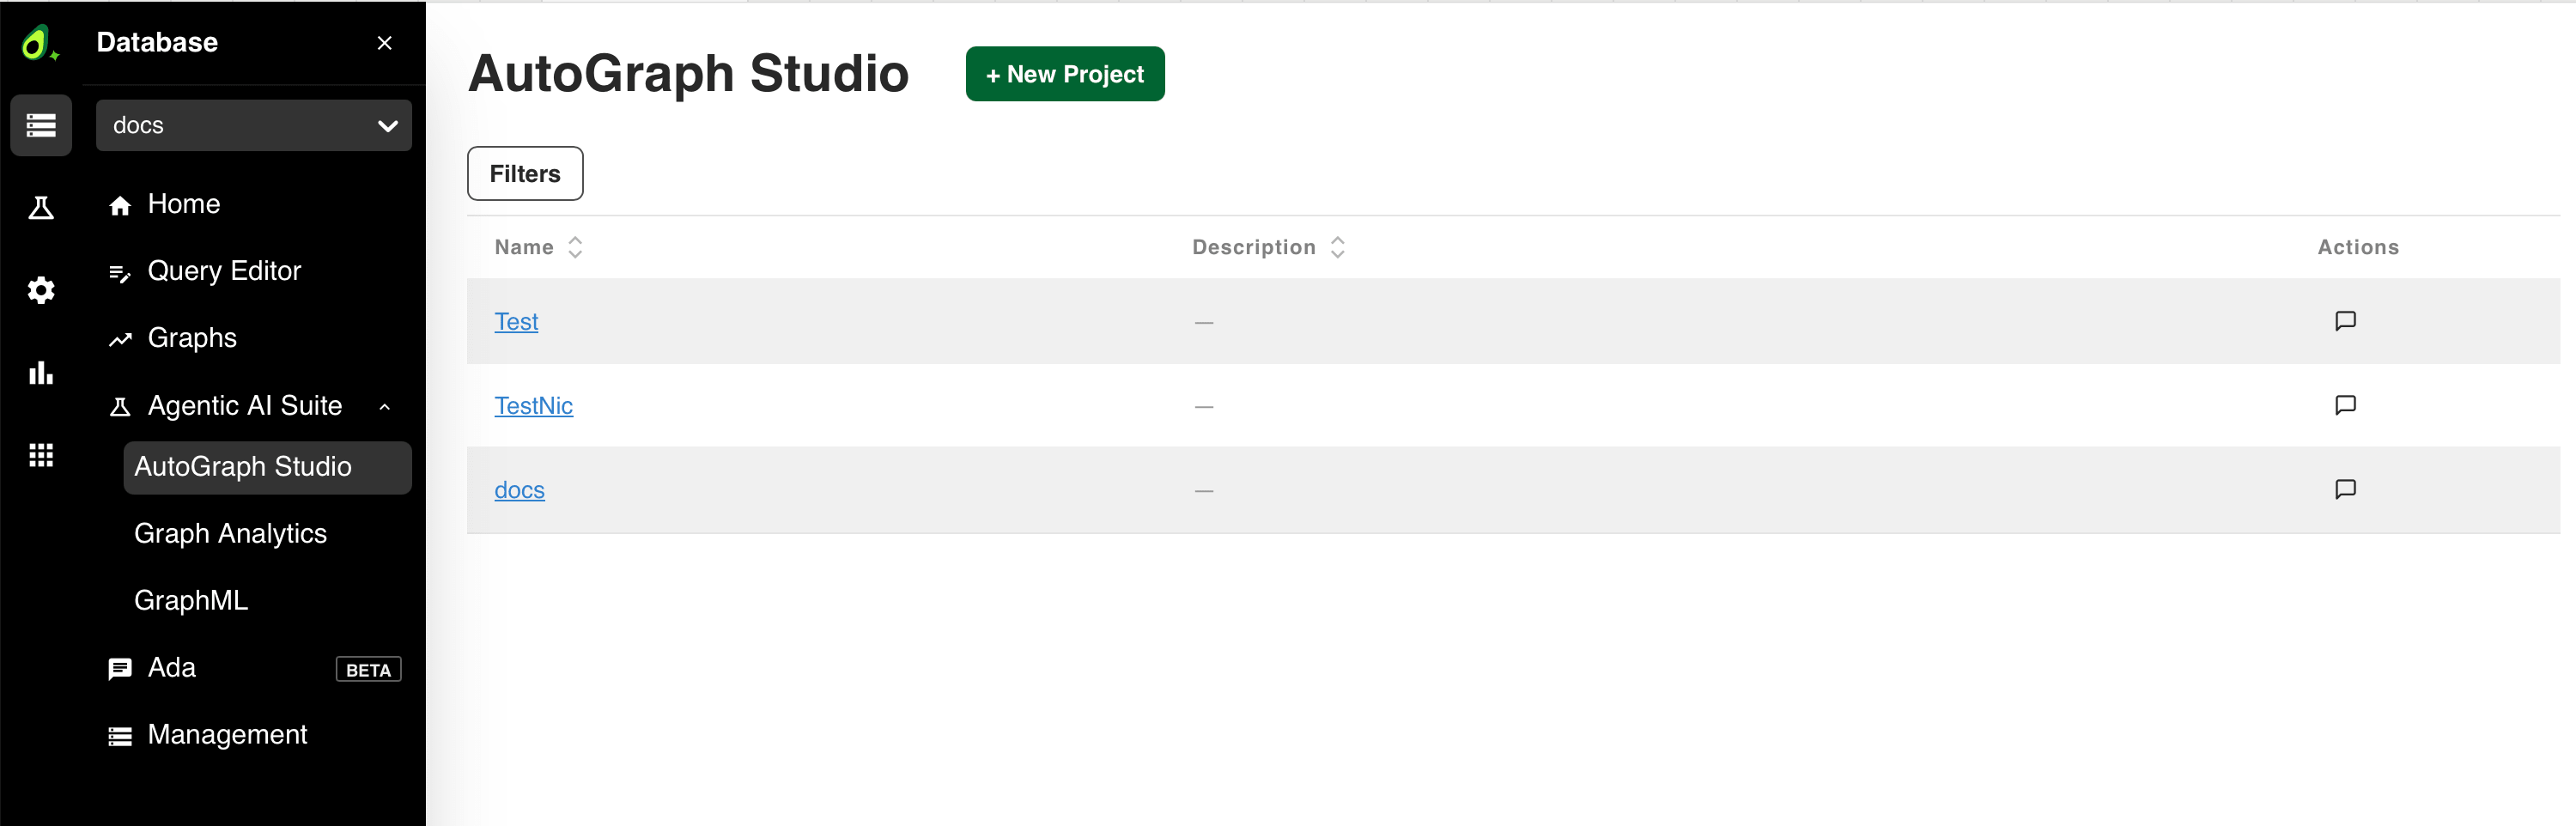
Existing projects of the current database are listed in a table with their Name, Description, and Actions. Click a column header to sort, use Filters to narrow the list, and click a project name to open it.
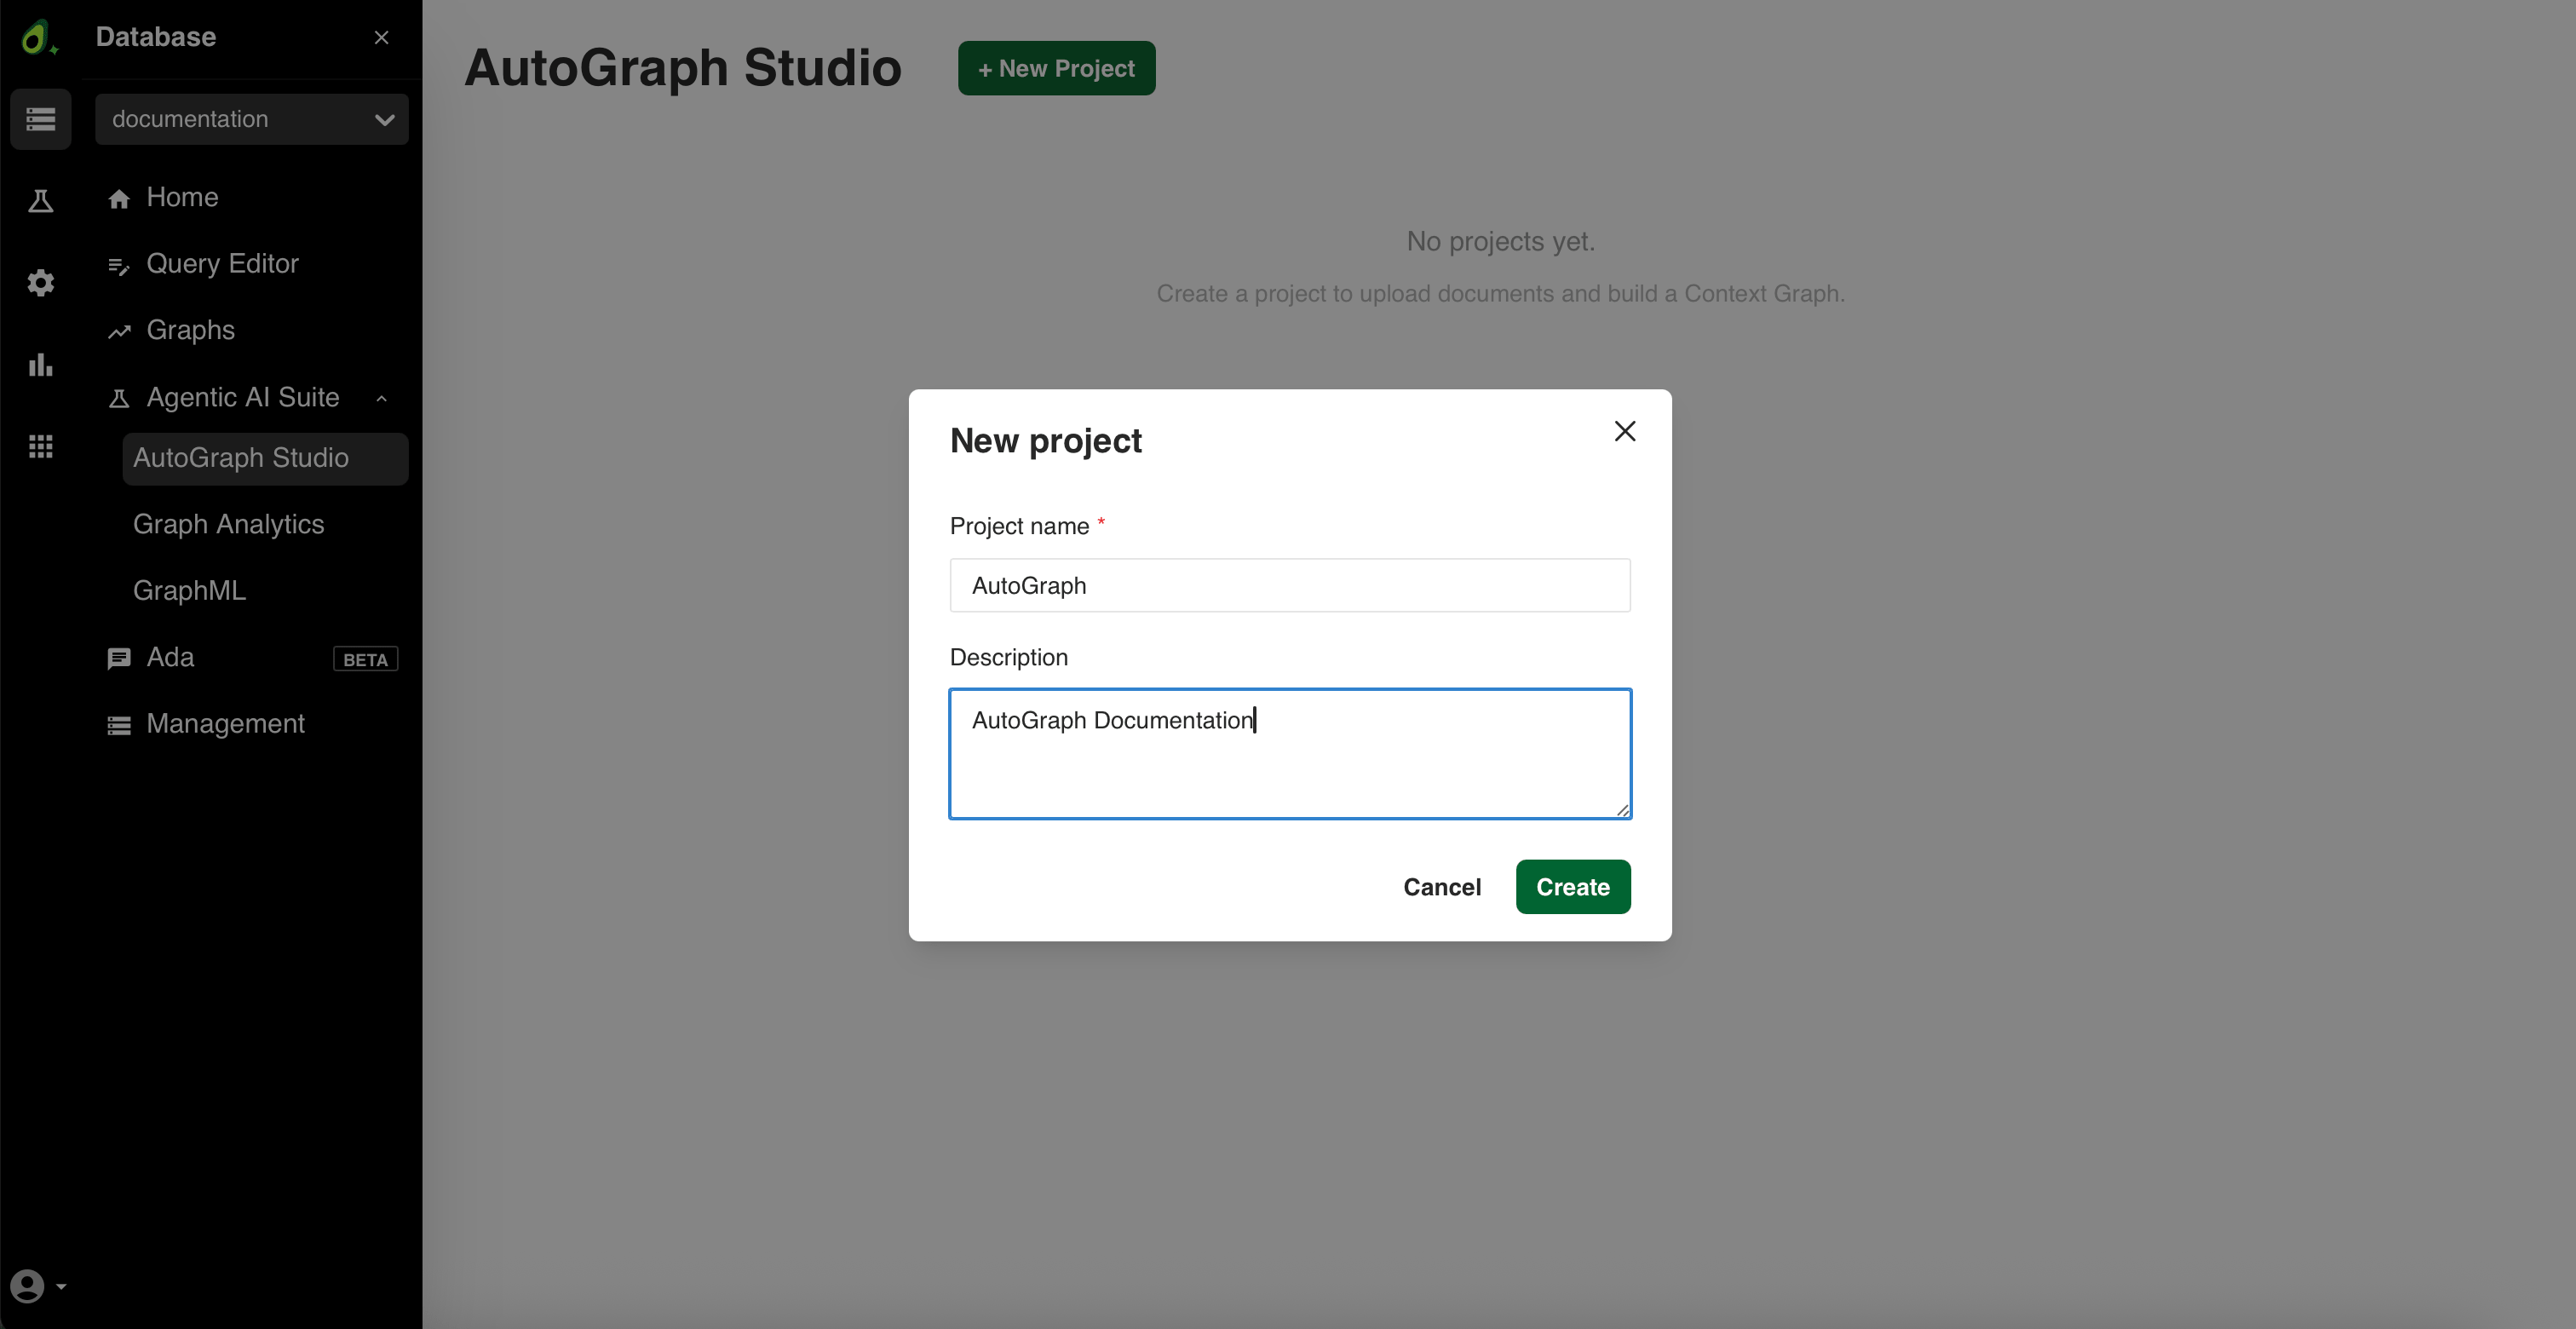
The New project dialog opens. Enter a Project name and, optionally, a Description of what this project’s knowledge base is for.
The project name must start with a letter and can only contain letters, numbers, underscores, and hyphens. Spaces are not allowed. It must be between 1 and 63 characters long.
Click Create.
The project opens the three-step setup wizard: Documents, Configure, and Build.
Add your documents
In the Documents step, you upload documents into categories. Each upload becomes a category that you name and can edit later. Documents are uploaded to the project when you continue to the next step.
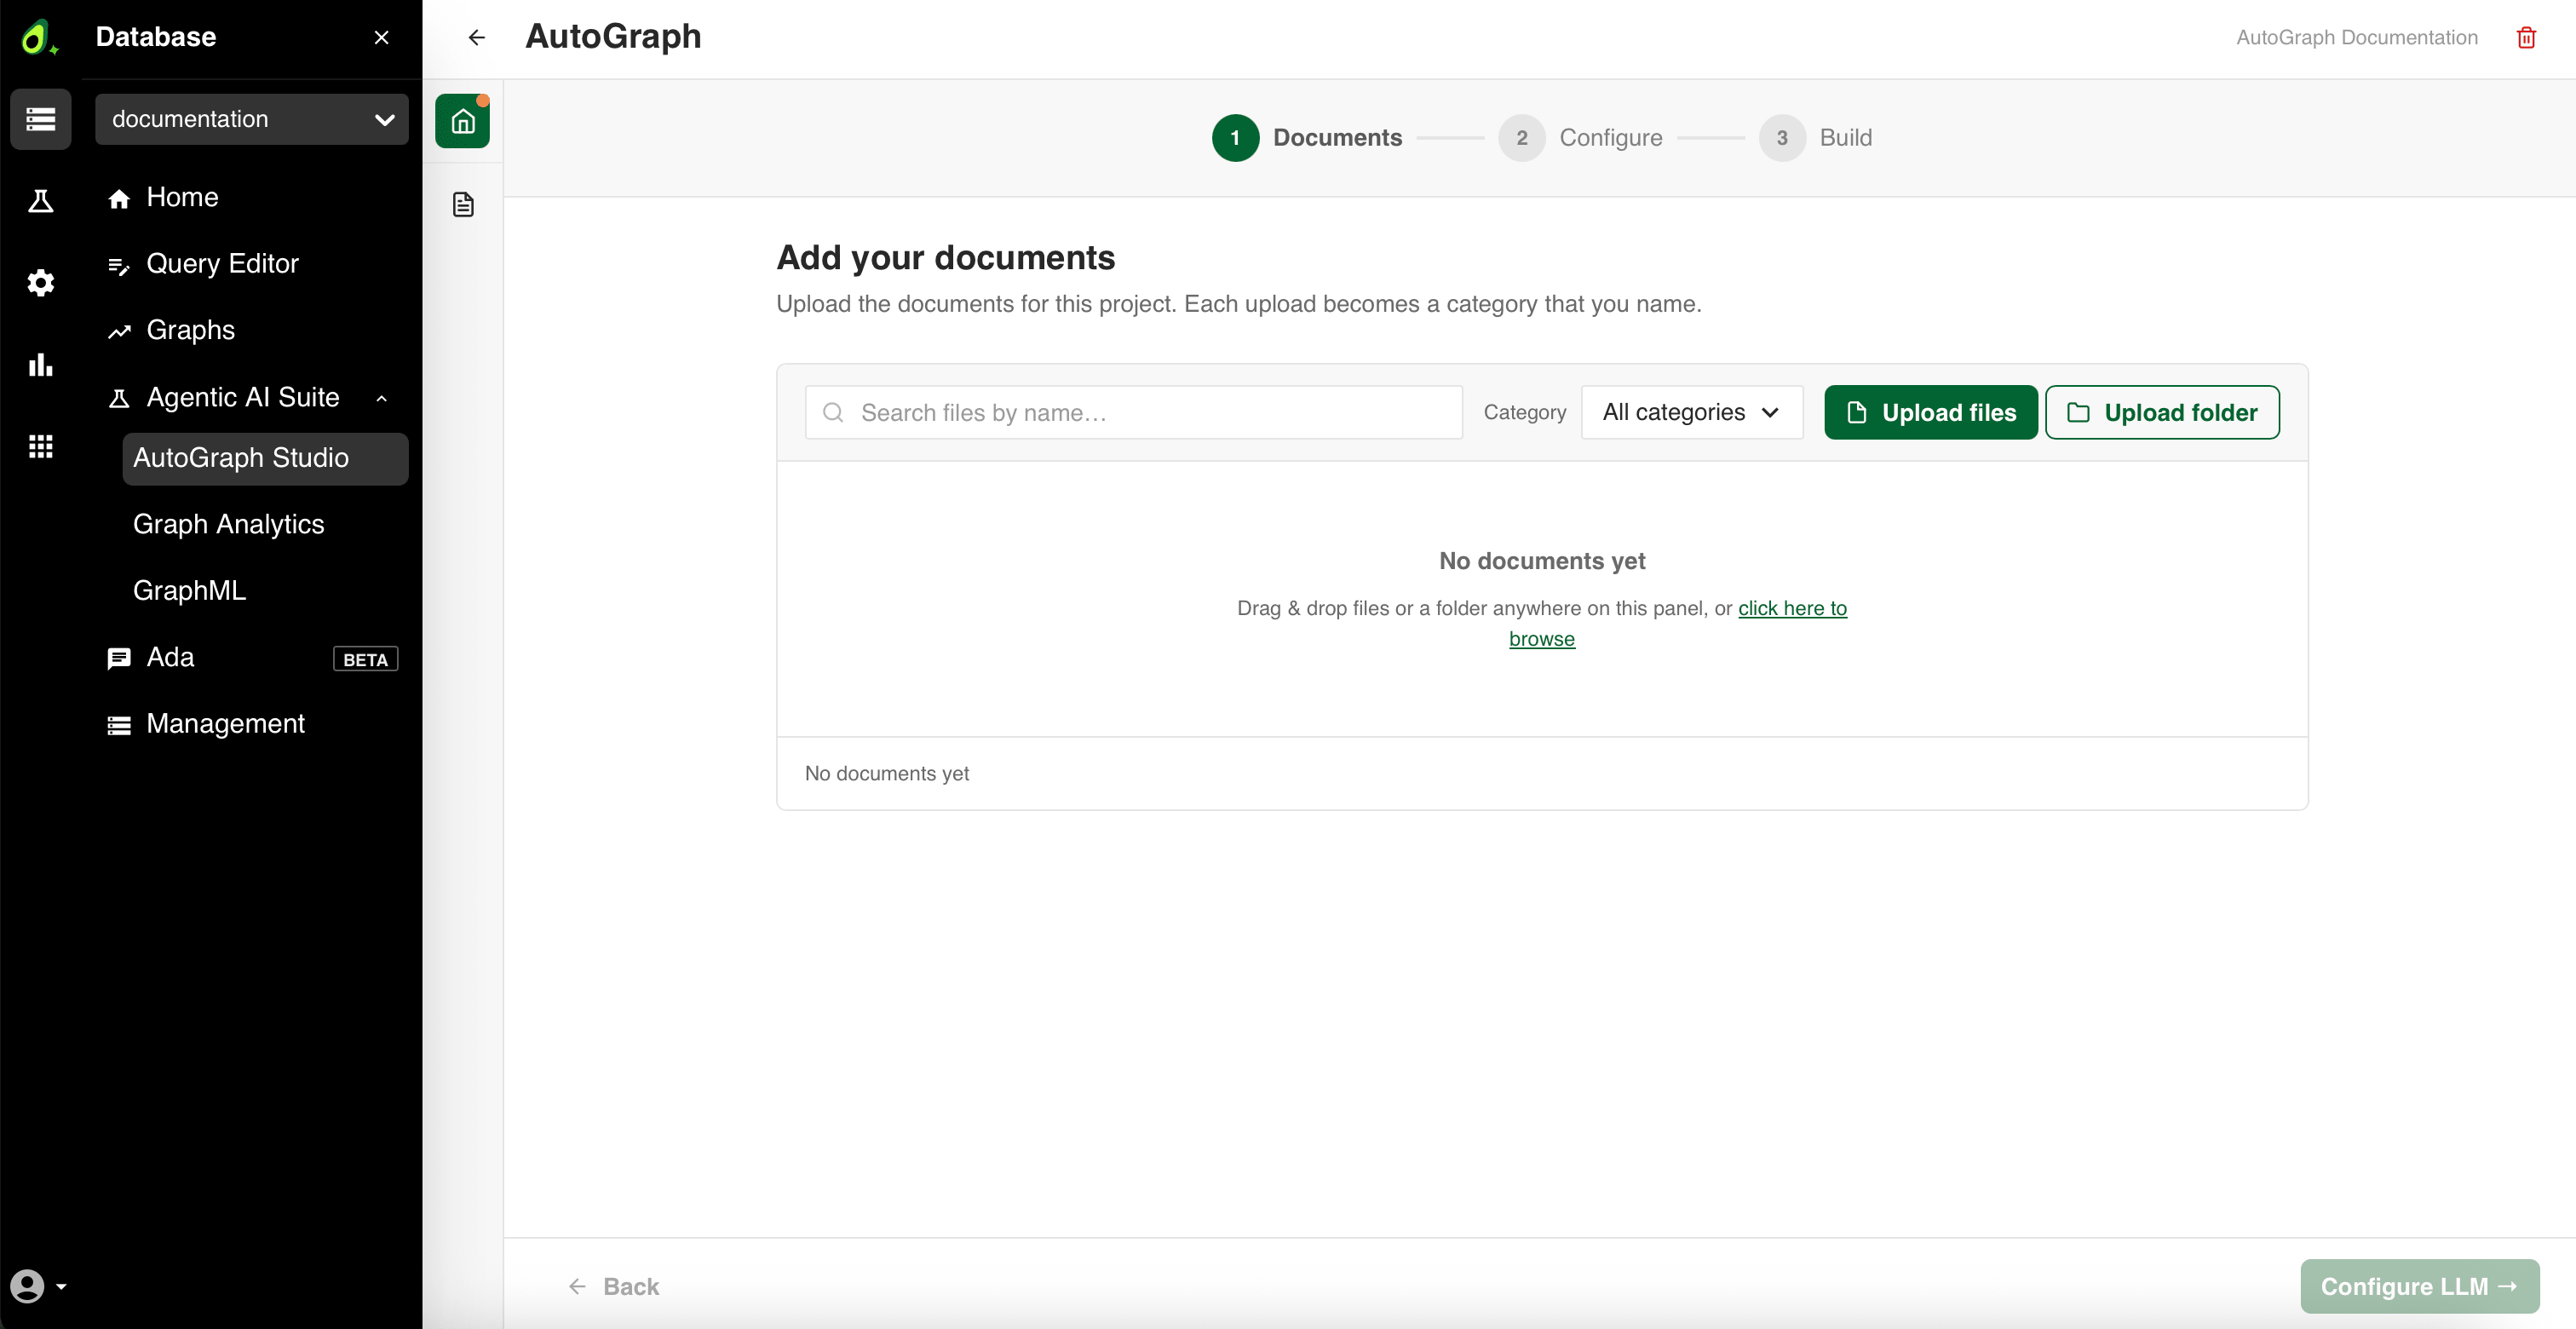
Click Upload files to select individual files, or Upload folder to upload an entire folder. You can also drag files or a folder anywhere onto the panel. Supported file formats are:
- Text files:
.txt,.md - PDF files:
.pdf, including scanned documents - Office documents:
.docx,.pptx,.doc,.ppt
For details, especially around image extraction, see Format support.
- Text files:
The Name this category dialog opens and lists the files you selected. Enter a short, unique Category name that describes what these files cover, for example
architectureorrelease-notes. You can edit it later.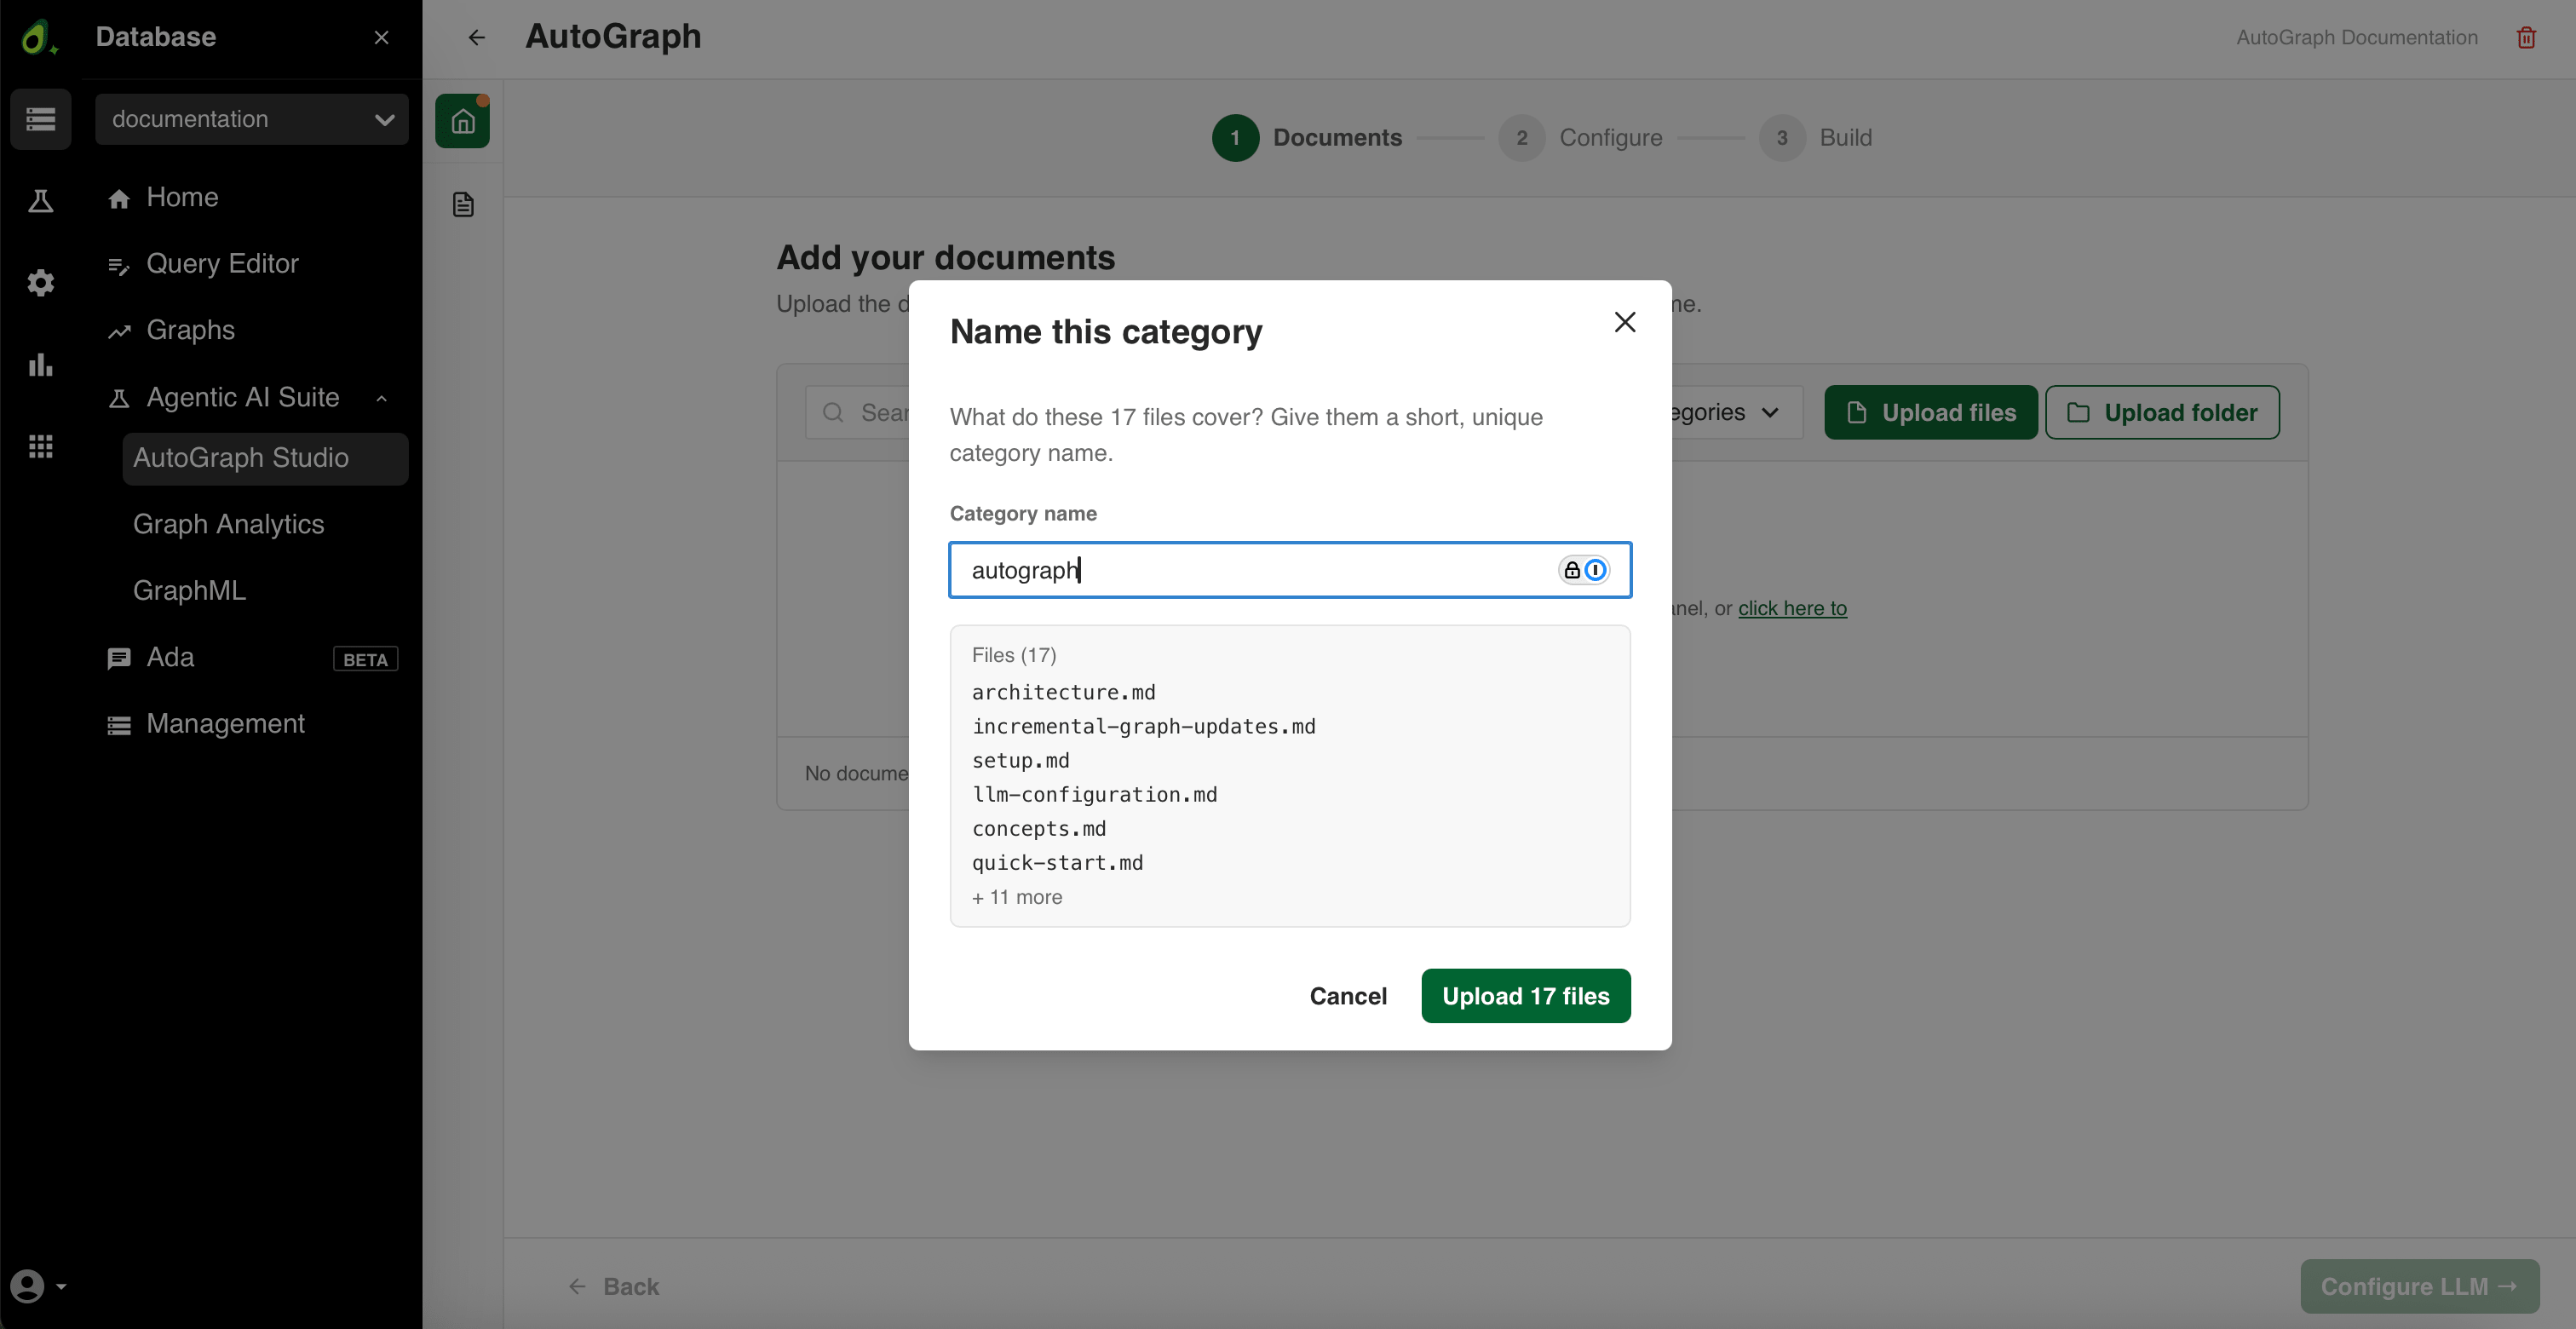
Click Upload # files.
The files appear grouped under the category with a Pending status and their file size.
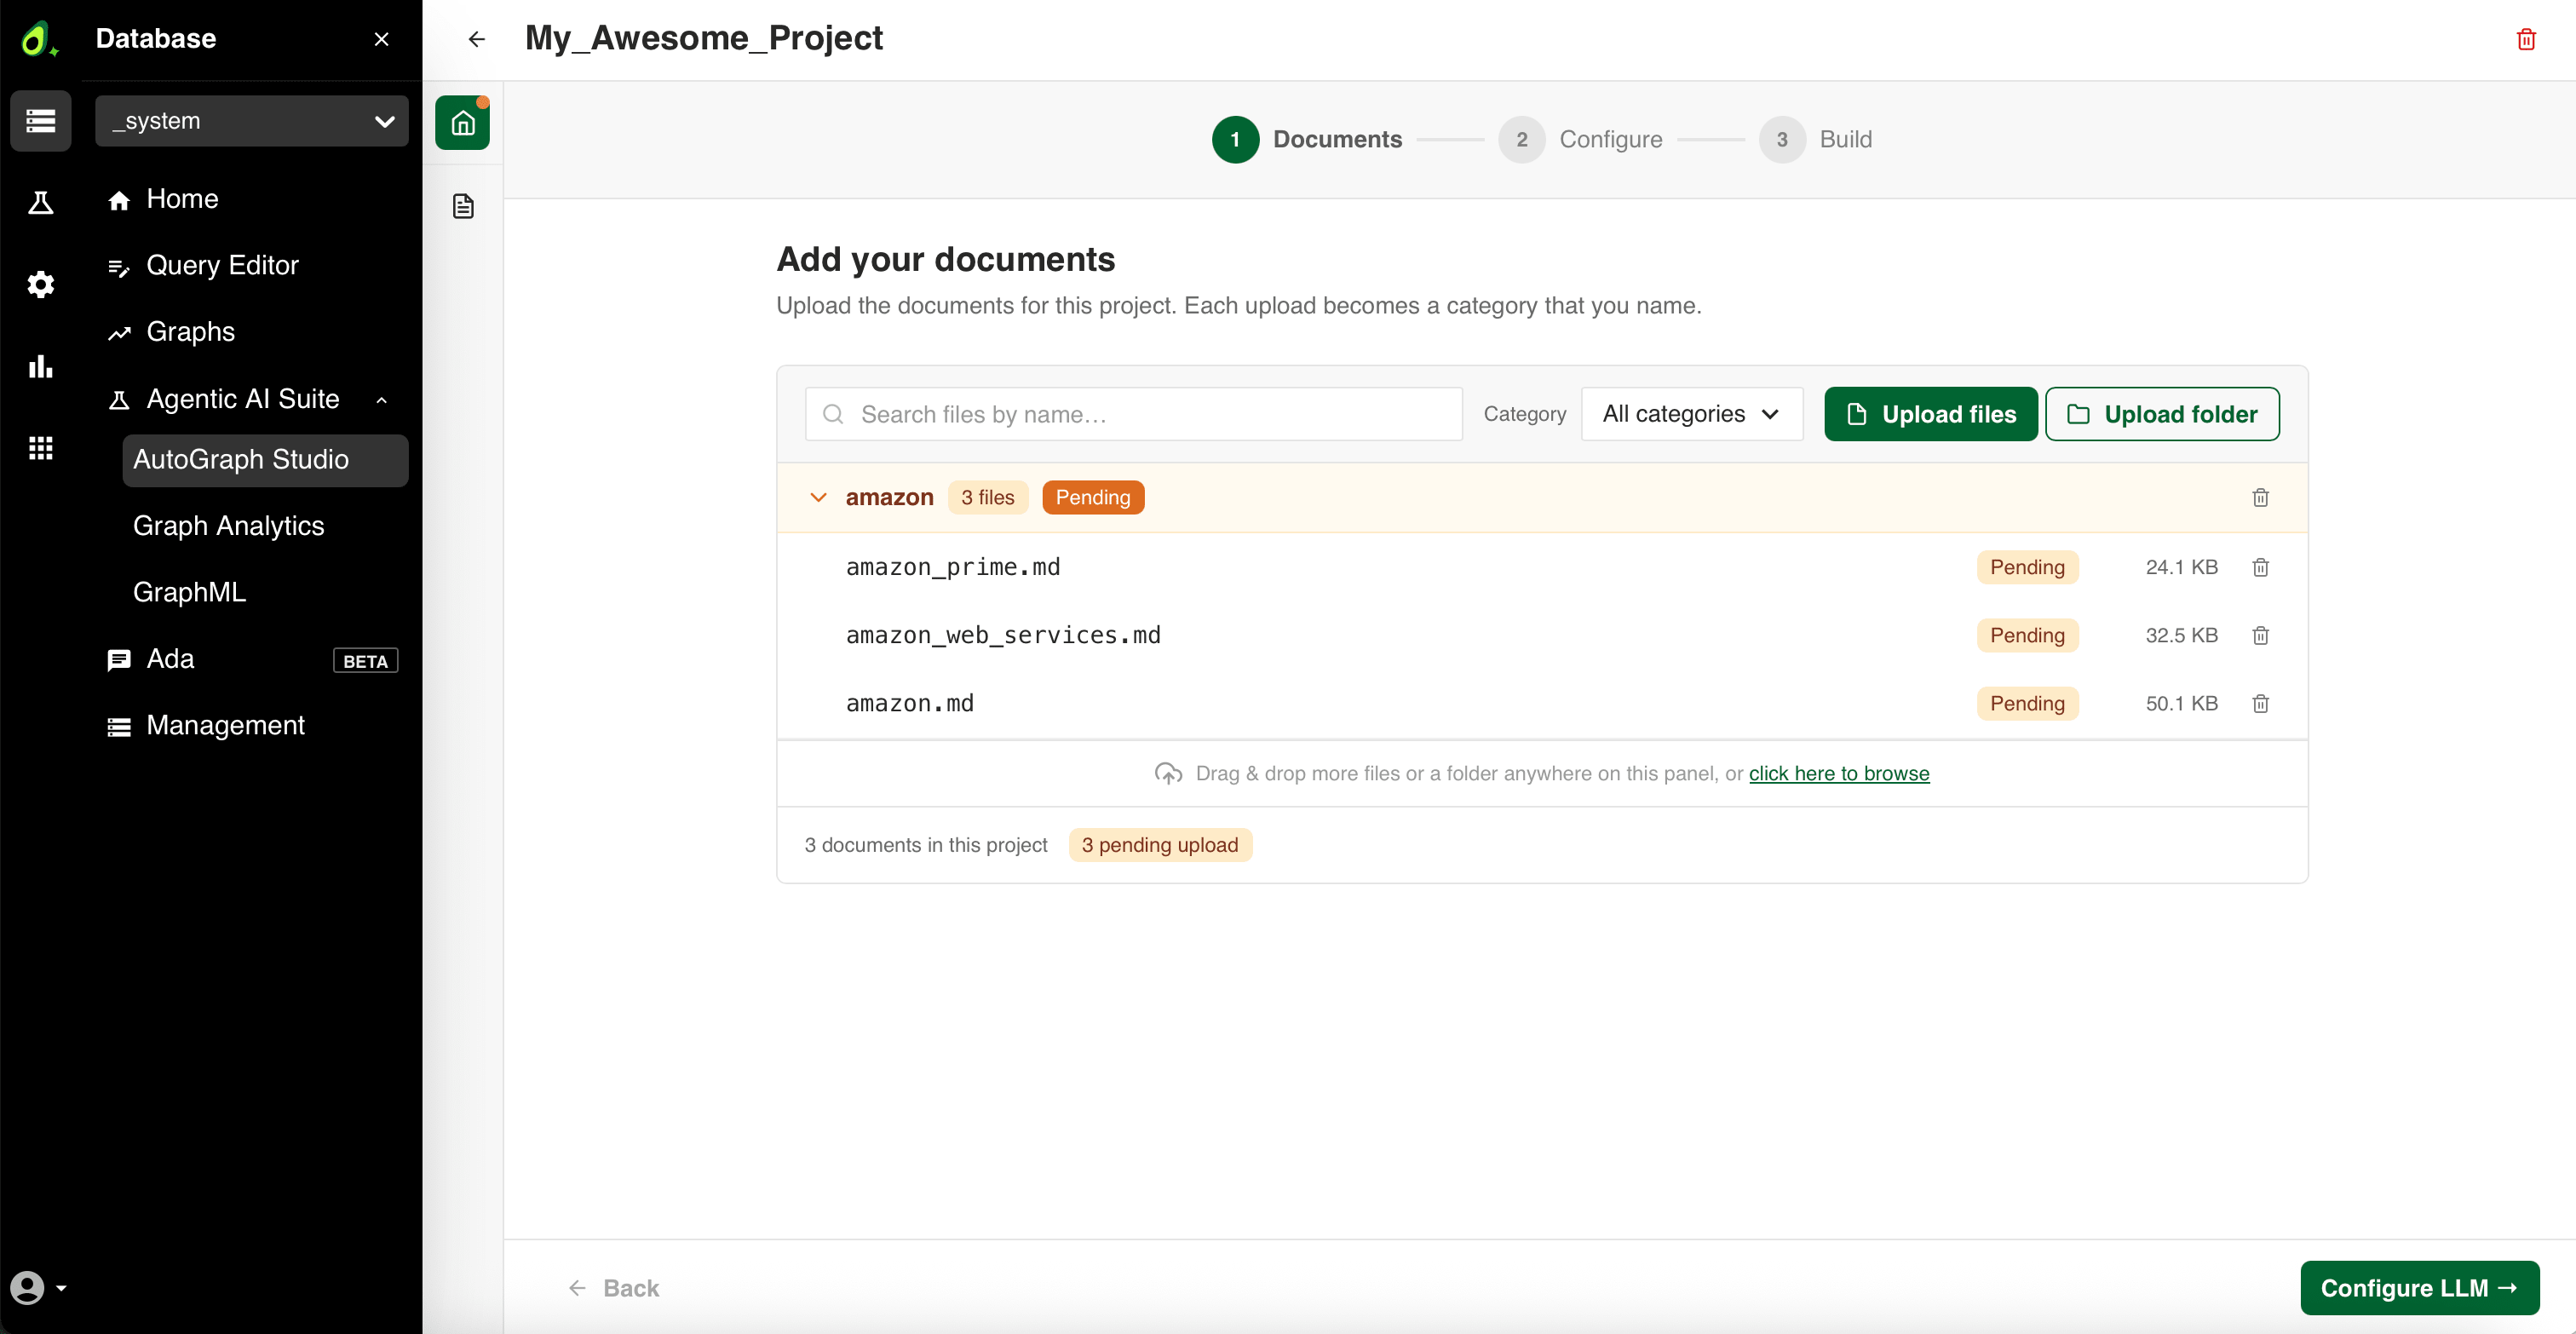
You can:
Use the Search files by name field and the Category dropdown to filter the list.
Remove a single file with the cross icon, or delete a whole category with the trash icon.
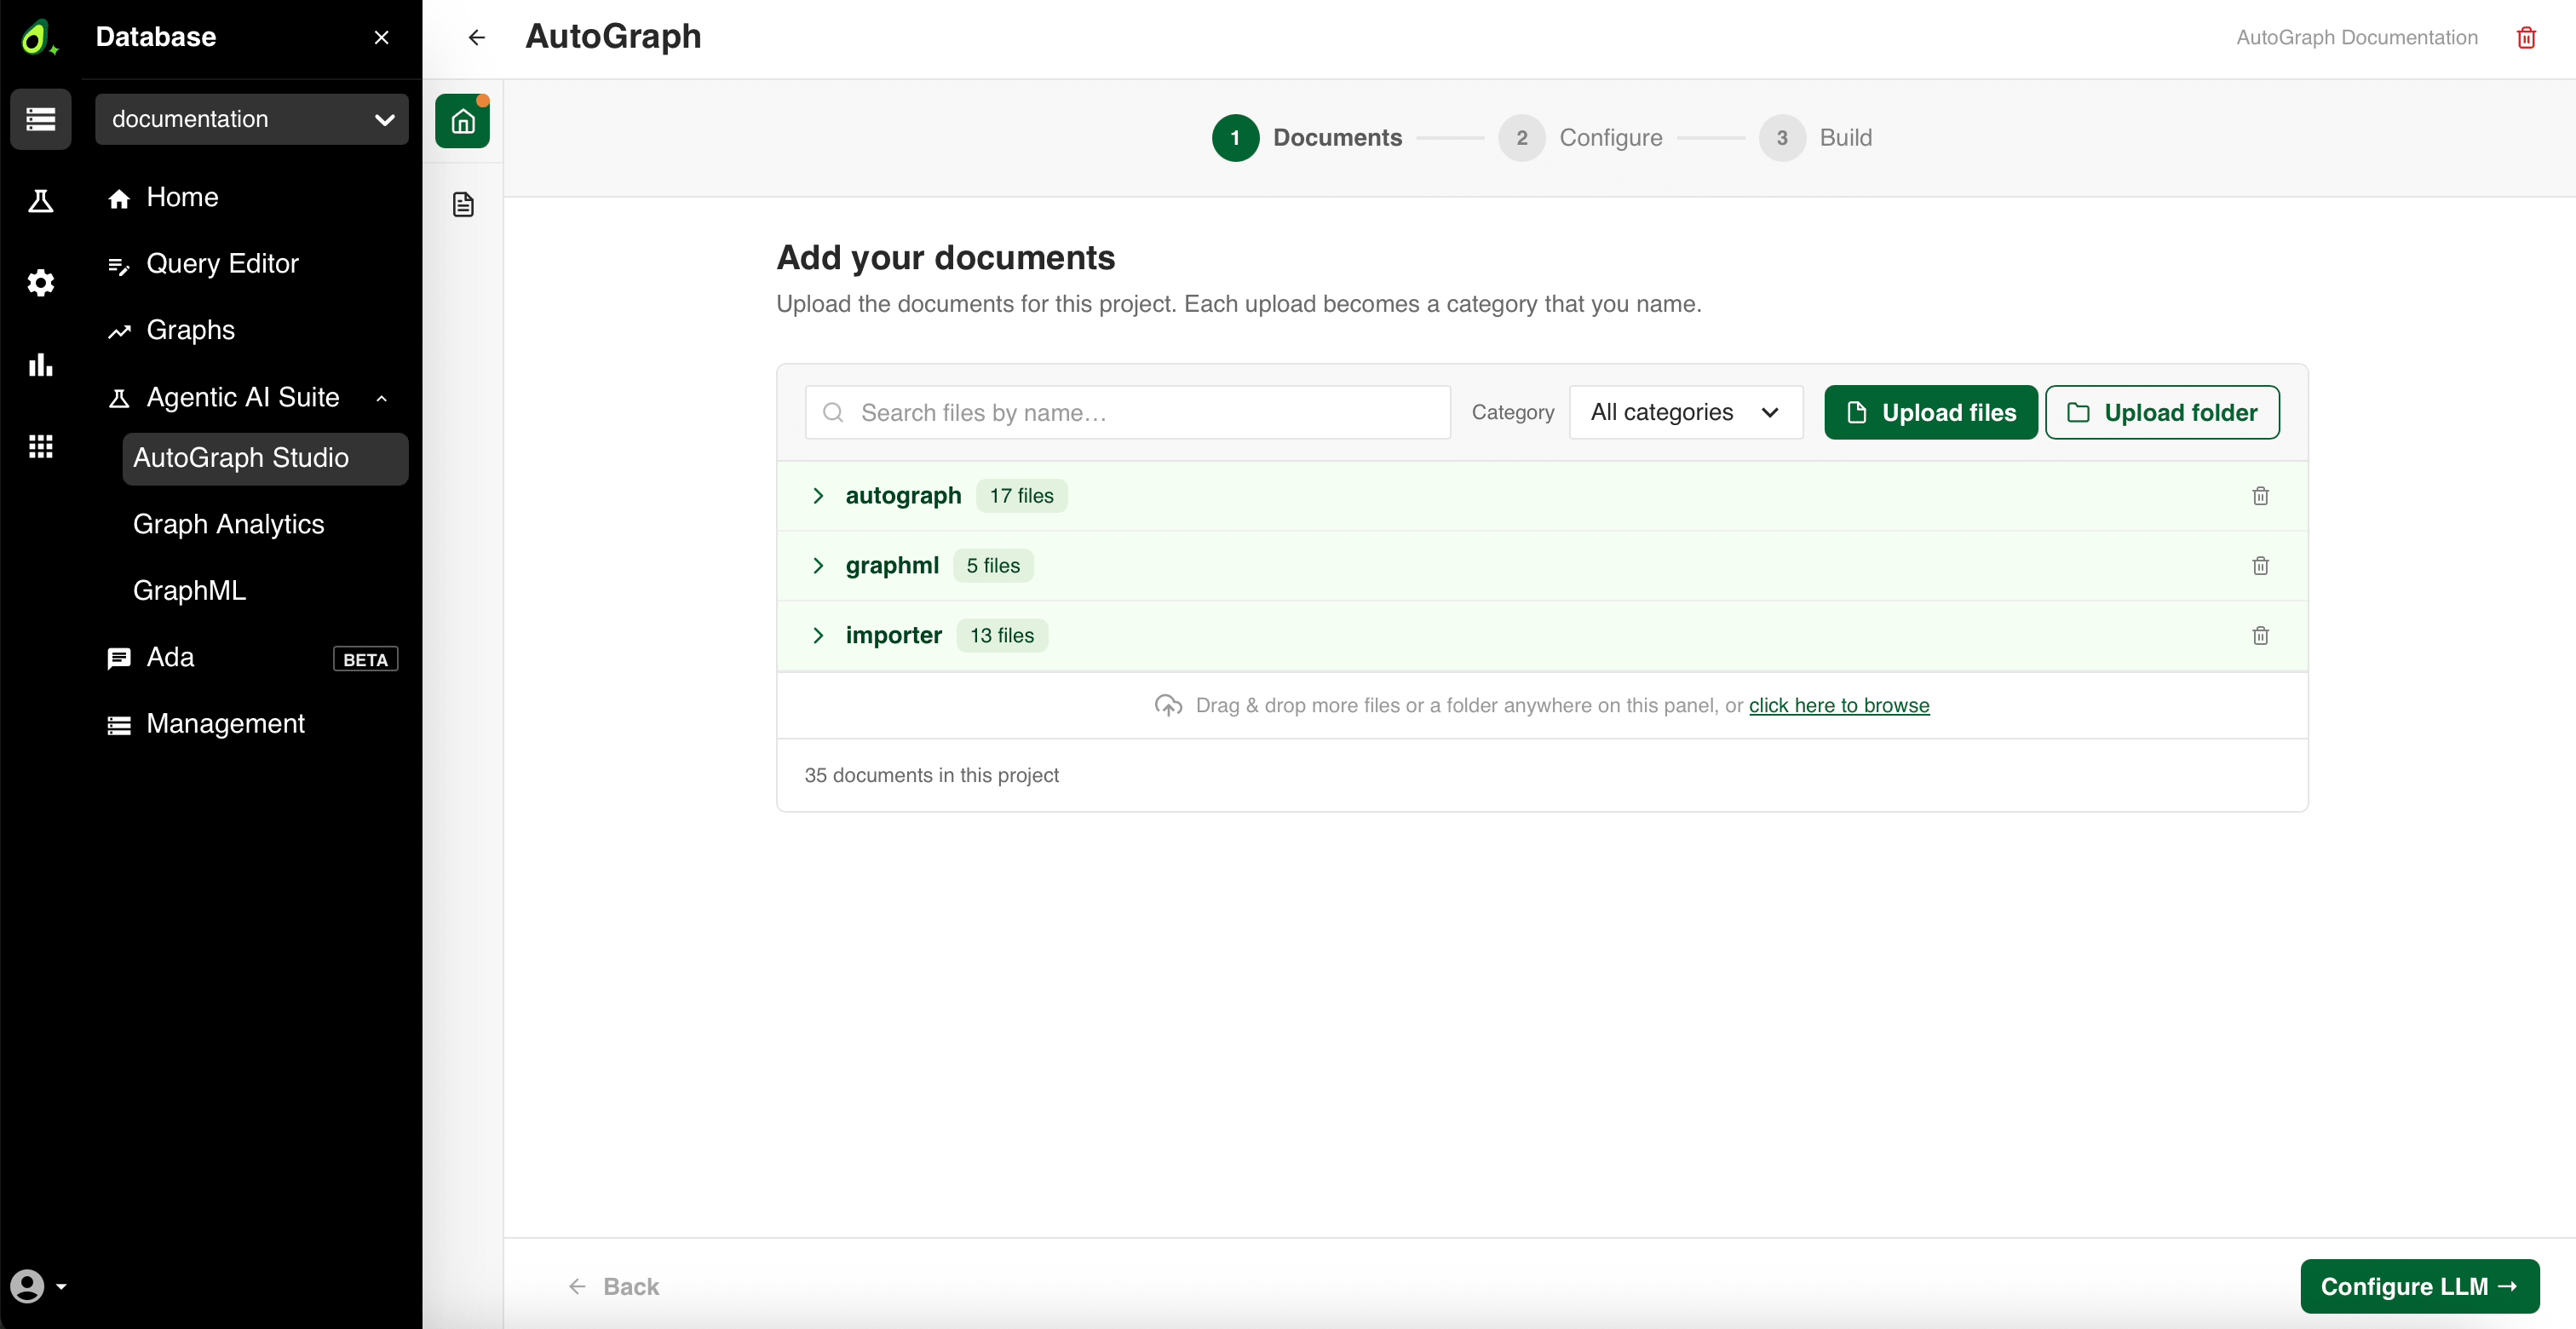
Repeat the upload to add more categories. Every upload opens its own Name this category dialog, and the files you already staged stay pending in the background. The footer counts them across all categories, for example 17 pending upload.
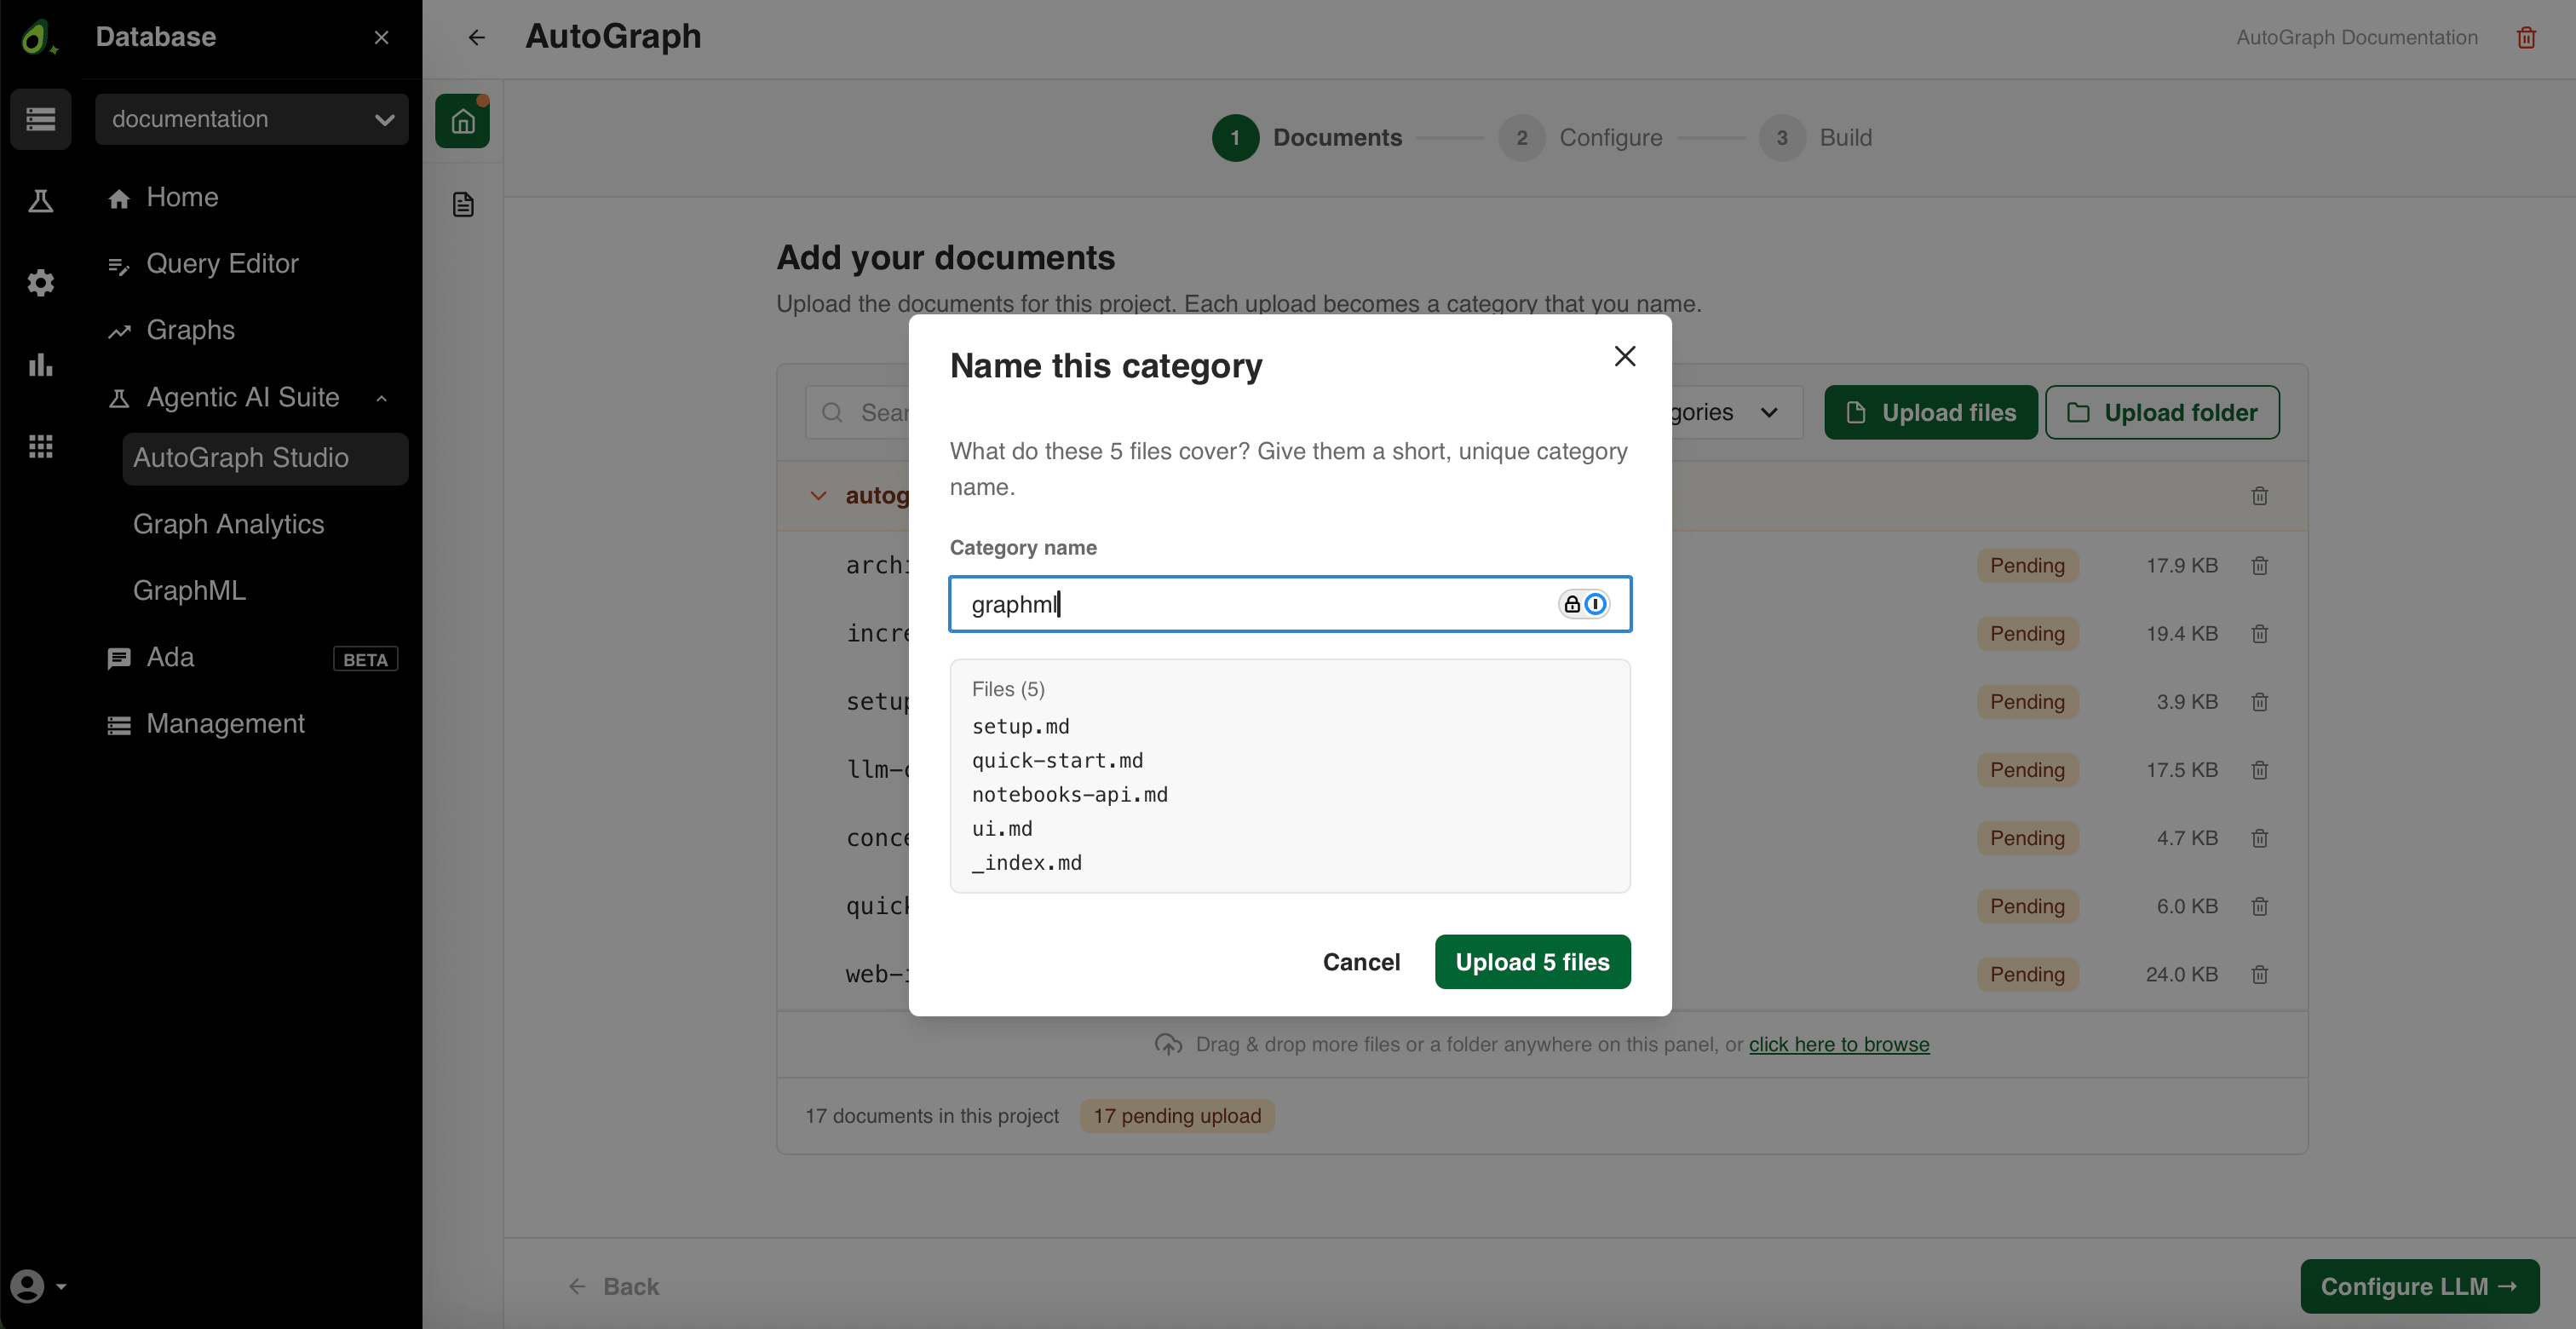
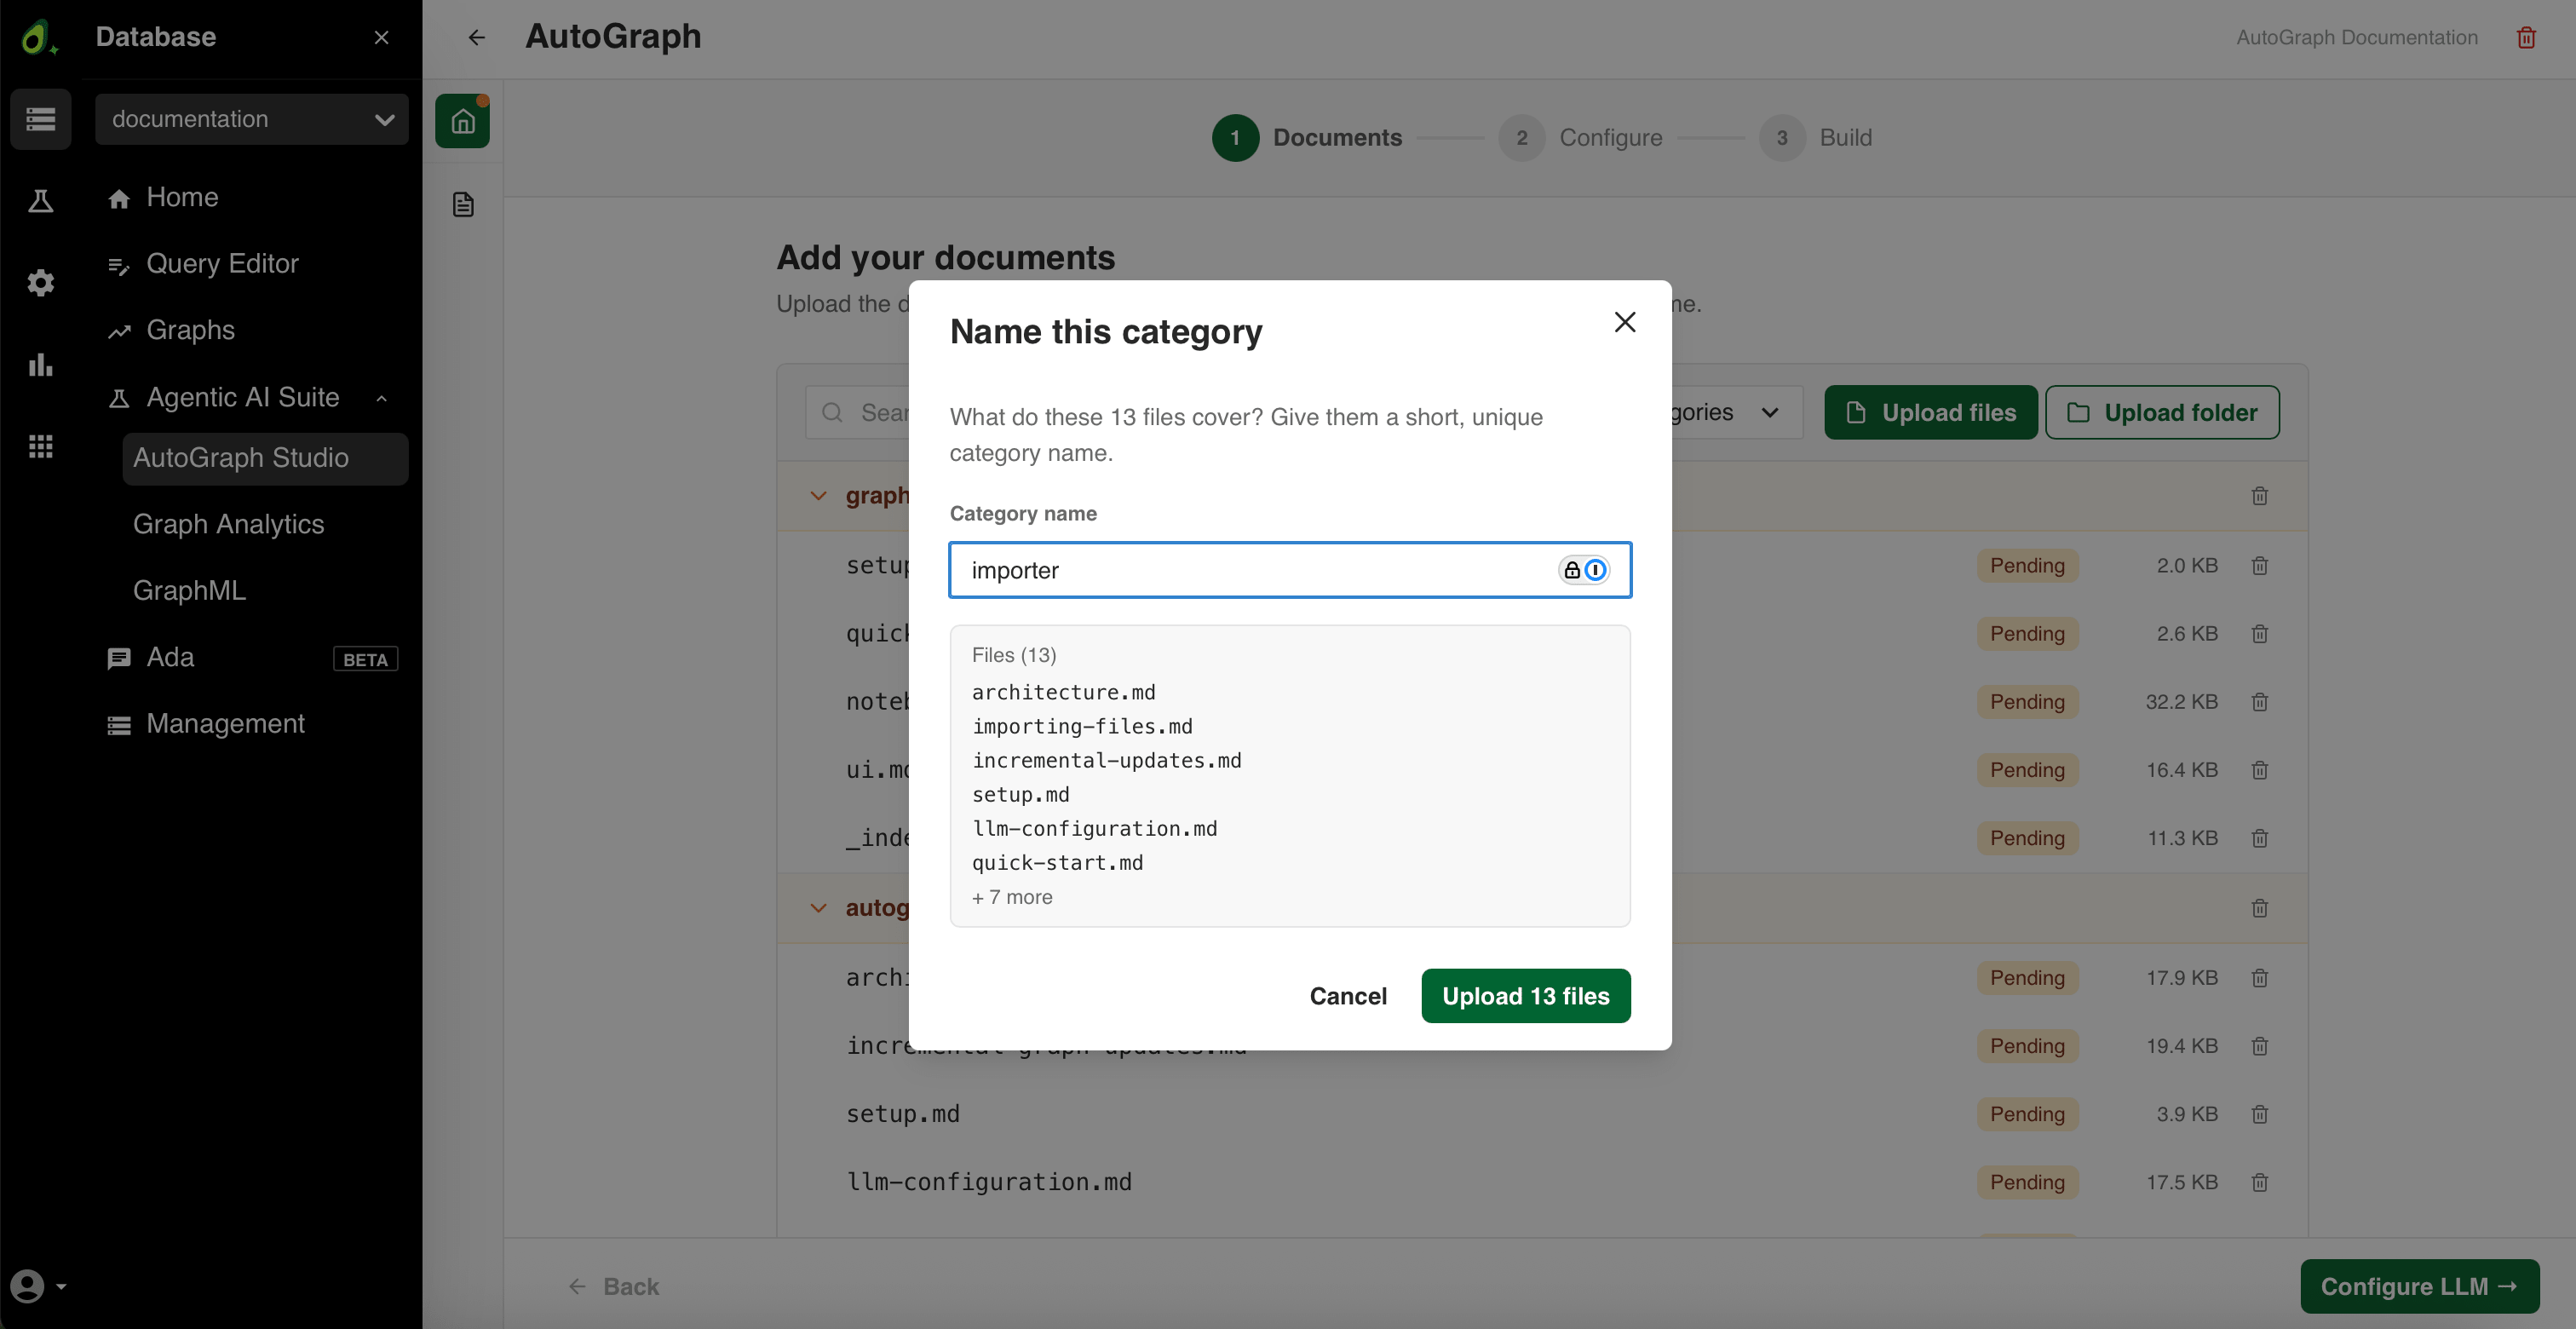
Click Configure LLM. The documents are uploaded to the project, with the progress reported as Uploading
<N>documents…, and the wizard continues to the configuration step automatically.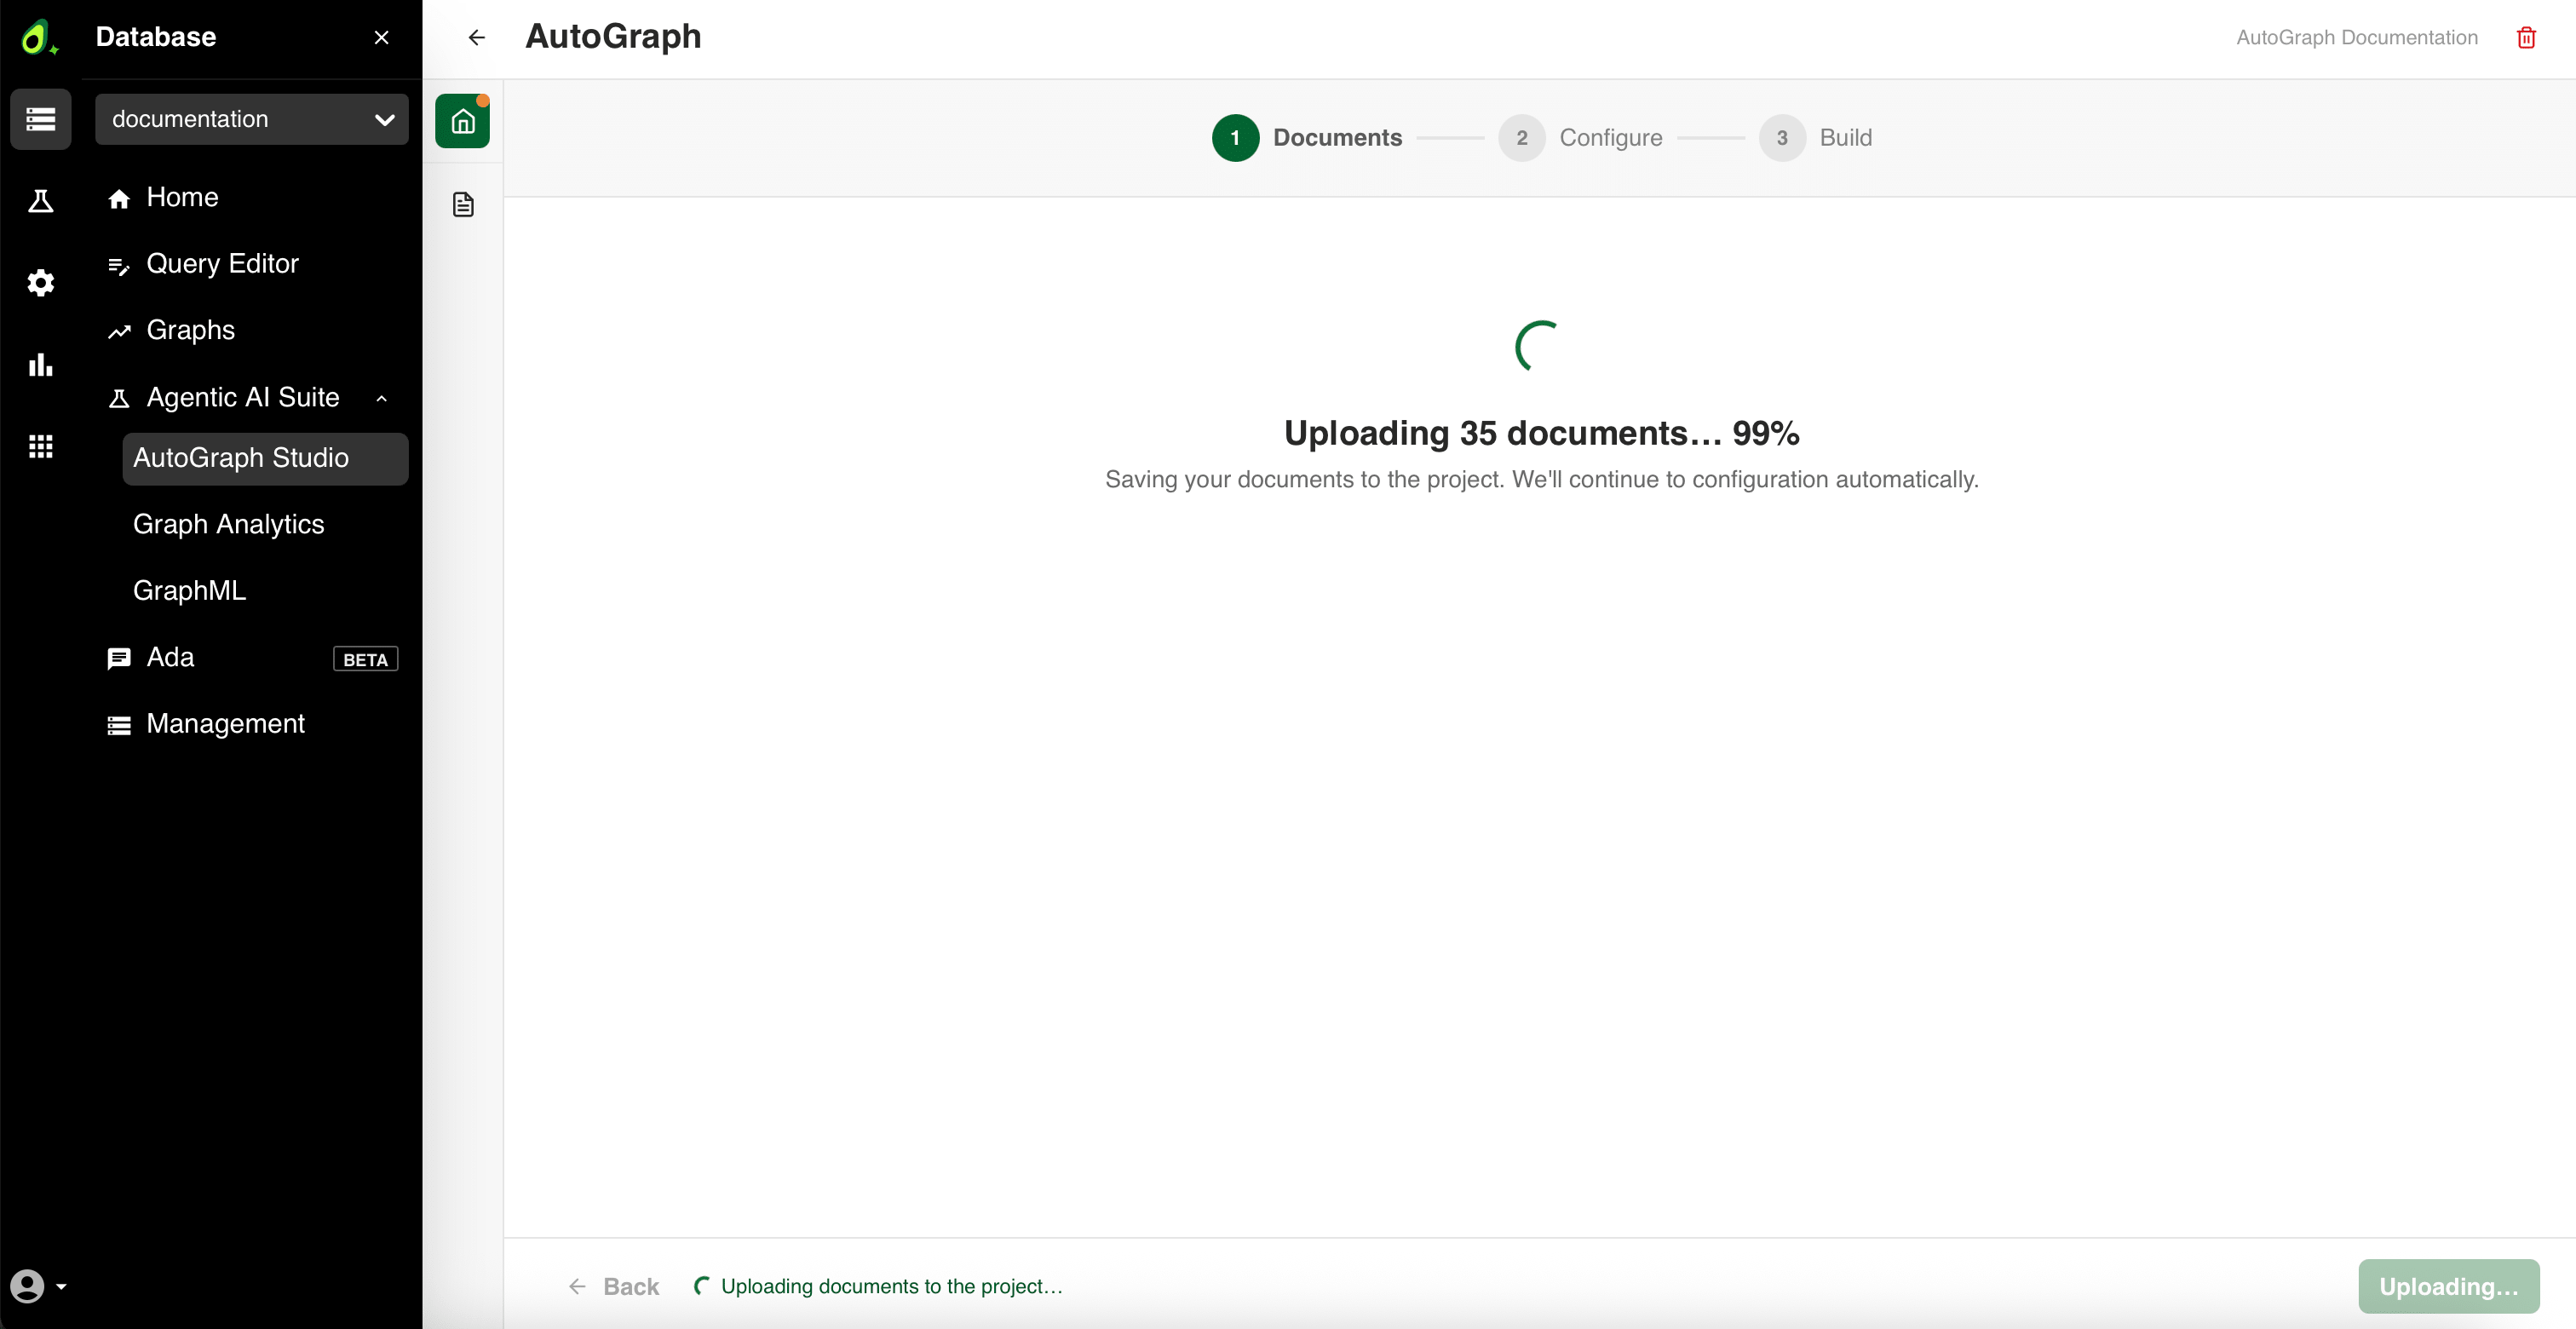
The categories are listed with their file counts once the upload completes.
Configure the LLM provider
In the Configure step, choose the LLM provider used to build the Corpus Graph. A banner confirms what you are building from, for example Building from 35 documents across 3 categories. A callout summarizes what clicking Start build does: it deploys the AutoGraph service with these settings and builds the Corpus Graph from your uploaded documents. When it is ready, the wizard finishes at your project overview, where you can generate retrieval strategies and build the Knowledge Graph (AutoRAG).
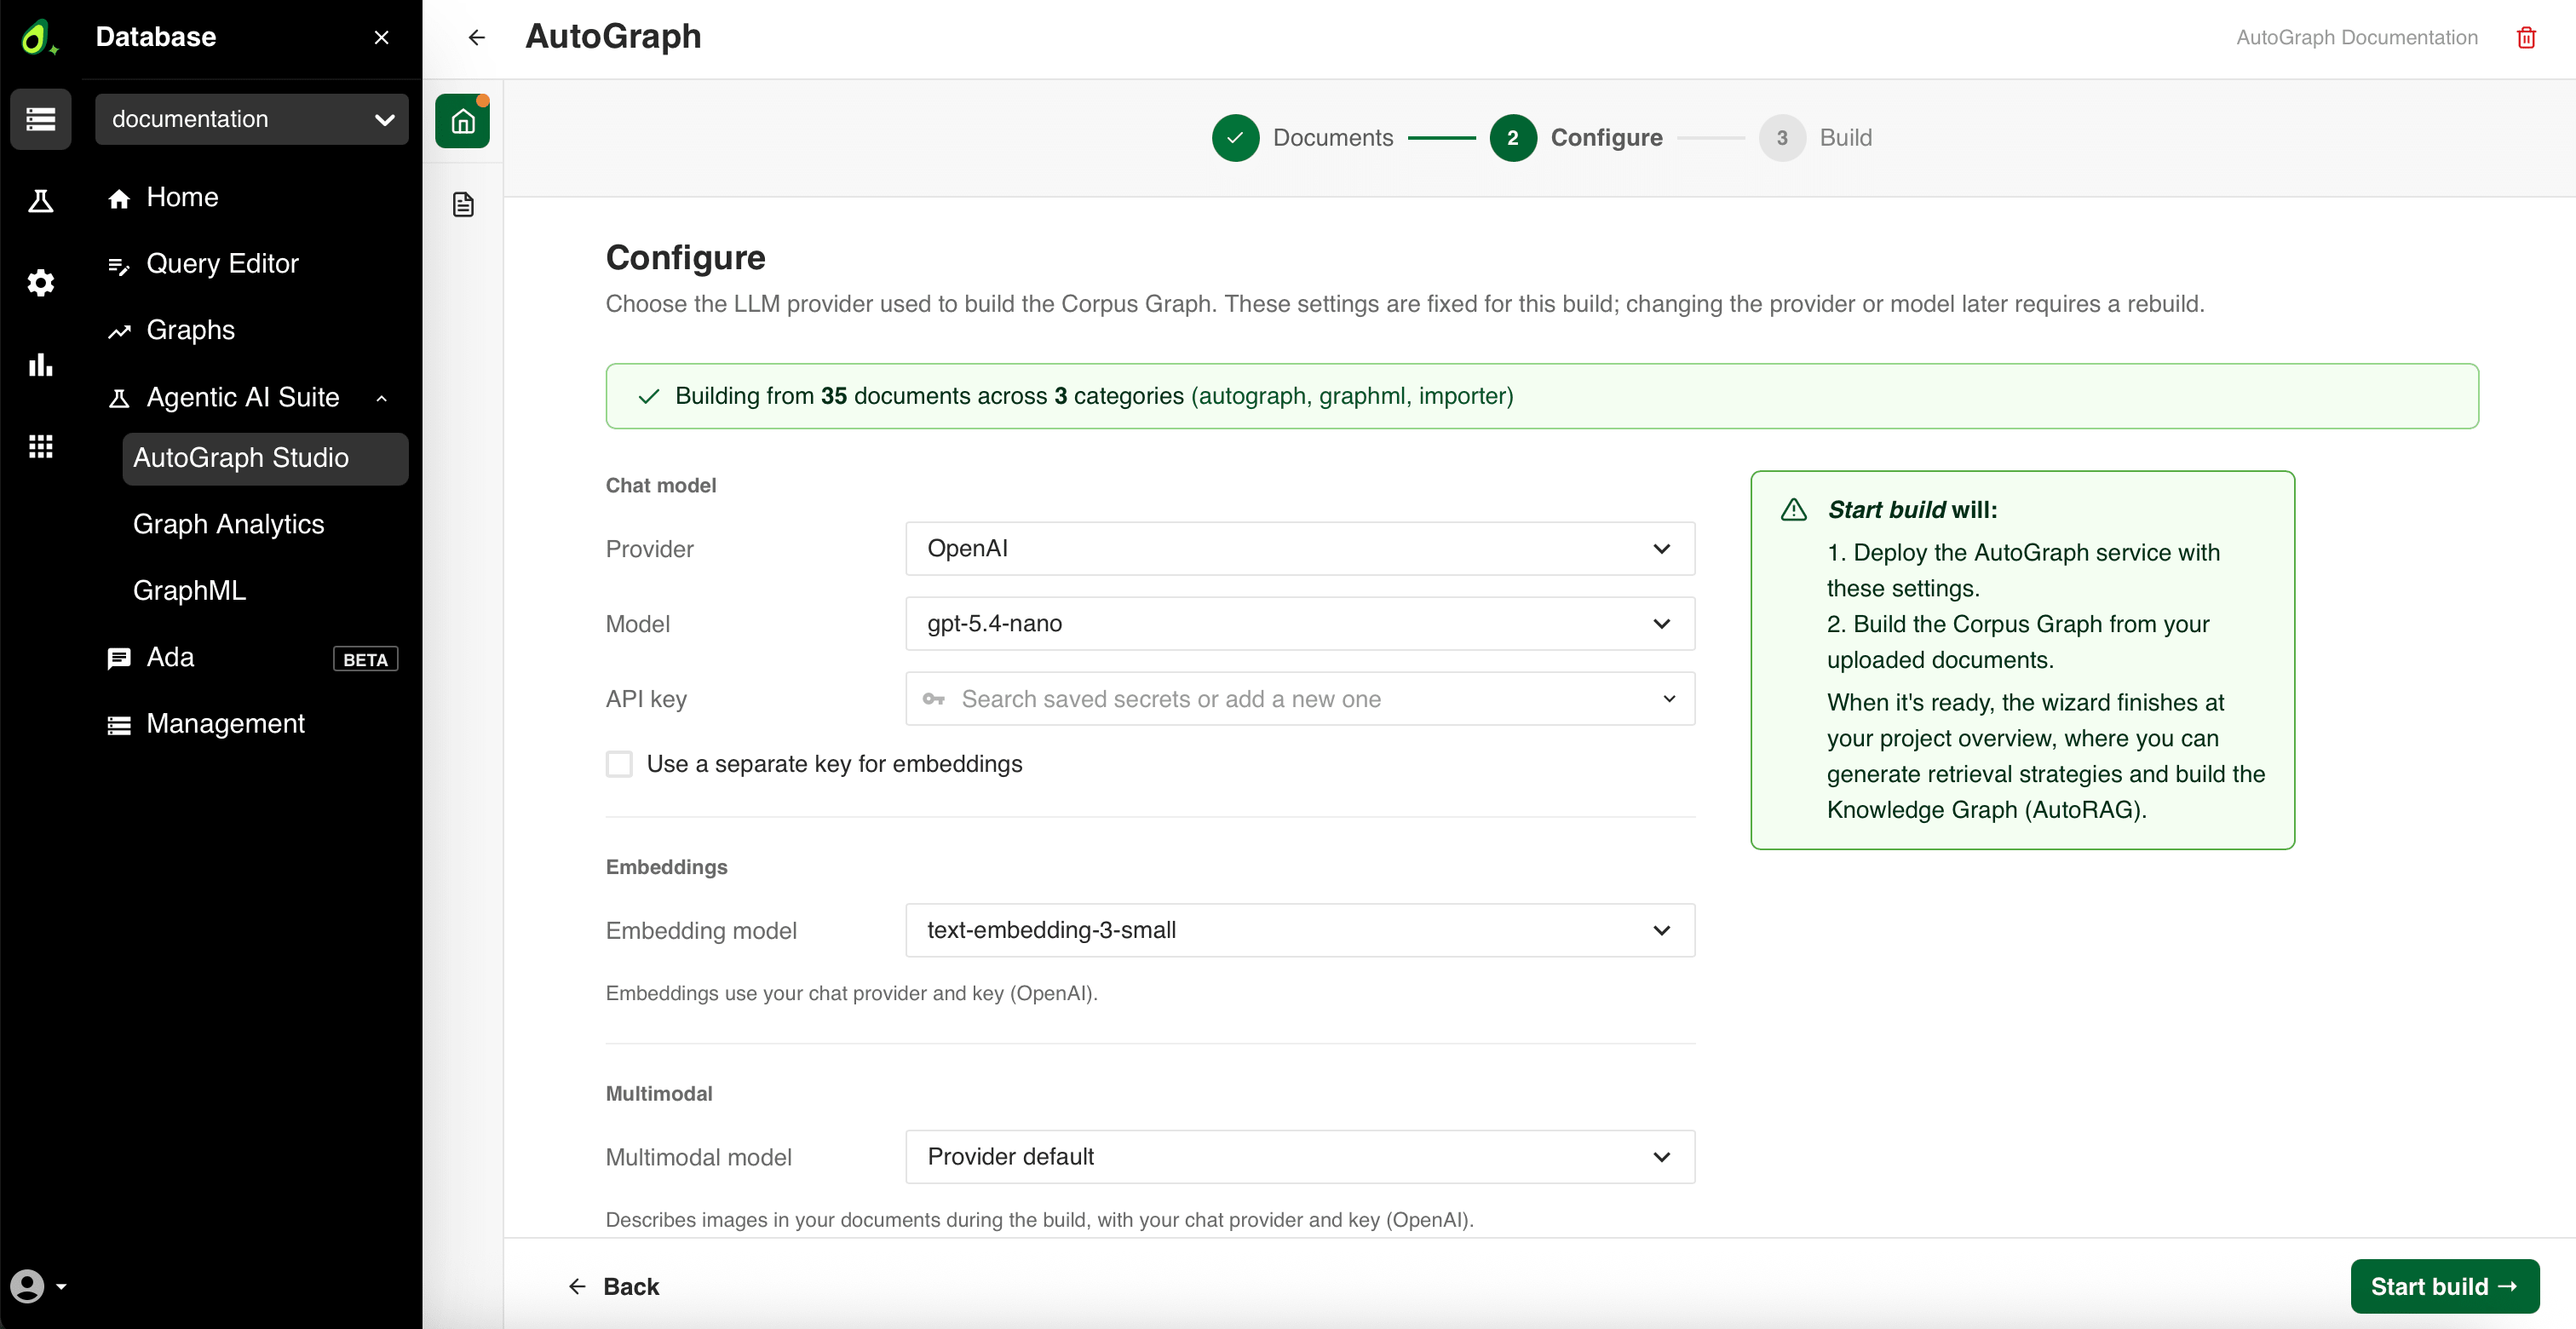
- In the Chat model section, select OpenAI from the Provider dropdown menu.
- Select the model you want to use from the Model dropdown menu.
The default is
gpt-5.4-nano. - In the API key field, search for a saved secret or add a new one. Keys are managed in the Secrets Manager.
- Optionally, select Use a separate key for embeddings to configure a separate provider and key for the embedding model. This adds a Provider dropdown menu and an Embedding key field to the Embeddings section. Otherwise, embeddings use your chat provider and key, as the hint below the Embeddings section states.
- In the Embeddings section, select the Embedding model
(
text-embedding-3-smallortext-embedding-3-large). - In the Multimodal section, select the Multimodal model. This model describes images in your documents during the build. Keep Provider default or select a specific model.
- Click Start build.
- In the Chat model section, select Custom (OpenAI-compatible) from the Provider dropdown menu.
- Enter the URL of your OpenAI-compatible endpoint and the Model name.
- In the API key field, search for a saved secret or add a new one. Keys are managed in the Secrets Manager.
- Optionally, select Use a separate key for embeddings to configure a separate endpoint and key for the embedding model.
- Configure the Embeddings and Multimodal sections as needed.
- Click Start build.
Clicking Start build moves the wizard to the Build step and deploys the AutoGraph service with these settings. The Corpus Graph itself is built in the next step, once the service is up and you click Build Corpus Graph.
For more details, see LLM Configuration.
Build the Corpus Graph
The Build step shows the two operations it performs. For details on what happens during the corpus build, see Corpus Build.
Deploy AutoGraph service: The service is deployed and the interface waits for it to respond, showing Checking service status… and Service deployed — waiting for it to respond. This might take up to 10 minutes. The AutoGraph service ID is displayed, for example
arangodb-autograph-hiojb.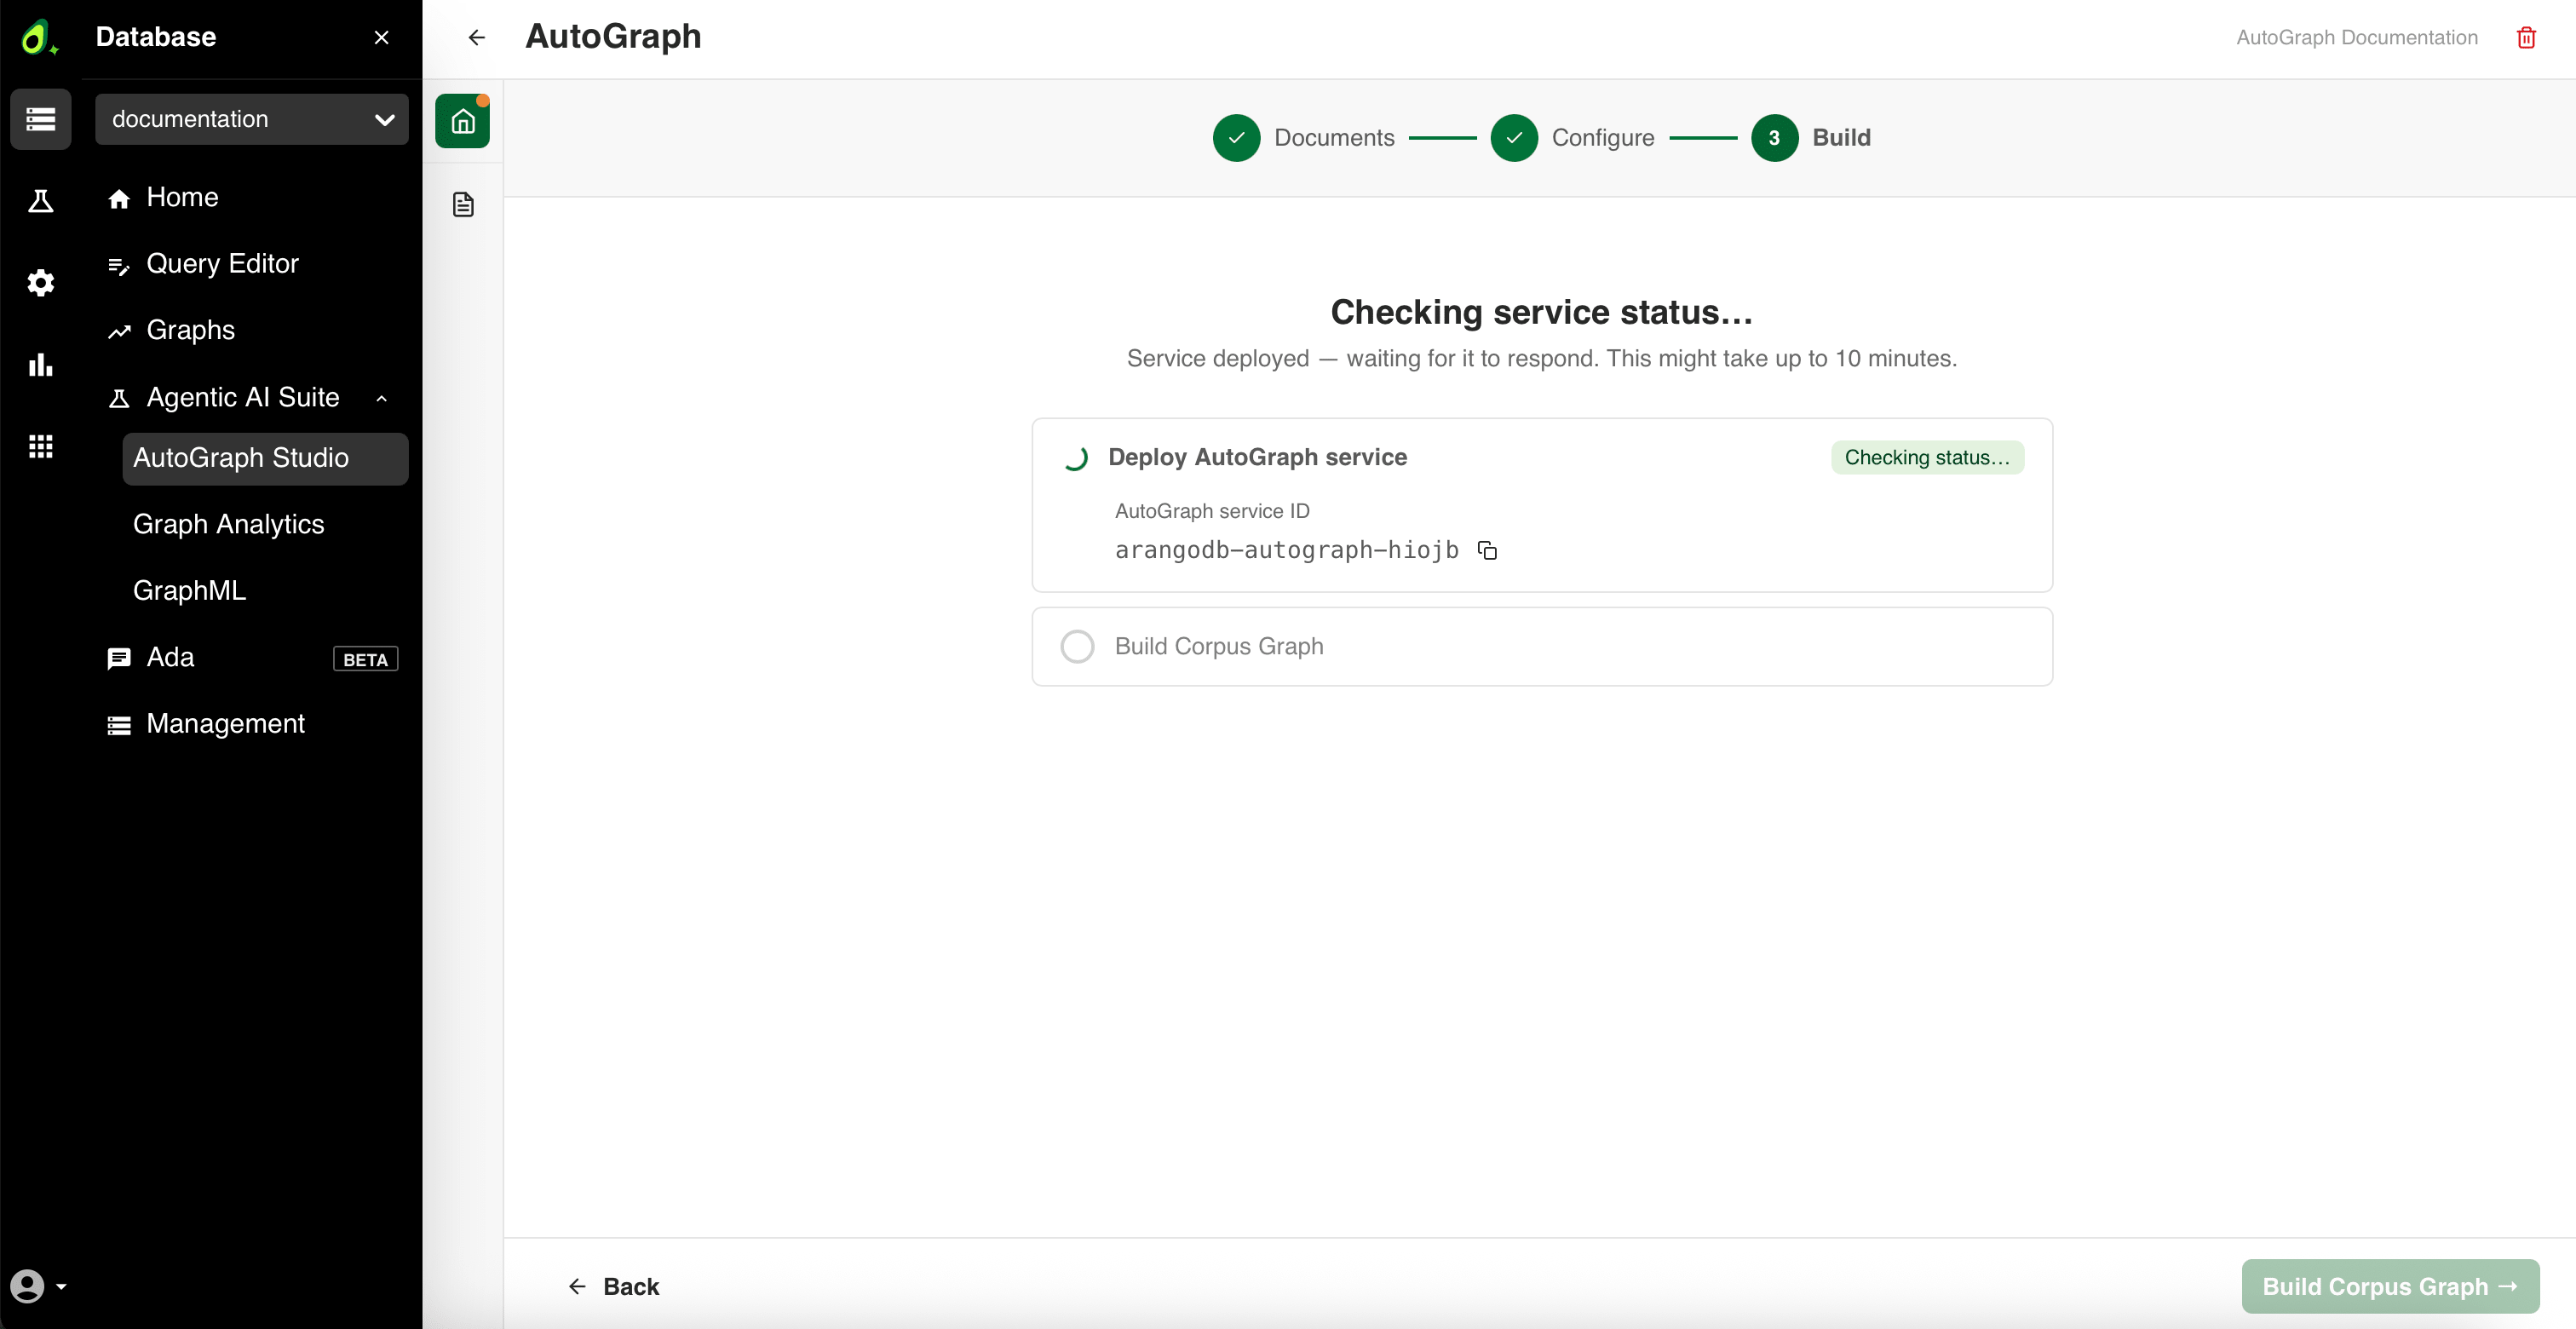
Wait for the confirmation message AutoGraph service deployed.
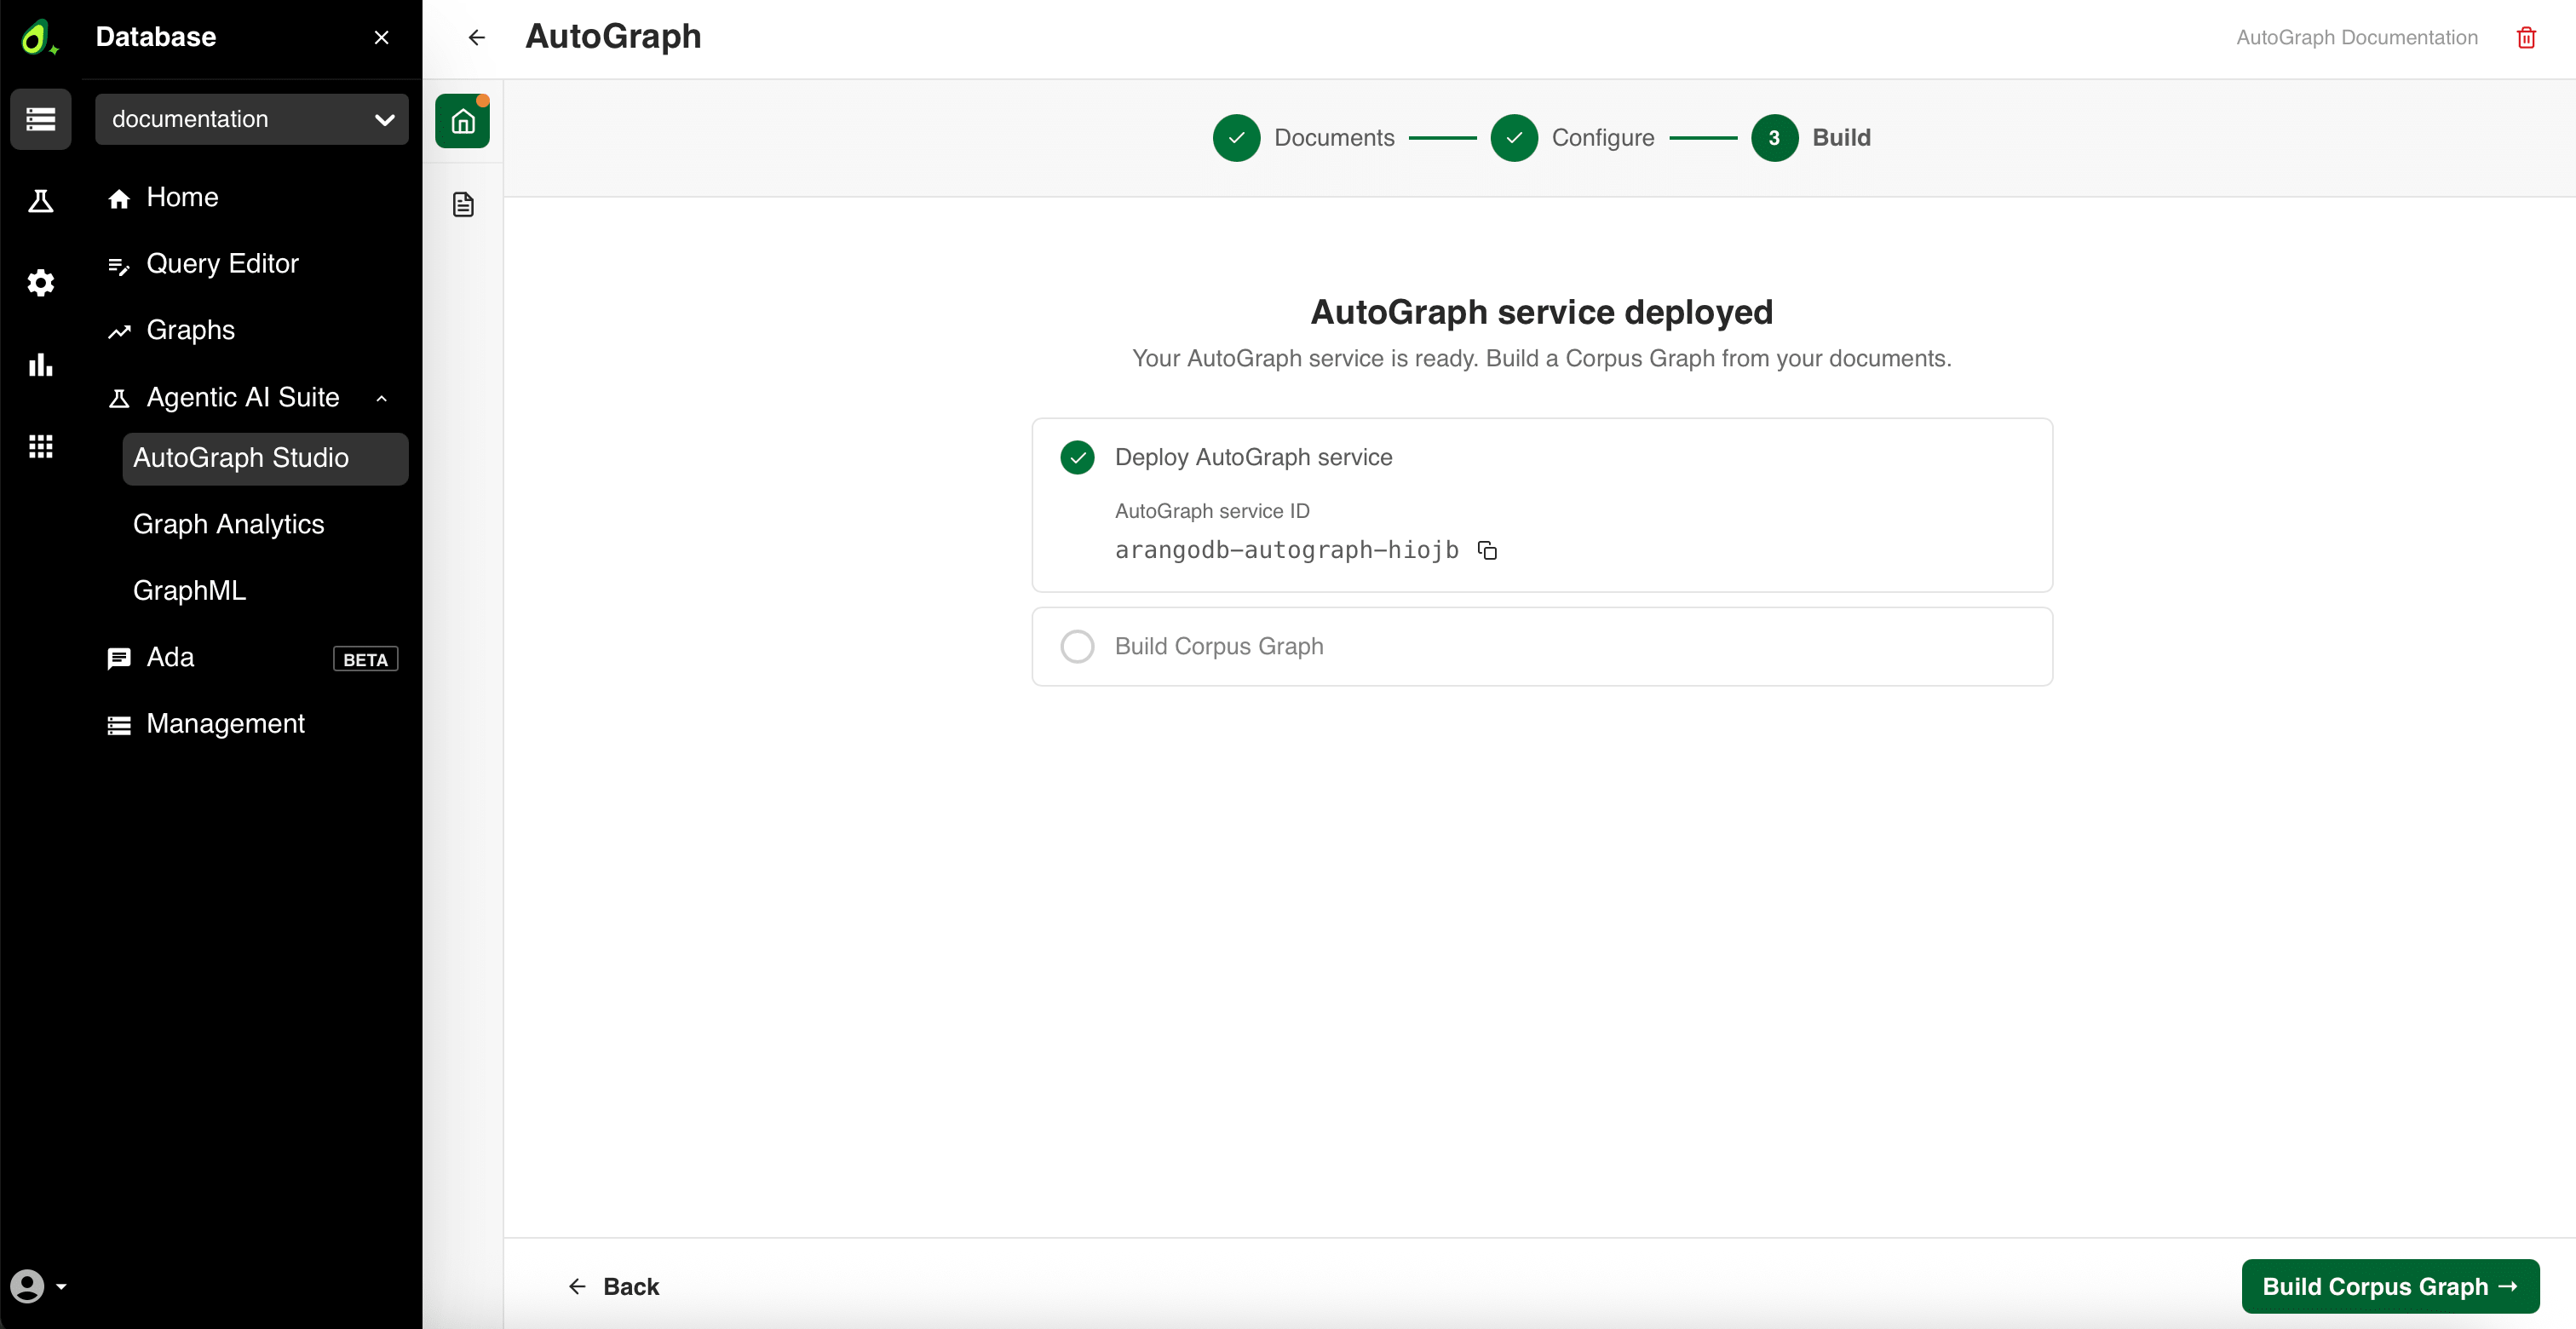
Click Build Corpus Graph.
Build corpus: Your documents are extracted into the Corpus Graph. The Build Corpus Graph step is marked as Running while it extracts your documents, which can take a while for large document sets.
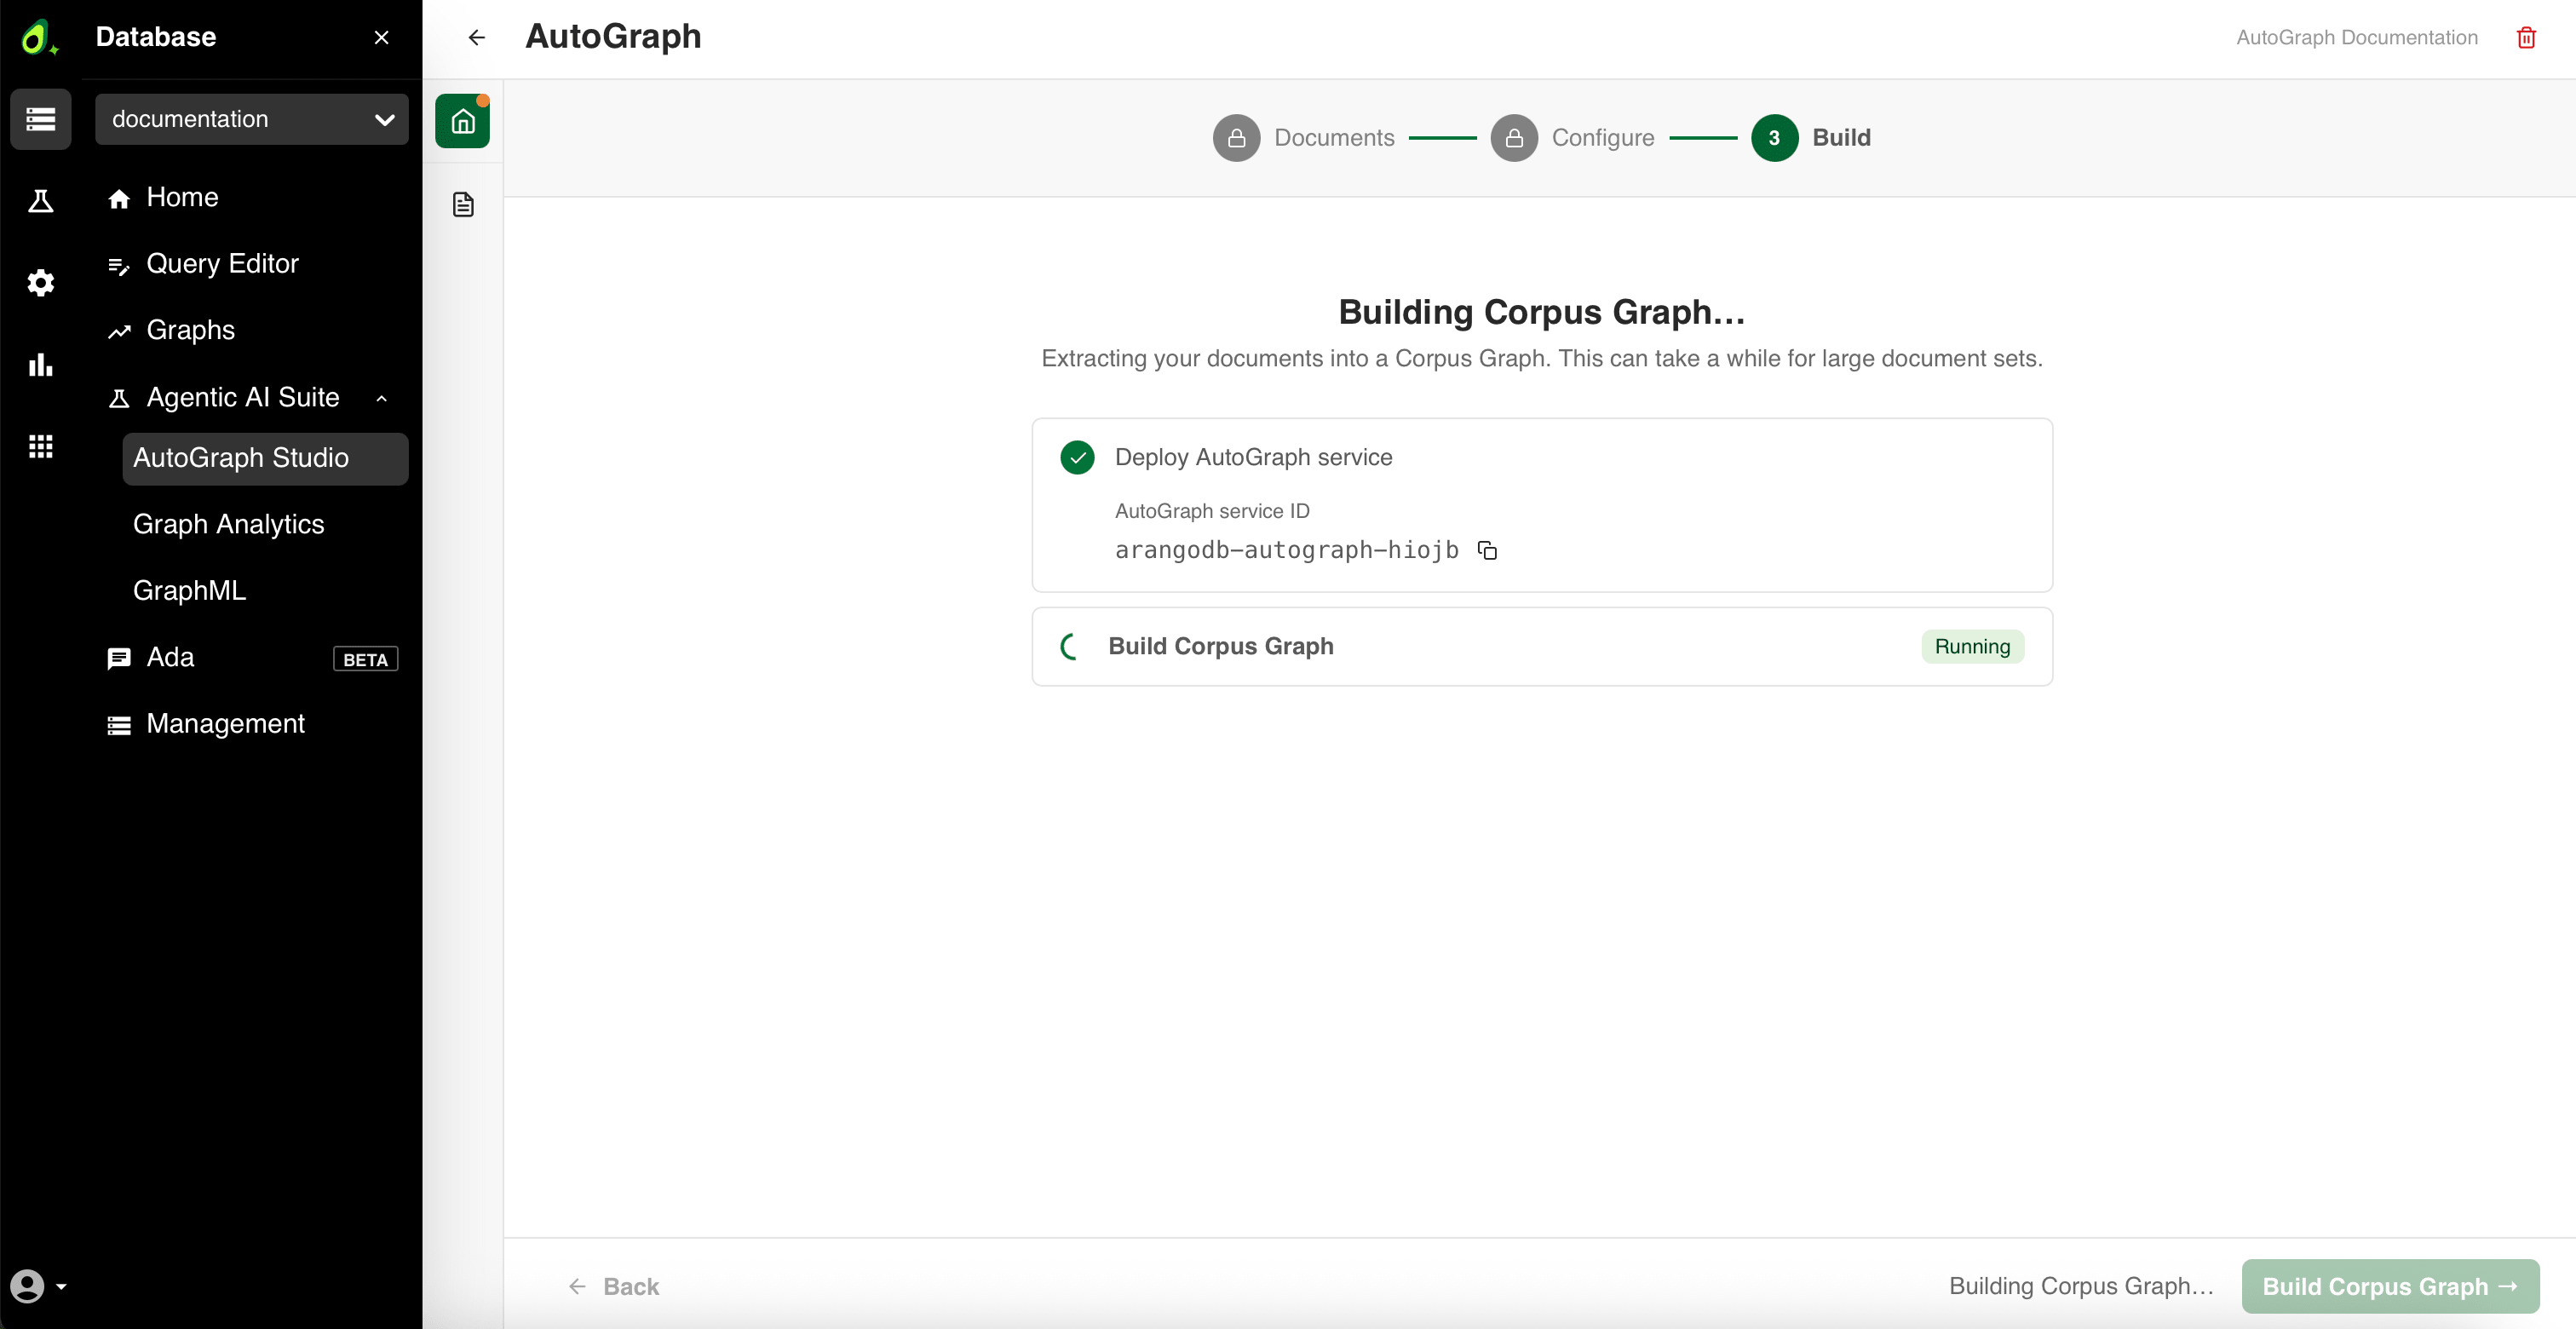
When it completes, a Corpus Graph ready notification appears and the project overview opens.
The project overview
The project overview is the home of your project. It has the following sections:
- Context Graph: The Corpus Graph and the Knowledge Graph.
- Categories: The documents in the project, grouped by category.
- Model & credentials: The provider and models used by the build.
- AutoRAG: Deploy retrievers against your Context Graph.
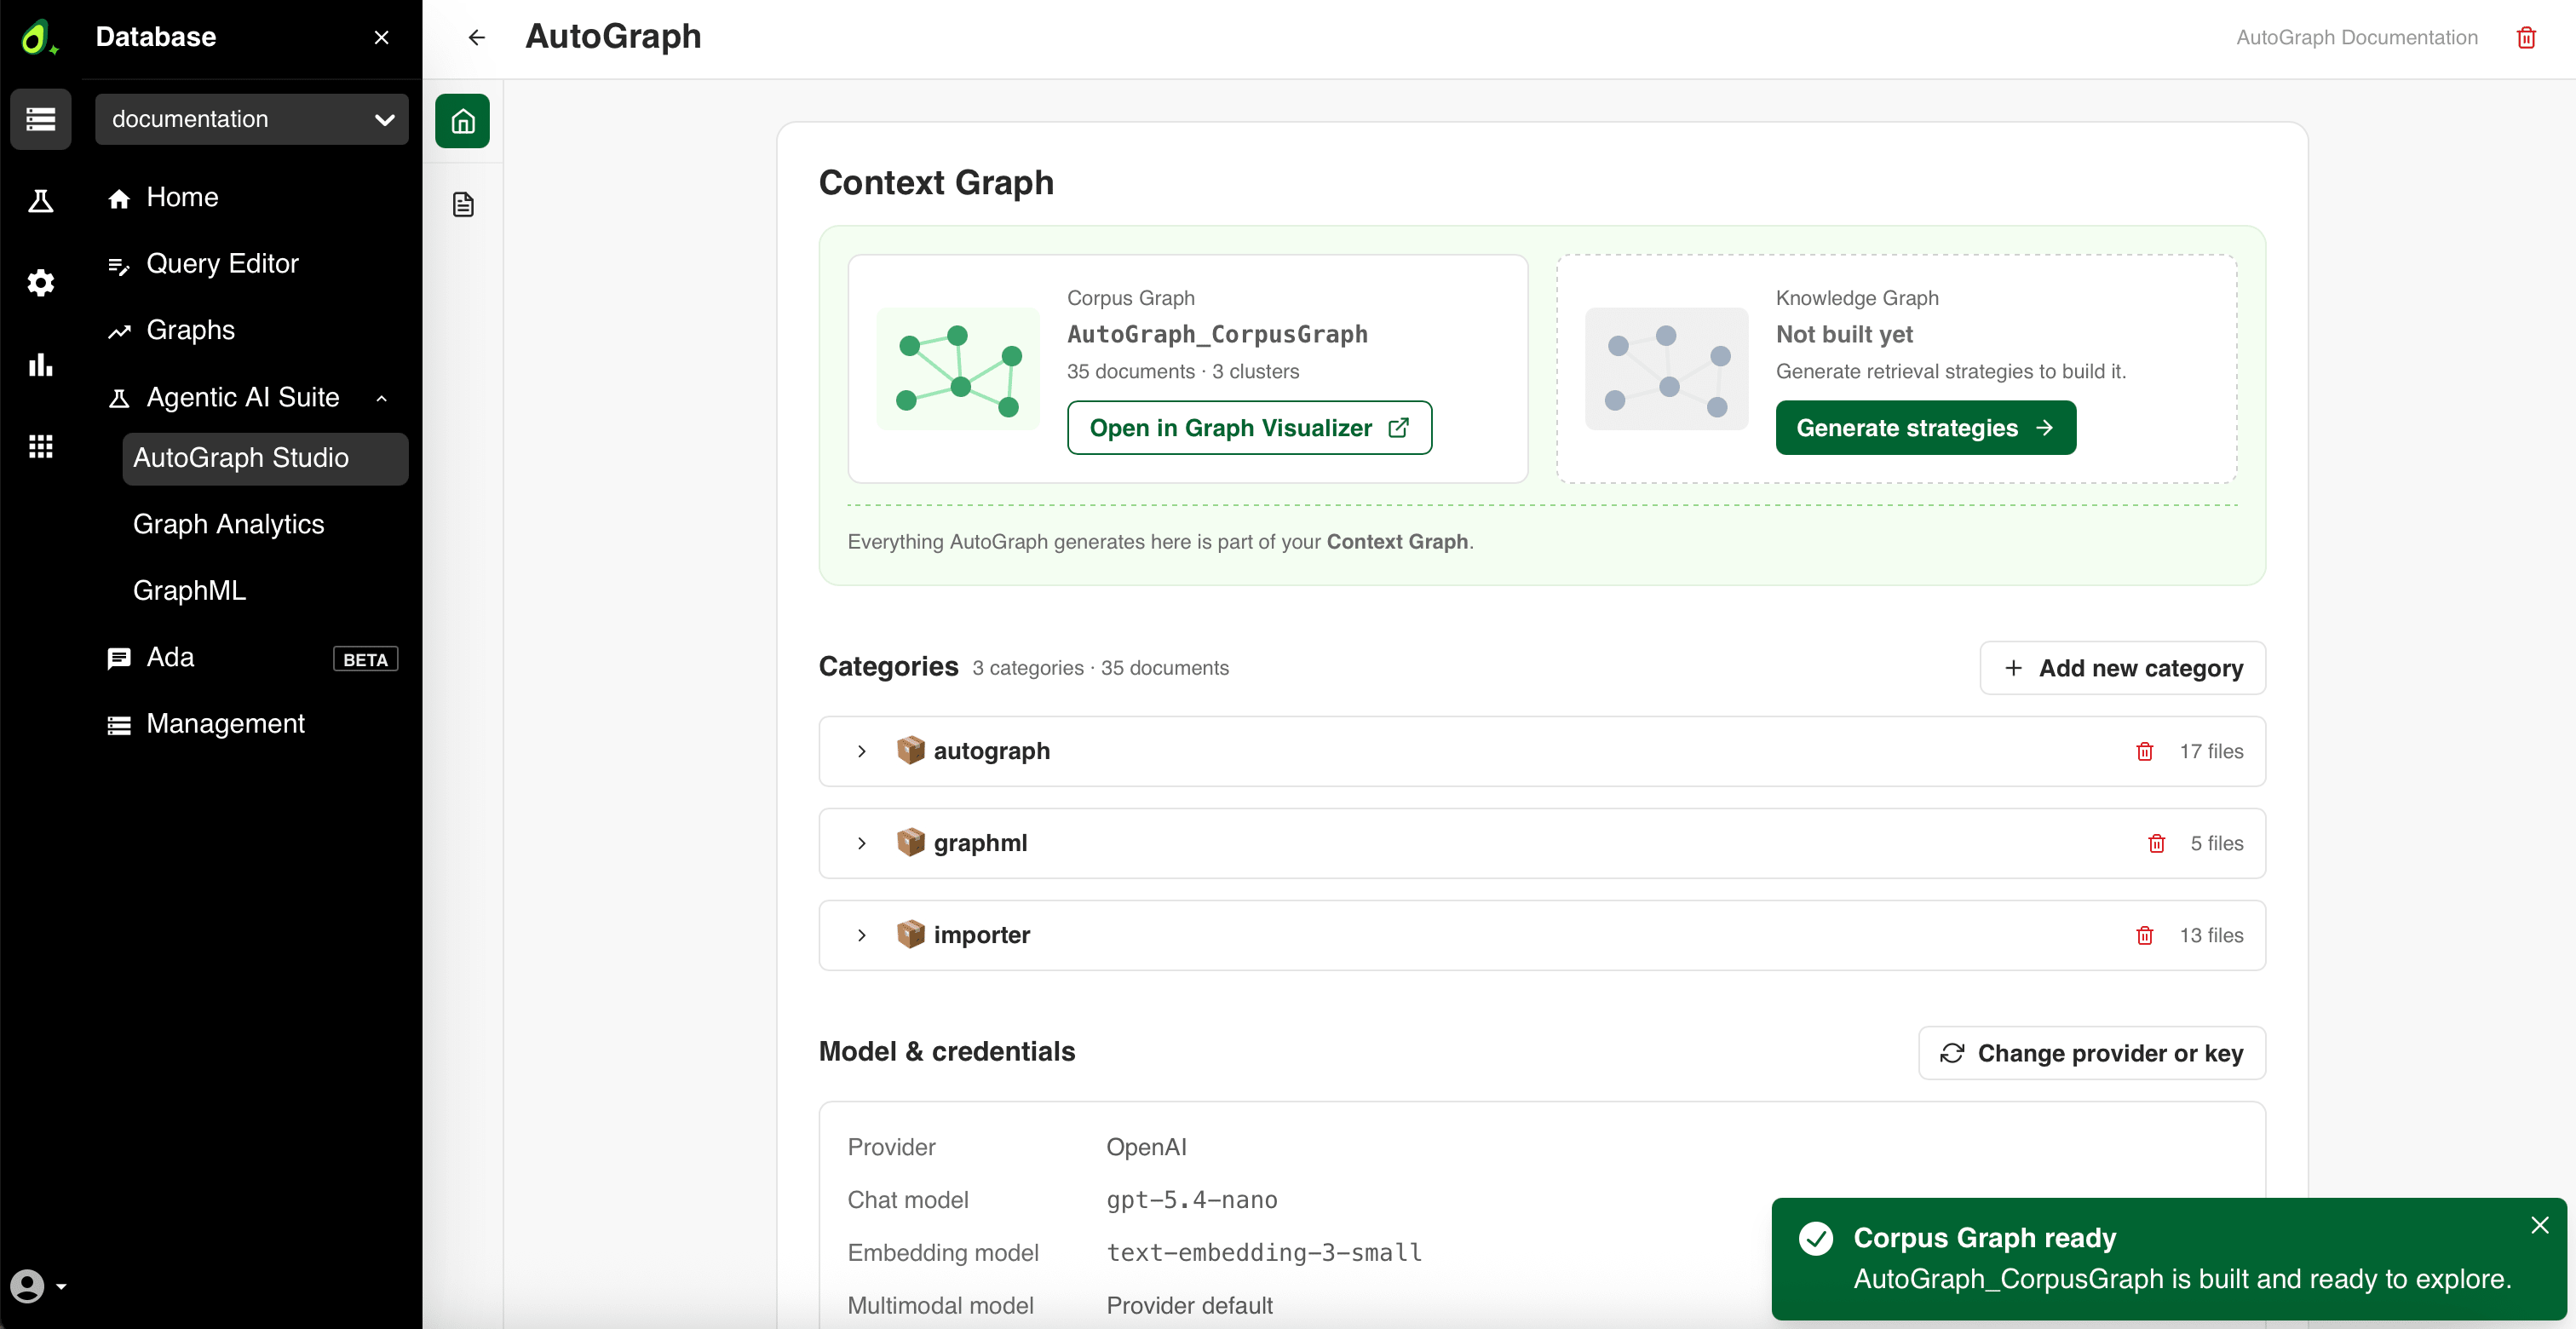
Your Context Graph is the Corpus Graph together with the Knowledge Graph — as the Context Graph section puts it, everything AutoGraph generates there is part of your Context Graph. The credentials and retriever services shown alongside them configure and serve the Context Graph, but are not part of it.
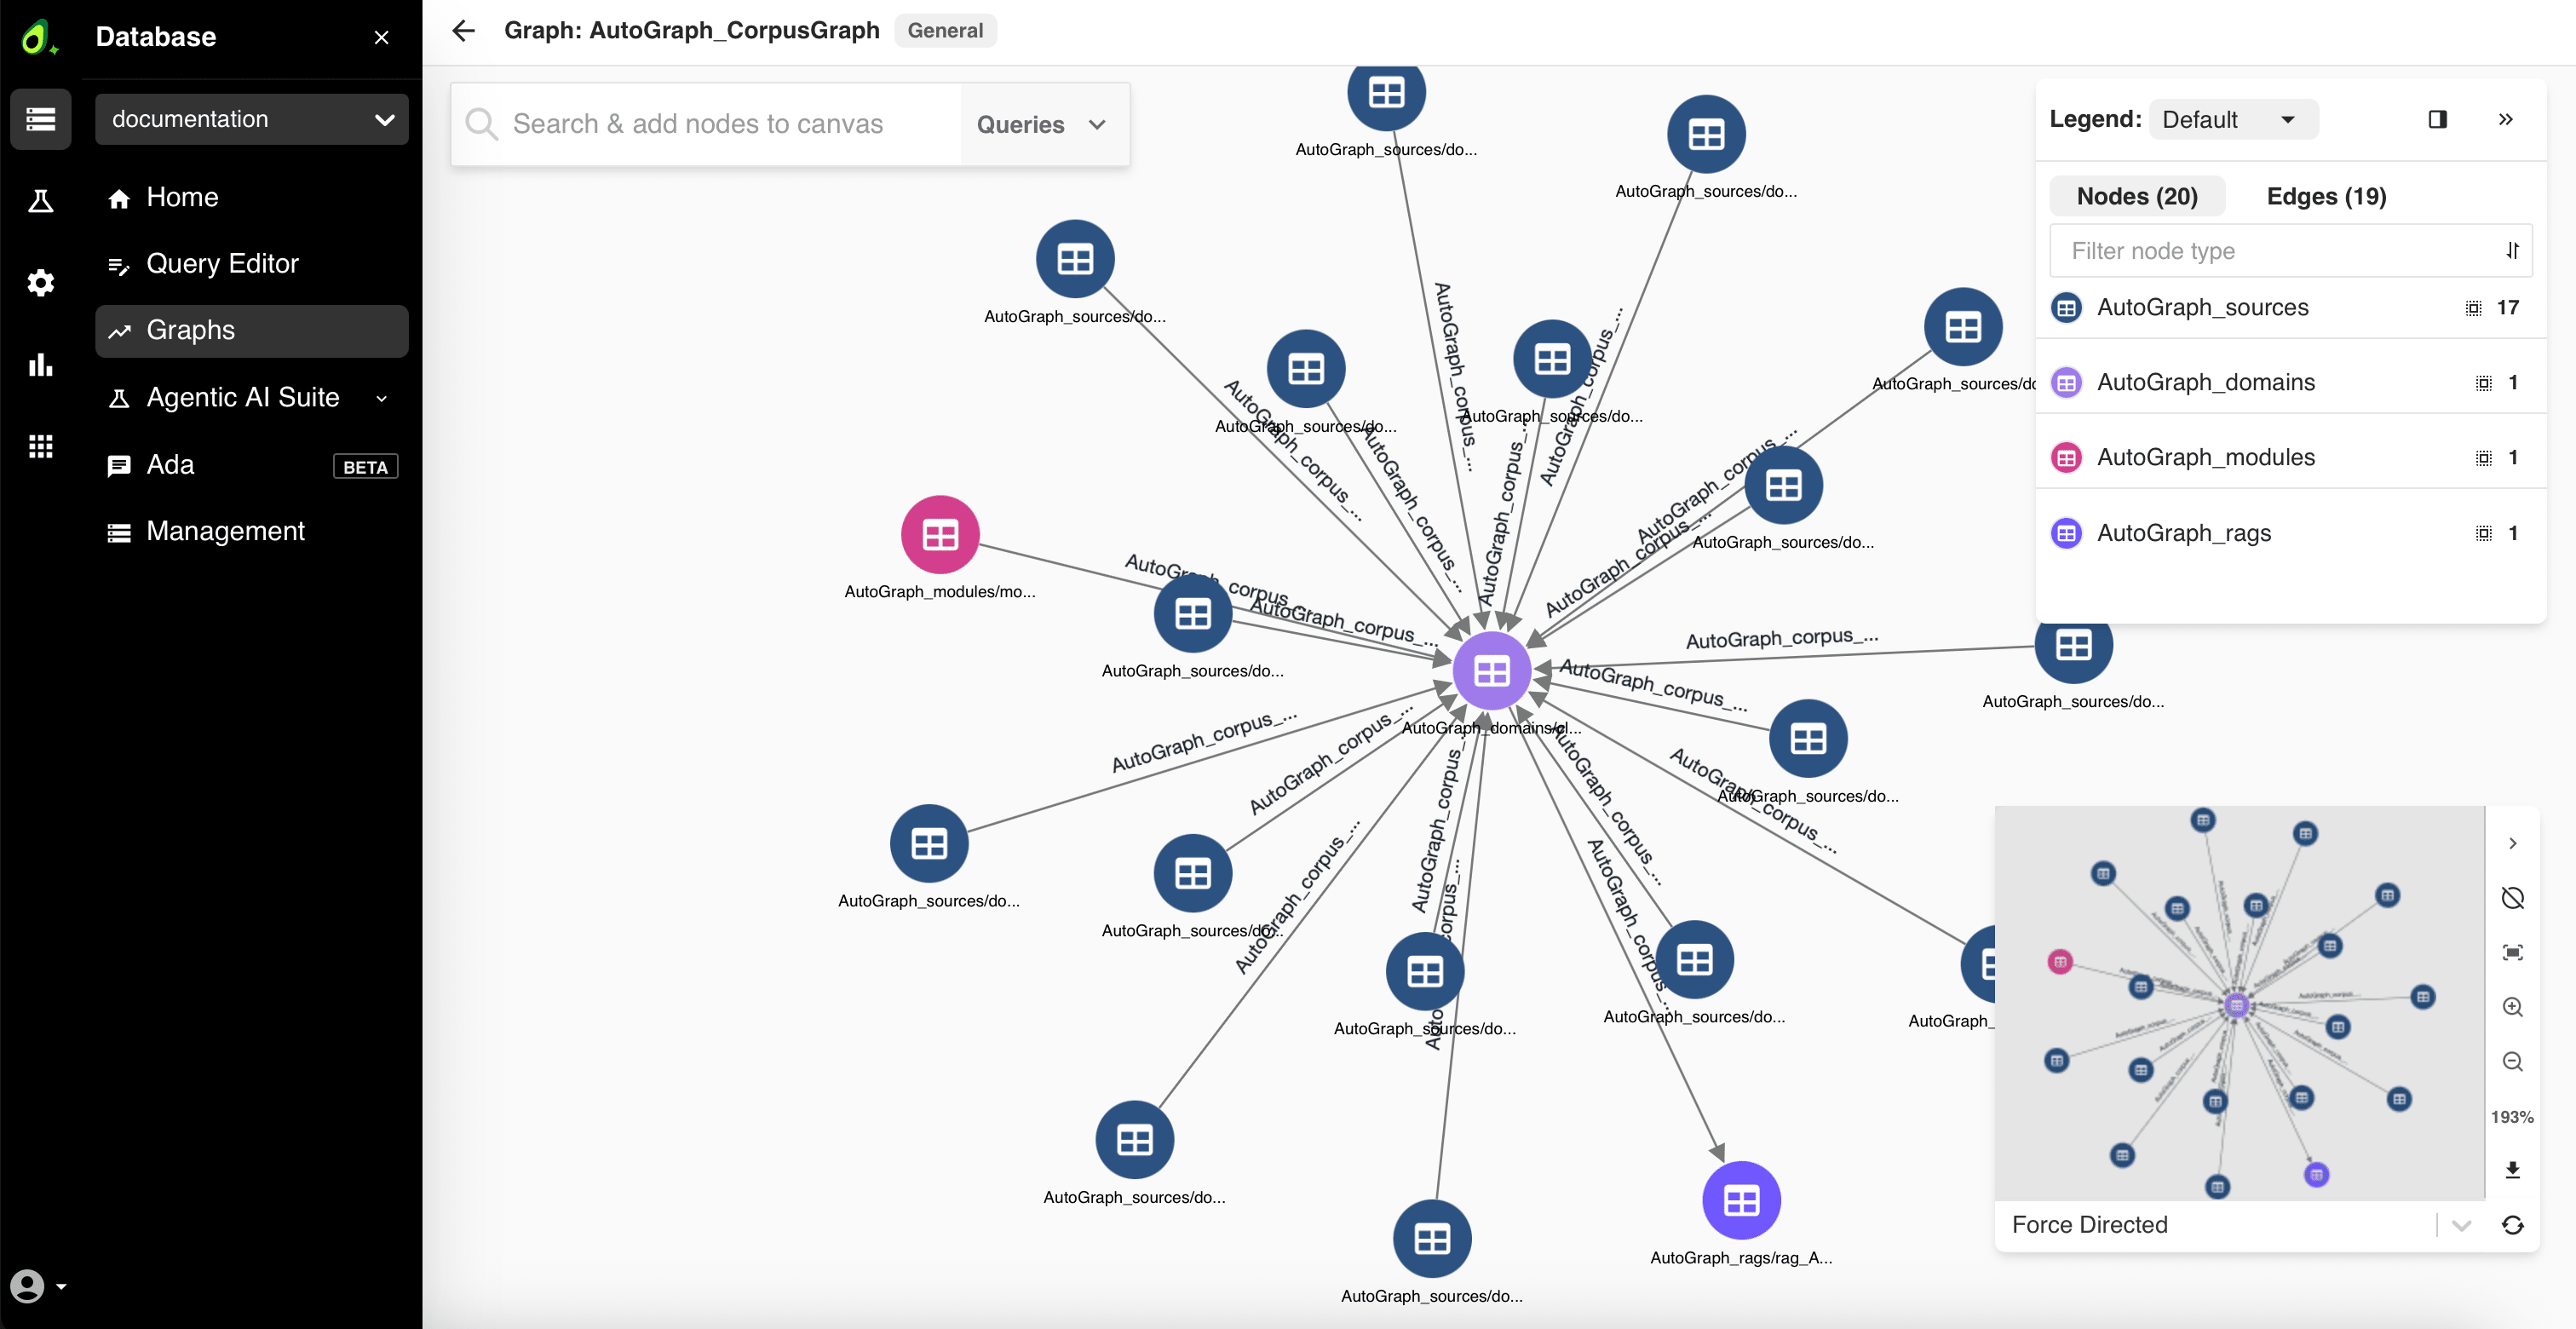
Explore the Corpus Graph
The Corpus Graph card shows the graph name (for example
<project>_CorpusGraph) and how many documents and clusters it holds.
Click Open in Graph Visualizer to inspect the graph. You can search and add nodes to the canvas, run queries, change the layout, and style node types by color, icon, and label, including attribute-based rules. For more information, see Graph Visualizer.
Add more documents
You can add documents to an existing project at any time.
- In the Categories section, click + Add new category.
- The Add a new category dialog opens. Drop files or a folder in the upload area, or use the Choose files and Choose folder buttons. Each upload becomes its own category, which you name next.
- The staged categories are listed below the upload area. Use the pencil icon to rename a category, the trash icon to drop it, and the cross icon to remove a single file.
- Click Add
<N>categories.
Added categories are staged as pending. They are listed with a pending build badge and an Undo button, and an Unbuilt changes — update the Corpus Graph banner appears at the top of the project naming the affected categories.
To include them in your Context Graph, click Update Corpus Graph. A Corpus Graph rebuilt notification confirms that your category changes are live. To drop the staged categories instead, click Discard changes in the banner.
Generate strategies and build the Knowledge Graph
The Knowledge Graph card shows the graph name (for example <project>_kg)
and whether the Knowledge Graph is built. Once it is, the card reports how many
entities and relationships it contains. The RAG Strategizer analyzes the
Corpus Graph and generates the import strategies per cluster. For details on how
strategies are determined, see RAG Strategizer.
Click Generate strategies on the Knowledge Graph card to open a three-step wizard: Configure, Review, and Build.
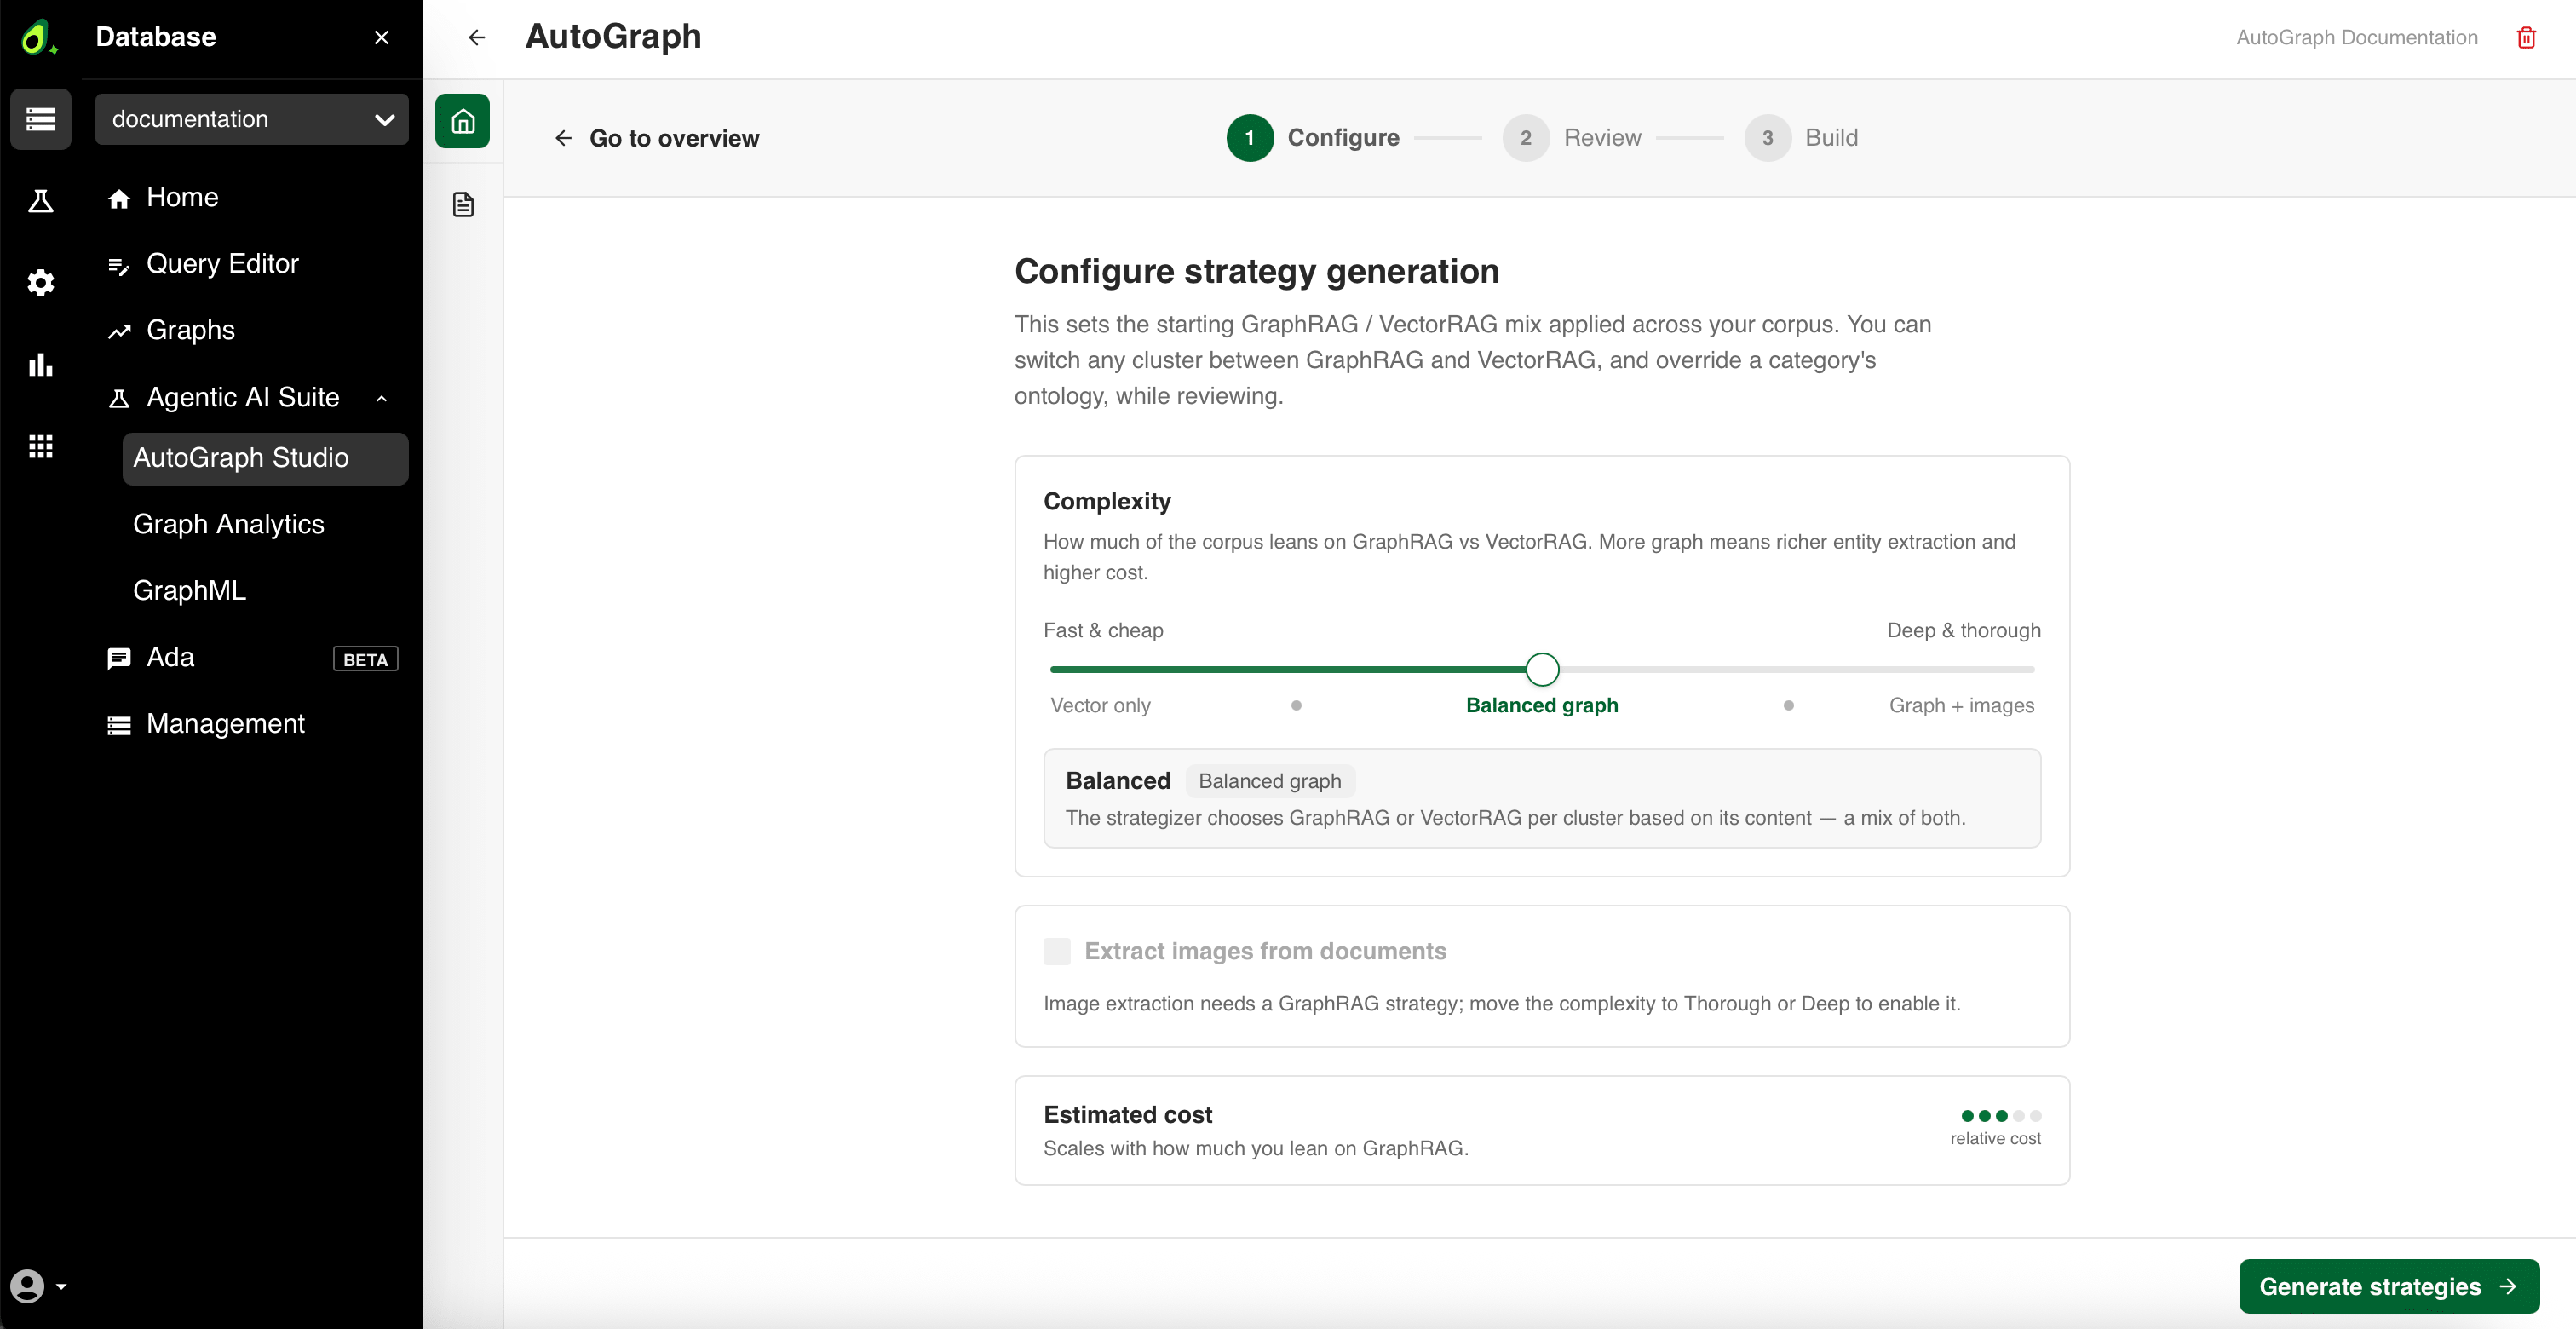
Configure strategy generation
Complexity sets the GraphRAG ↔ VectorRAG mix the strategizer applies across your corpus. The strategizer partitions each category into clusters and assigns every cluster the strategy that fits it. Drag the slider between Fast & cheap and Deep & thorough:
| Level | Label | What it does |
|---|---|---|
| Fast & cheap | Vector only | Every cluster uses VectorRAG — chunks are embedded directly, no entity extraction. Cheapest and fastest to build. |
| Balanced | Balanced graph | The strategizer chooses GraphRAG or VectorRAG per cluster based on its content — a mix of both. |
| Thorough | Mostly graph | GraphRAG for most clusters — richer entity graphs and more relationships, at higher cost. |
| Deep | Graph + images | GraphRAG for every cluster, with image extraction always on. The most thorough and most expensive setting. |
Two intermediate stops between these levels let you fine-tune the mix.
Extract images from documents pulls entities and descriptions out of images during the import, at extra cost. It needs a graph-heavy strategy: the checkbox is disabled below Thorough and always on at Deep.
The Estimated cost card shows the relative cost of your selection, which scales with how much you lean on GraphRAG and with image extraction.
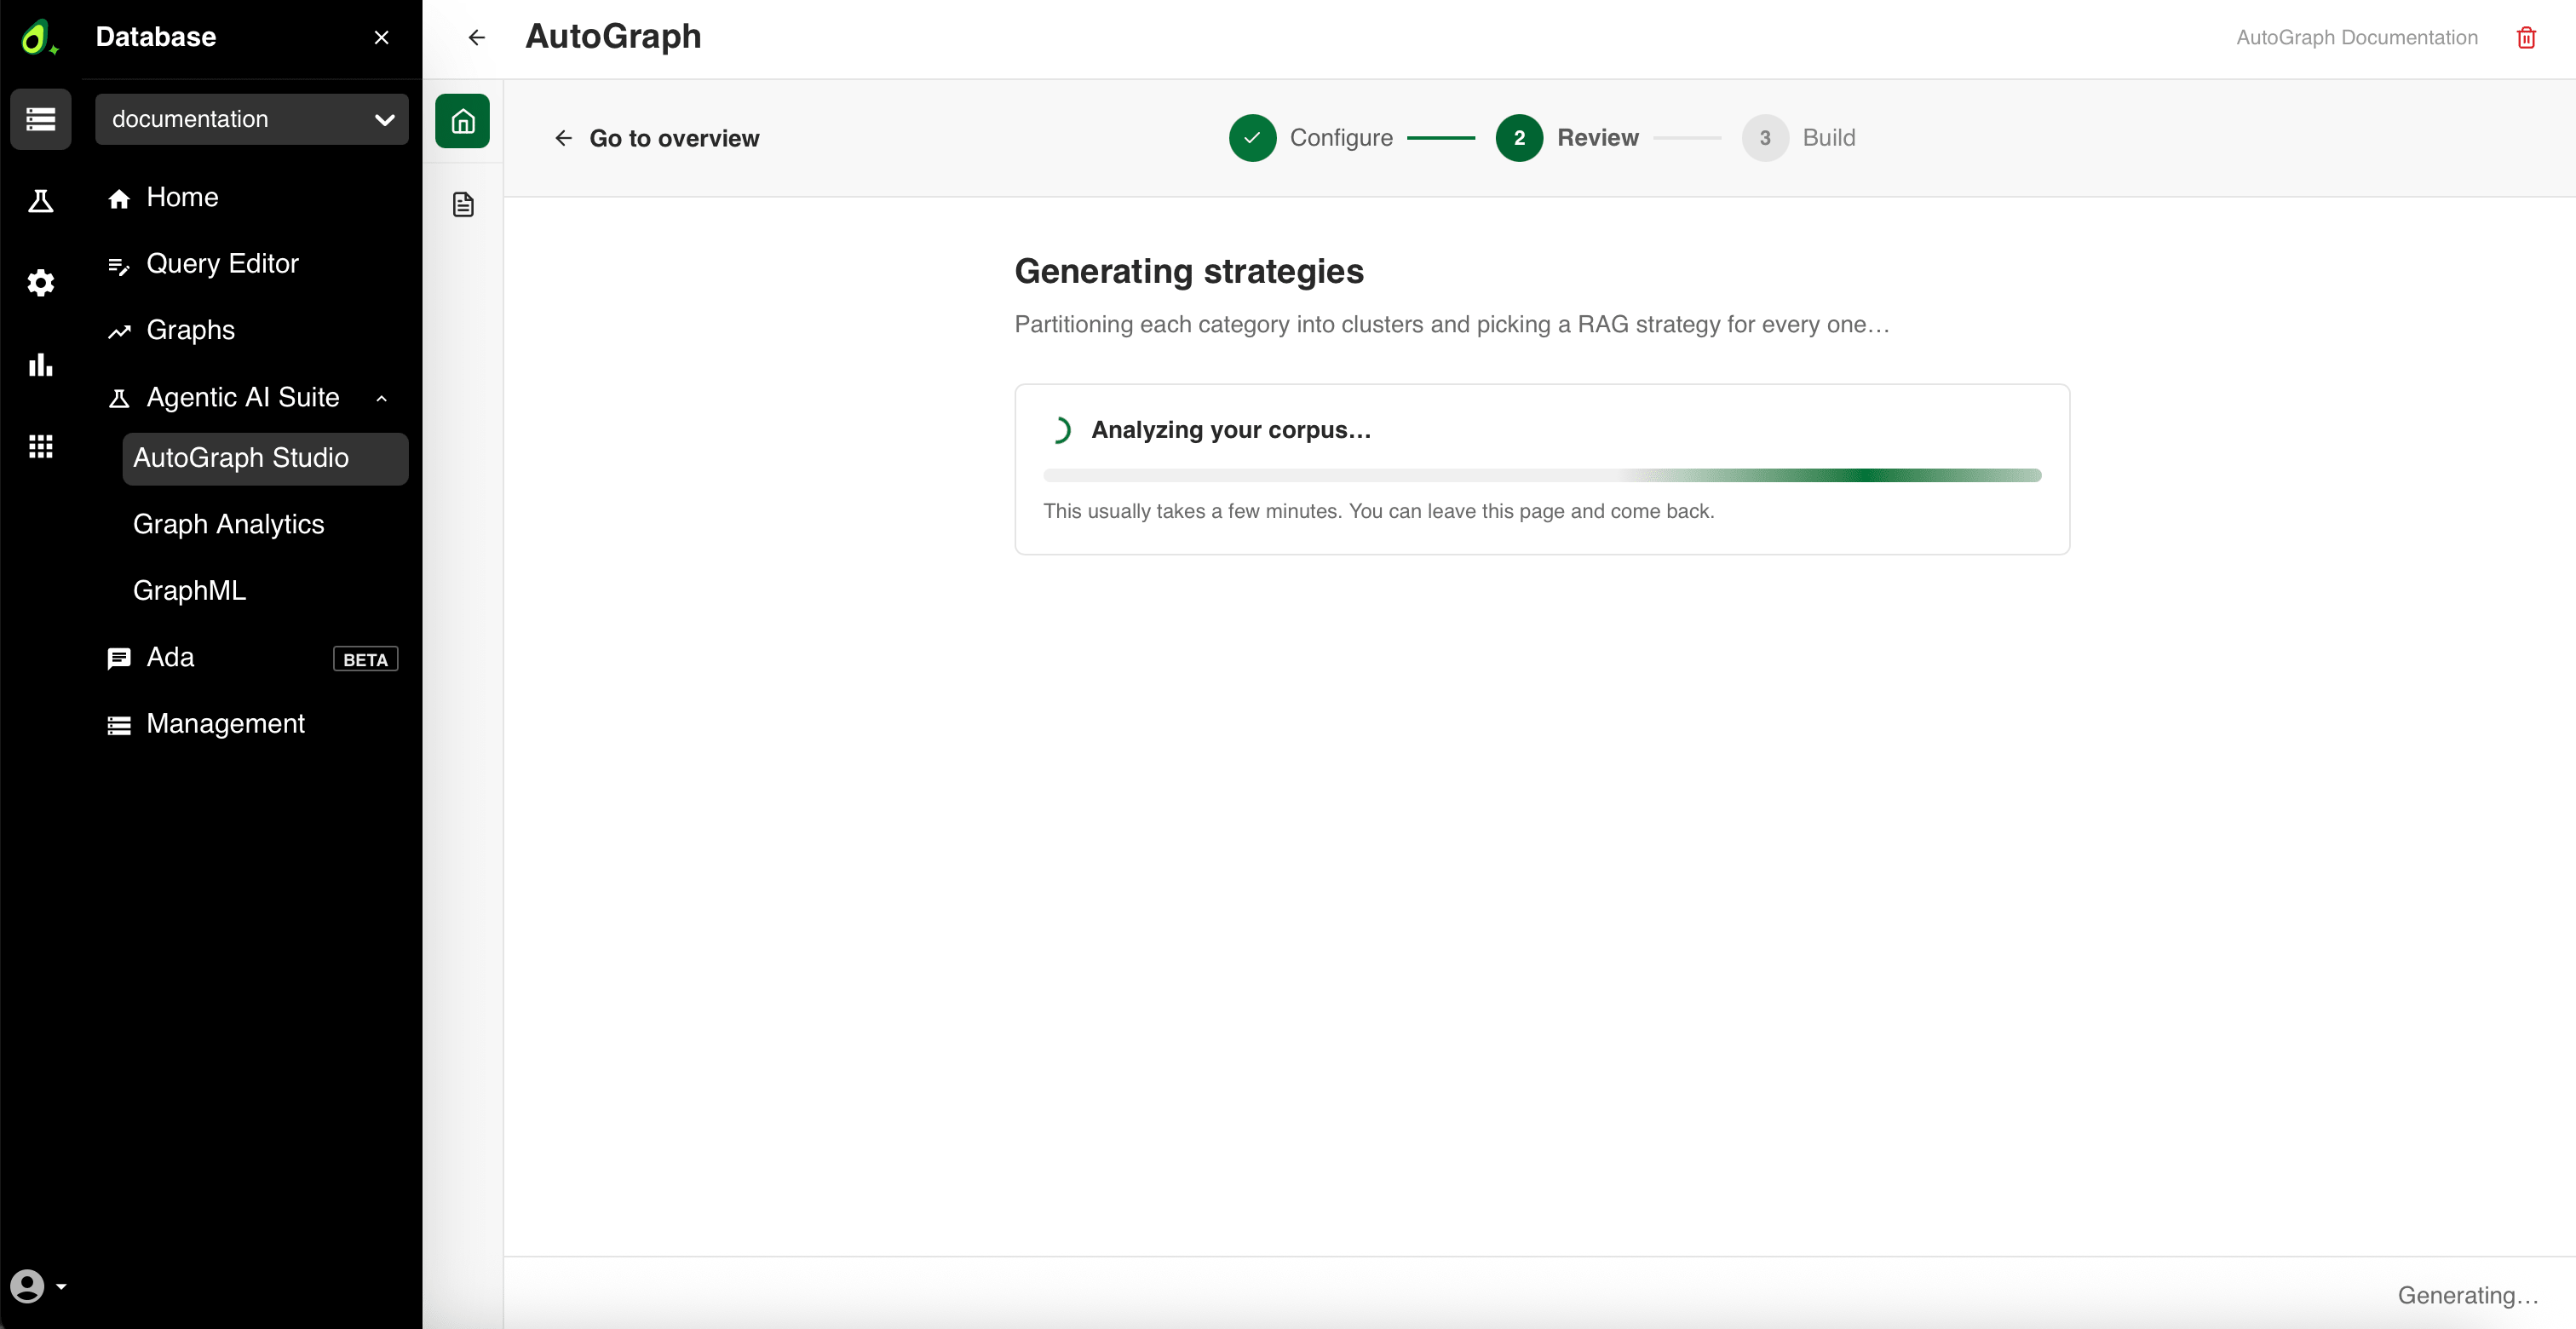
Click Generate strategies. Generation runs server-side, so you can leave the page and come back. The wizard moves to Review and reports progress as Analyzing your corpus….
Review strategies
The Review strategies step lists each category and the clusters below it, with the assigned Strategy, the size of its Ontology, and the number of Documents. Every category row summarizes its clusters, for example 1 cluster · 1 GraphRAG · ontology: 12 types. Your edits here are staged and applied when you build — the footer counts them, for example 1 staged edit — applied on build, and edited rows are marked with an edited badge.
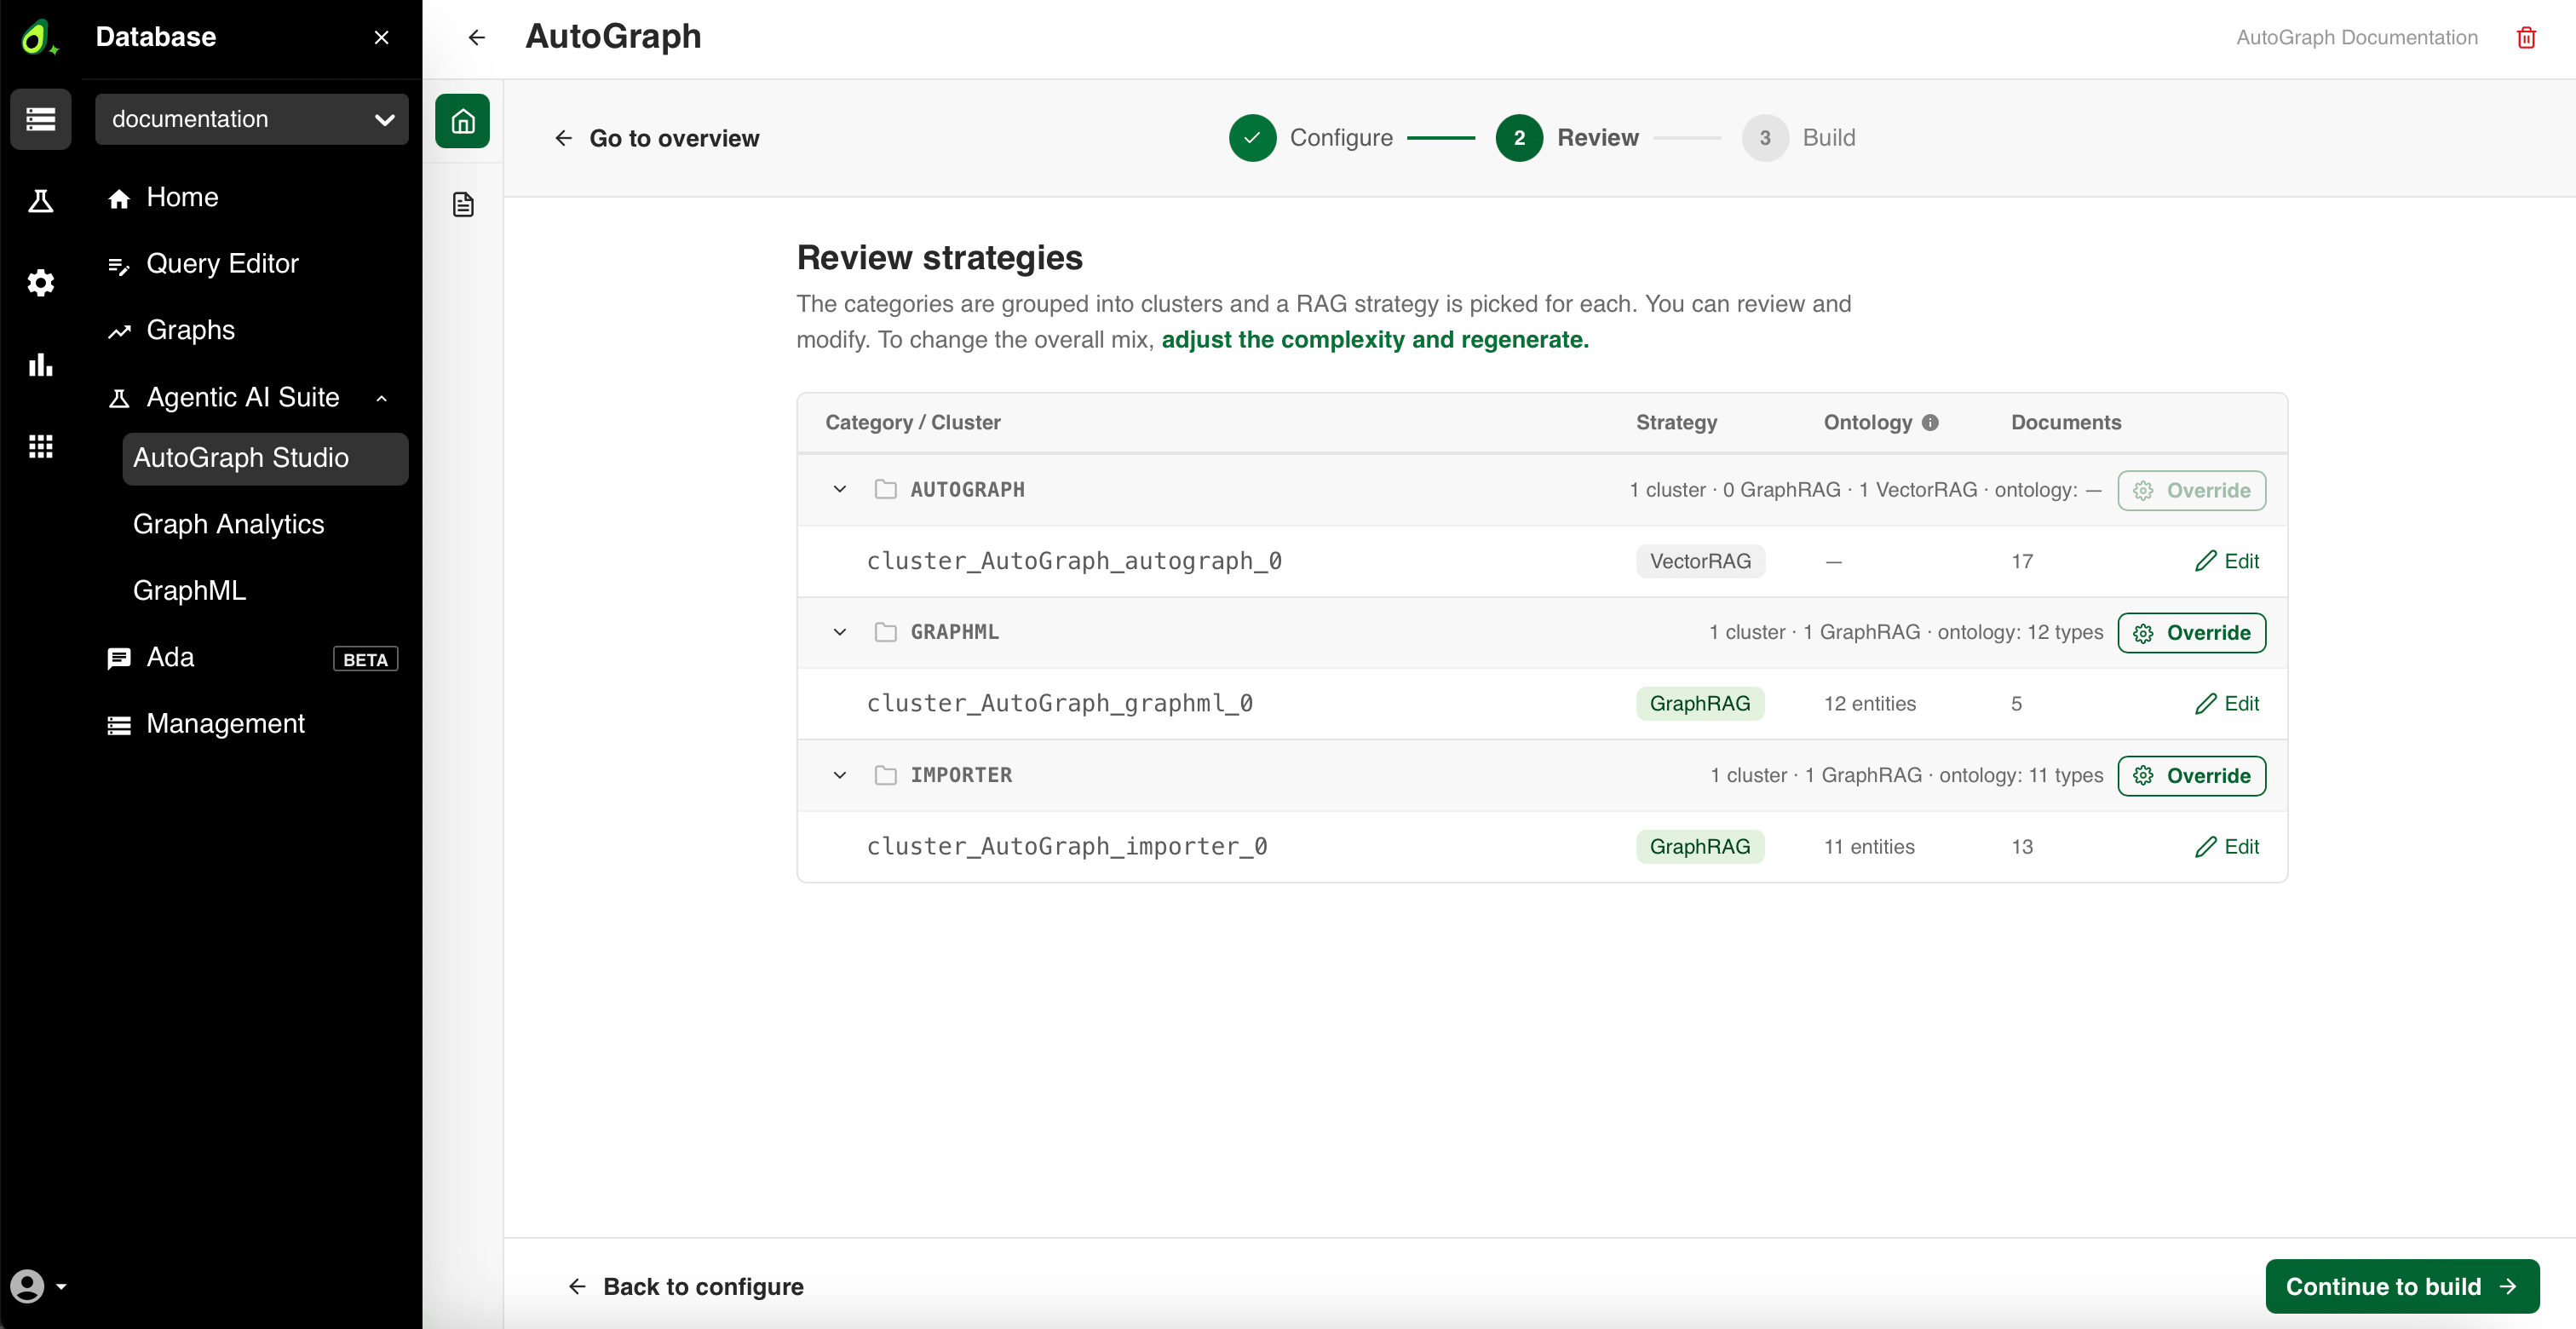
- Click Edit on a cluster to open its editor. You can switch the strategy Type between GraphRAG and VectorRAG, toggle Extract images from documents for GraphRAG clusters, and add, rename, or remove entity types under Ontology — entity types. Use Prev and Next to move between clusters.
- Click Override on a category to set one shared entity-type list for all of its GraphRAG clusters. The button is disabled while a category has no GraphRAG clusters — switch a cluster to GraphRAG first.
- To change the overall mix instead of individual clusters, click adjust the complexity and regenerate.
Click Continue to build when you are happy with the strategies, or Back to configure to change the complexity and regenerate.
ORGANIZATION, PERSON, GEO, EVENT) instead of entity types
tailored to your documents. Click Cancel to add entity types in the cluster
editor or via the category’s Override, or Build anyway to continue.Build the Knowledge Graph
The Build step imports every cluster with its assigned strategy: GraphRAG clusters extract entities and relationships, VectorRAG clusters embed chunks. It names what it is about to build, for example Building 2 GraphRAG clusters and 1 VectorRAG cluster. For details, see Orchestration.
Set Parallel builds to the number of clusters to import at the same time.
More parallel builds finish faster but put more load on the service. The default
is 1.
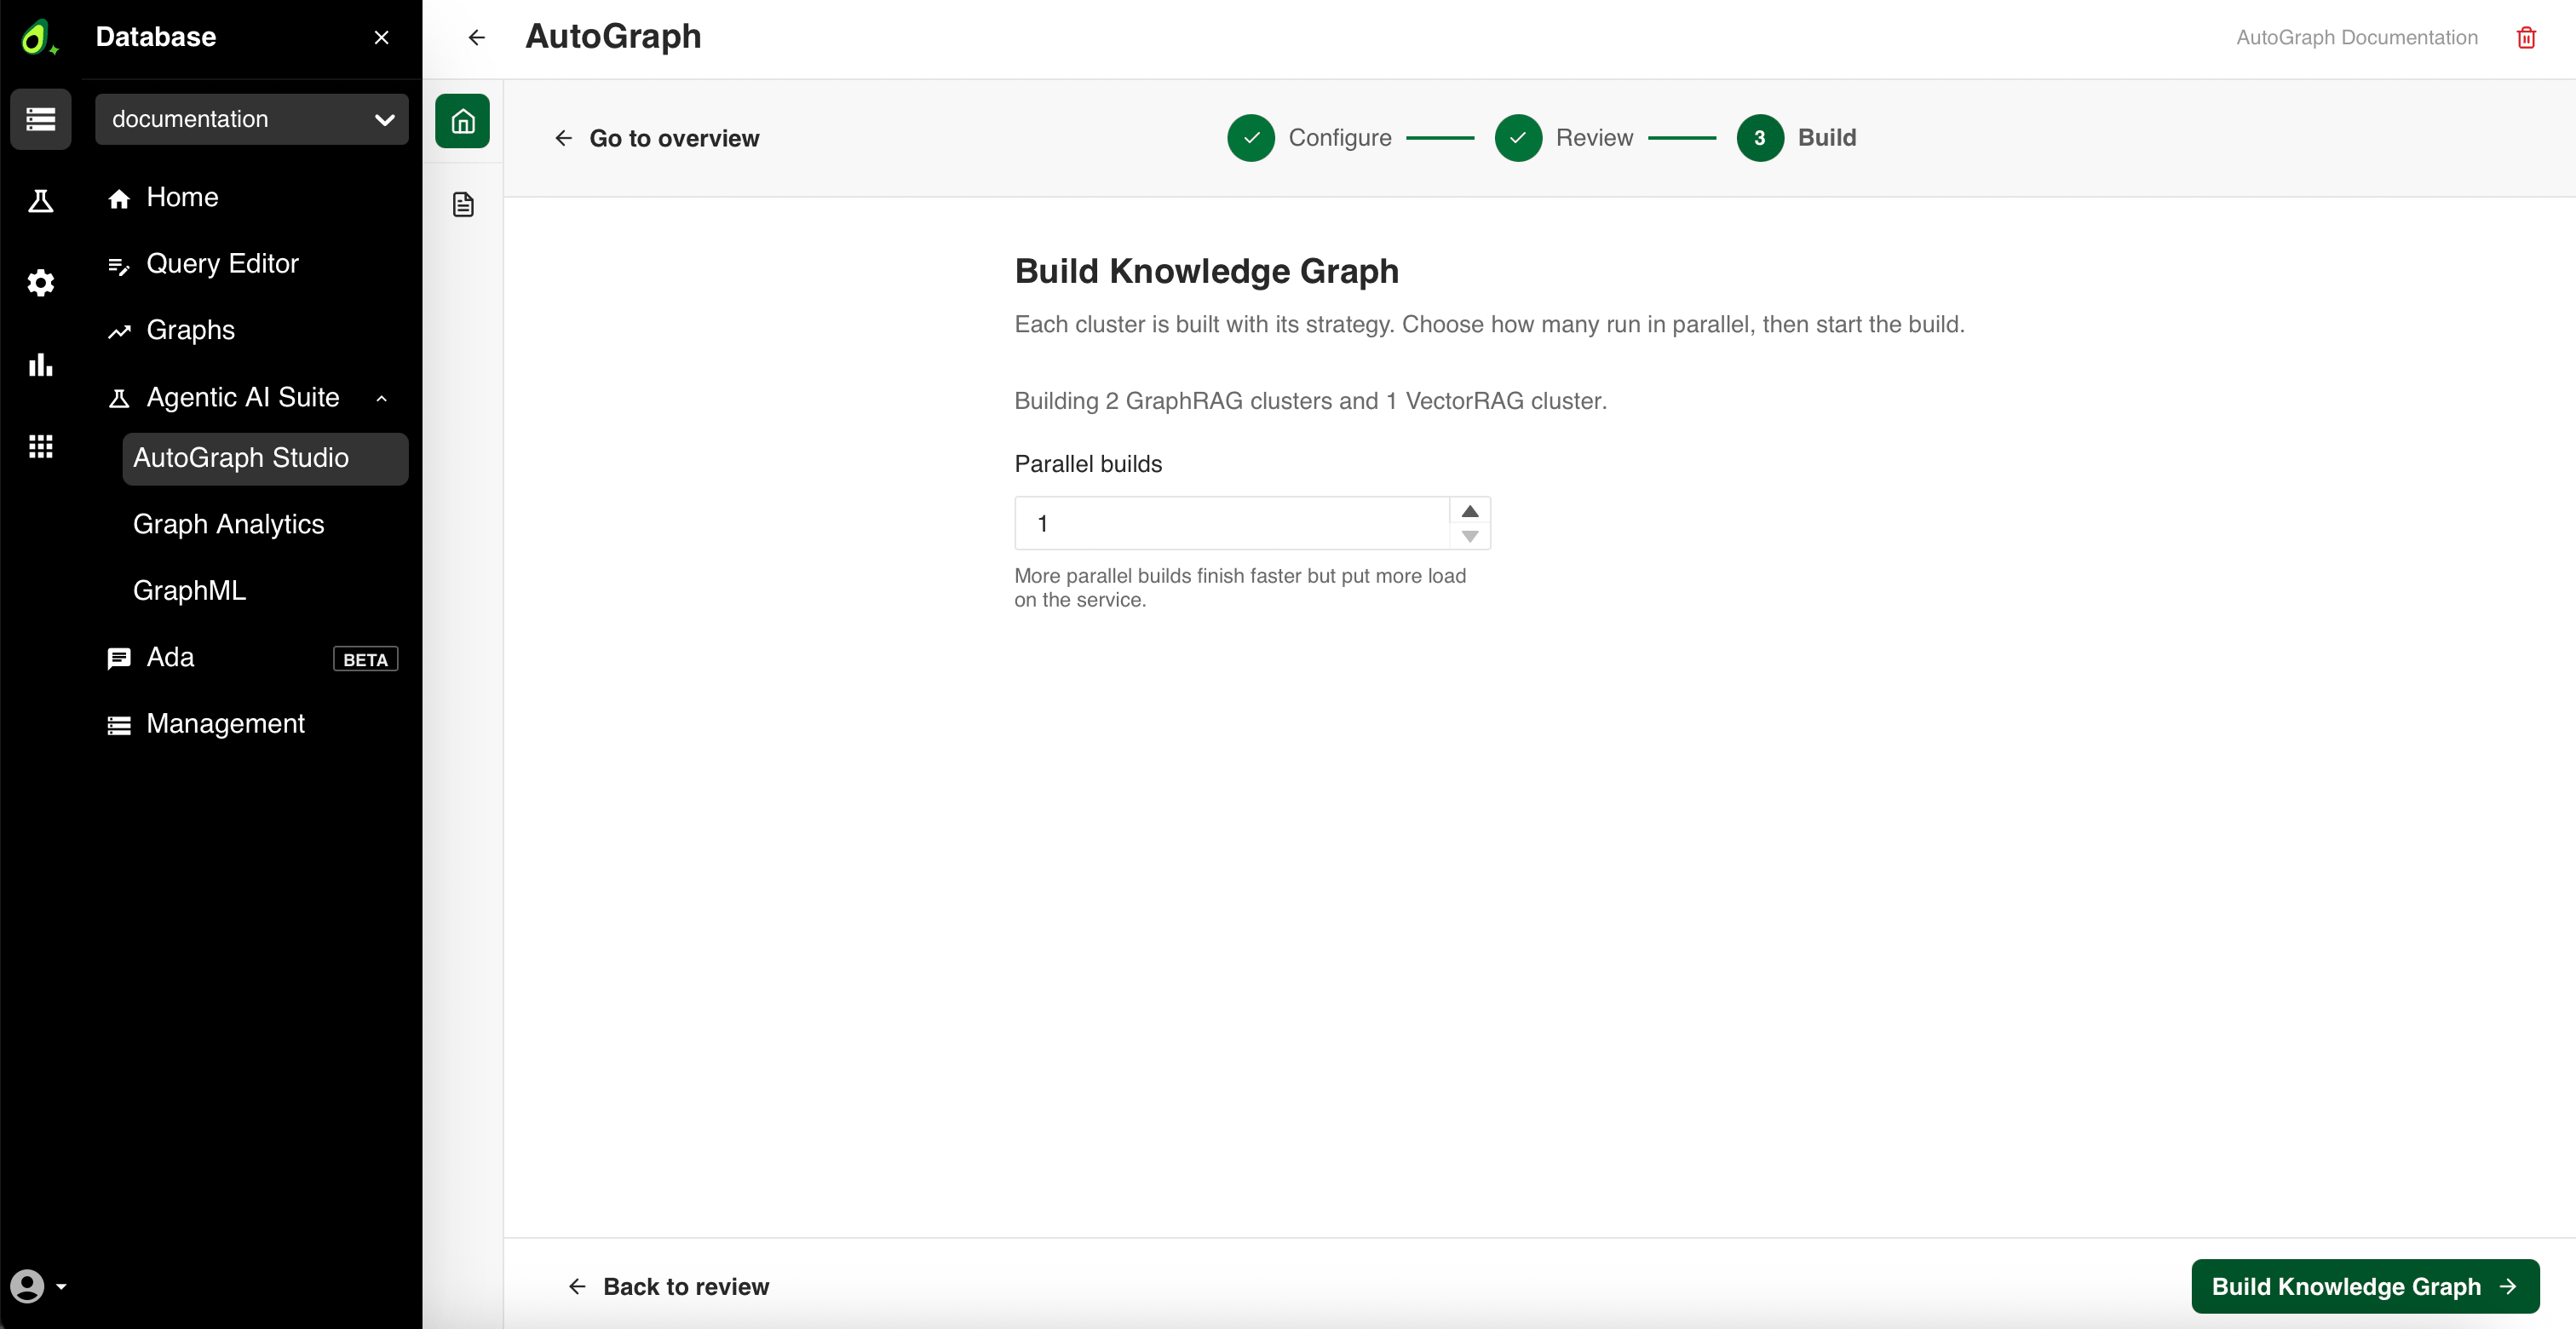
Click Build Knowledge Graph to start the import. It reports progress as Importing your corpus… and runs server-side, so you can leave the page and come back.
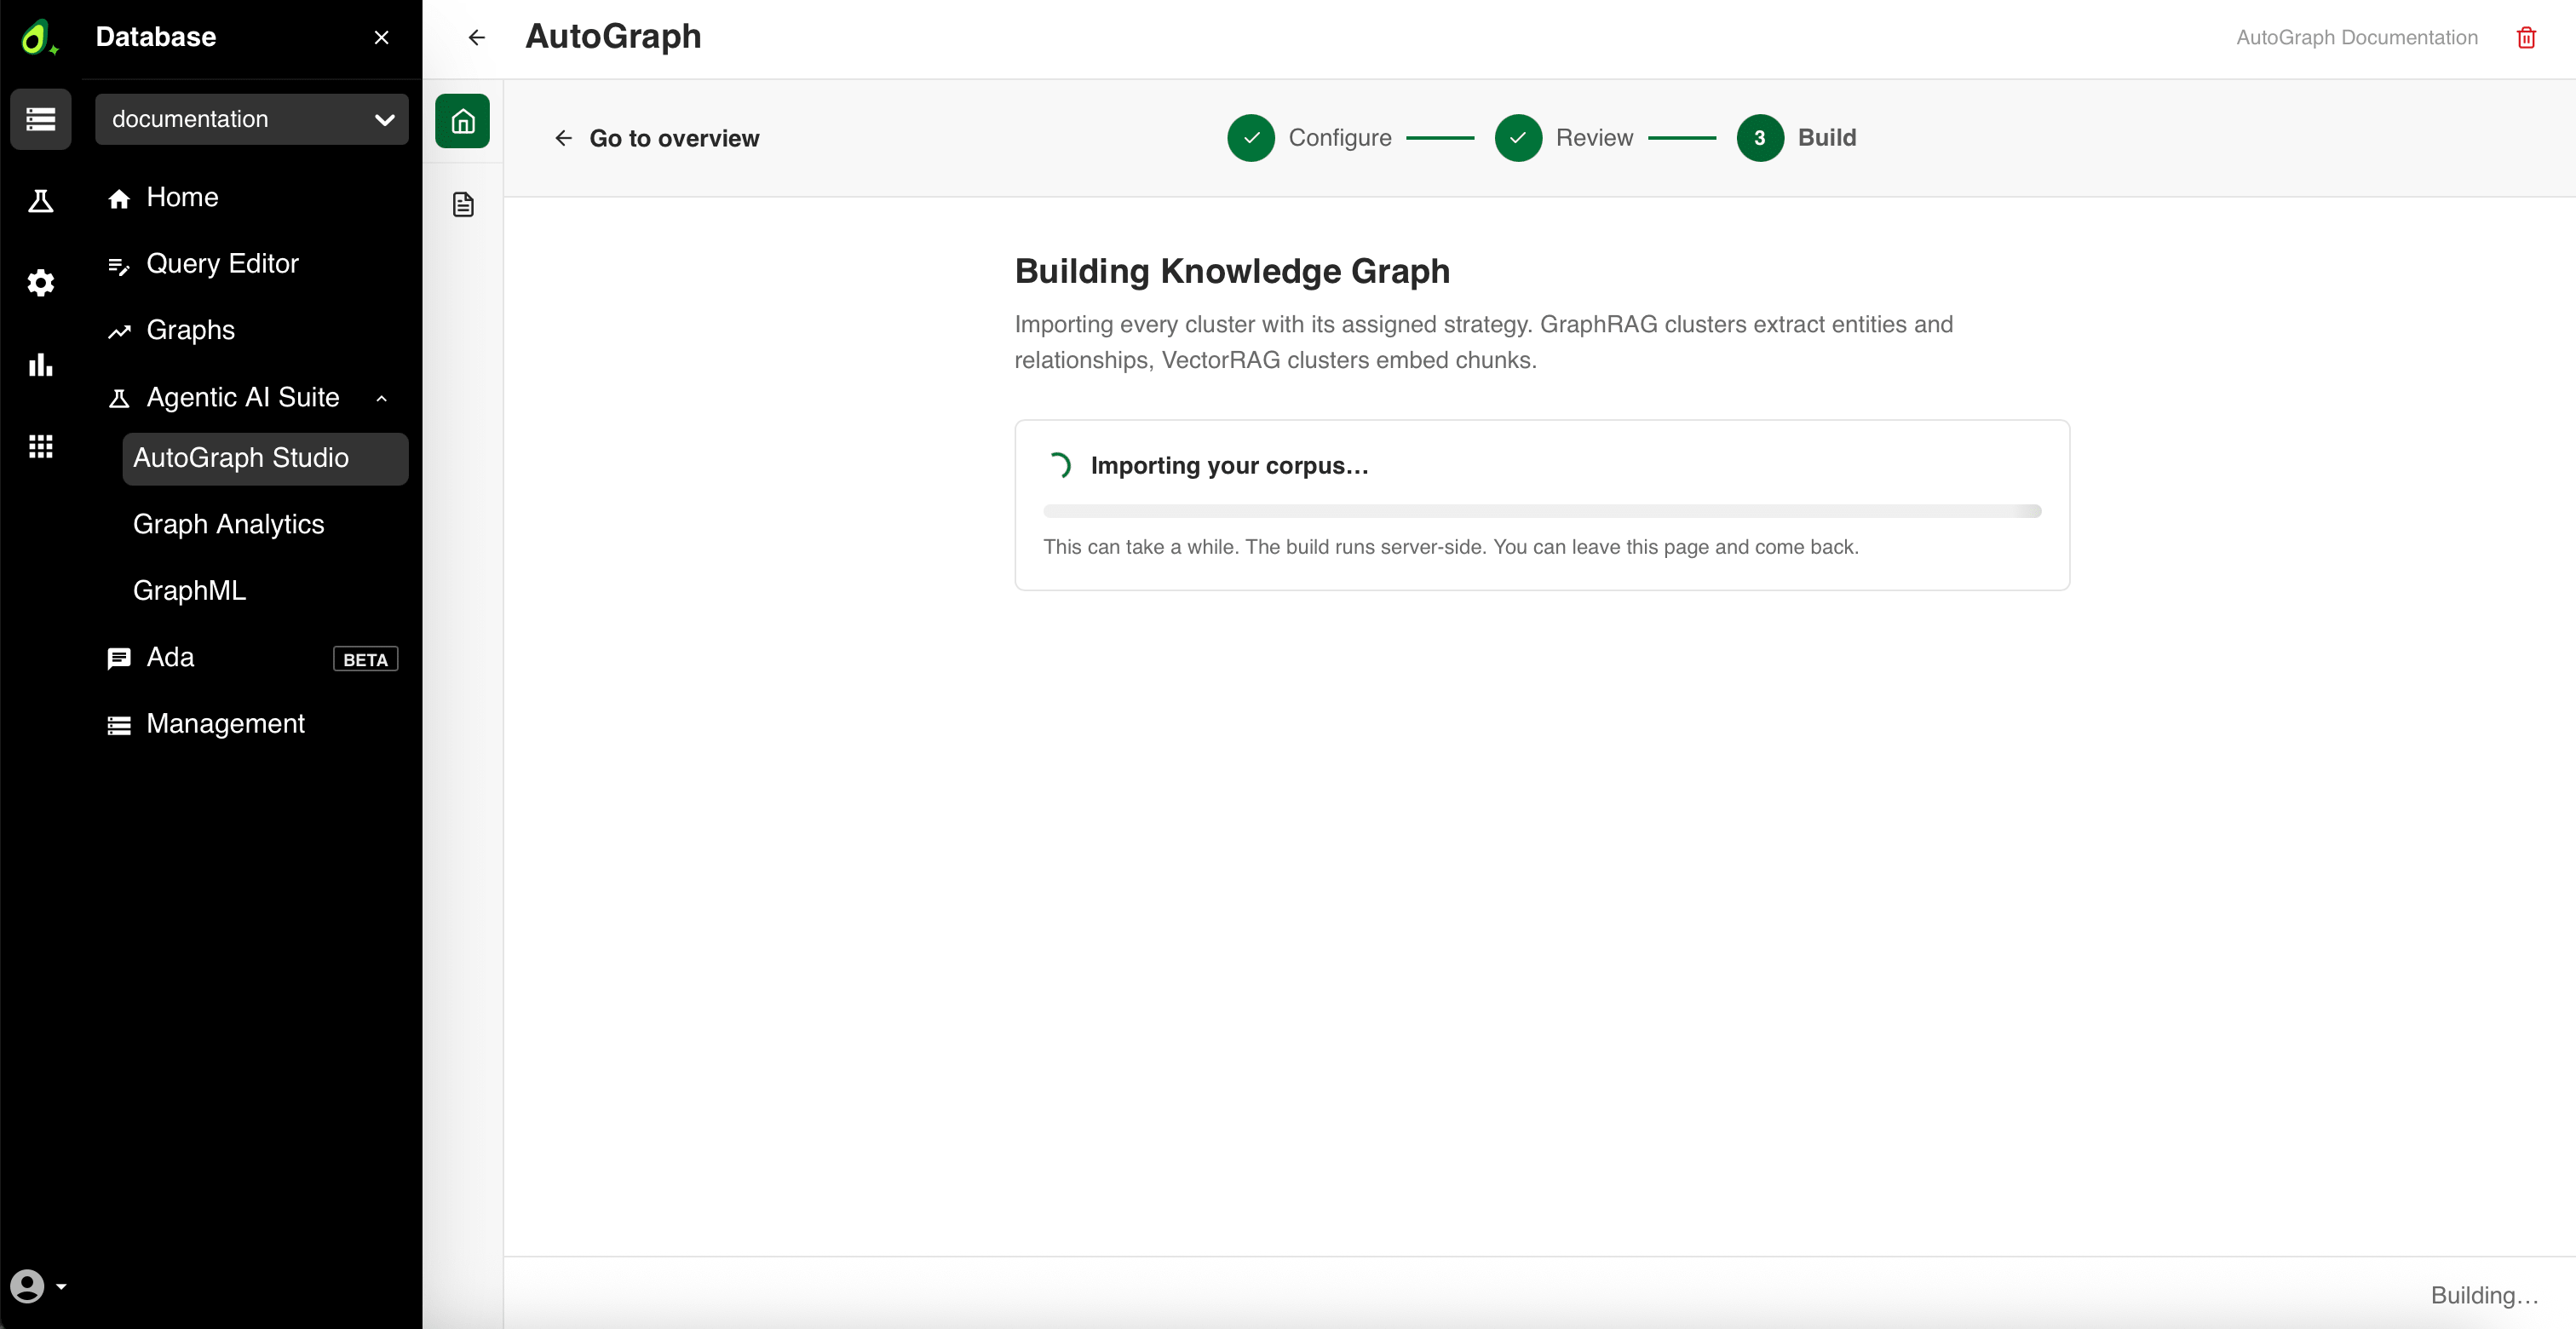
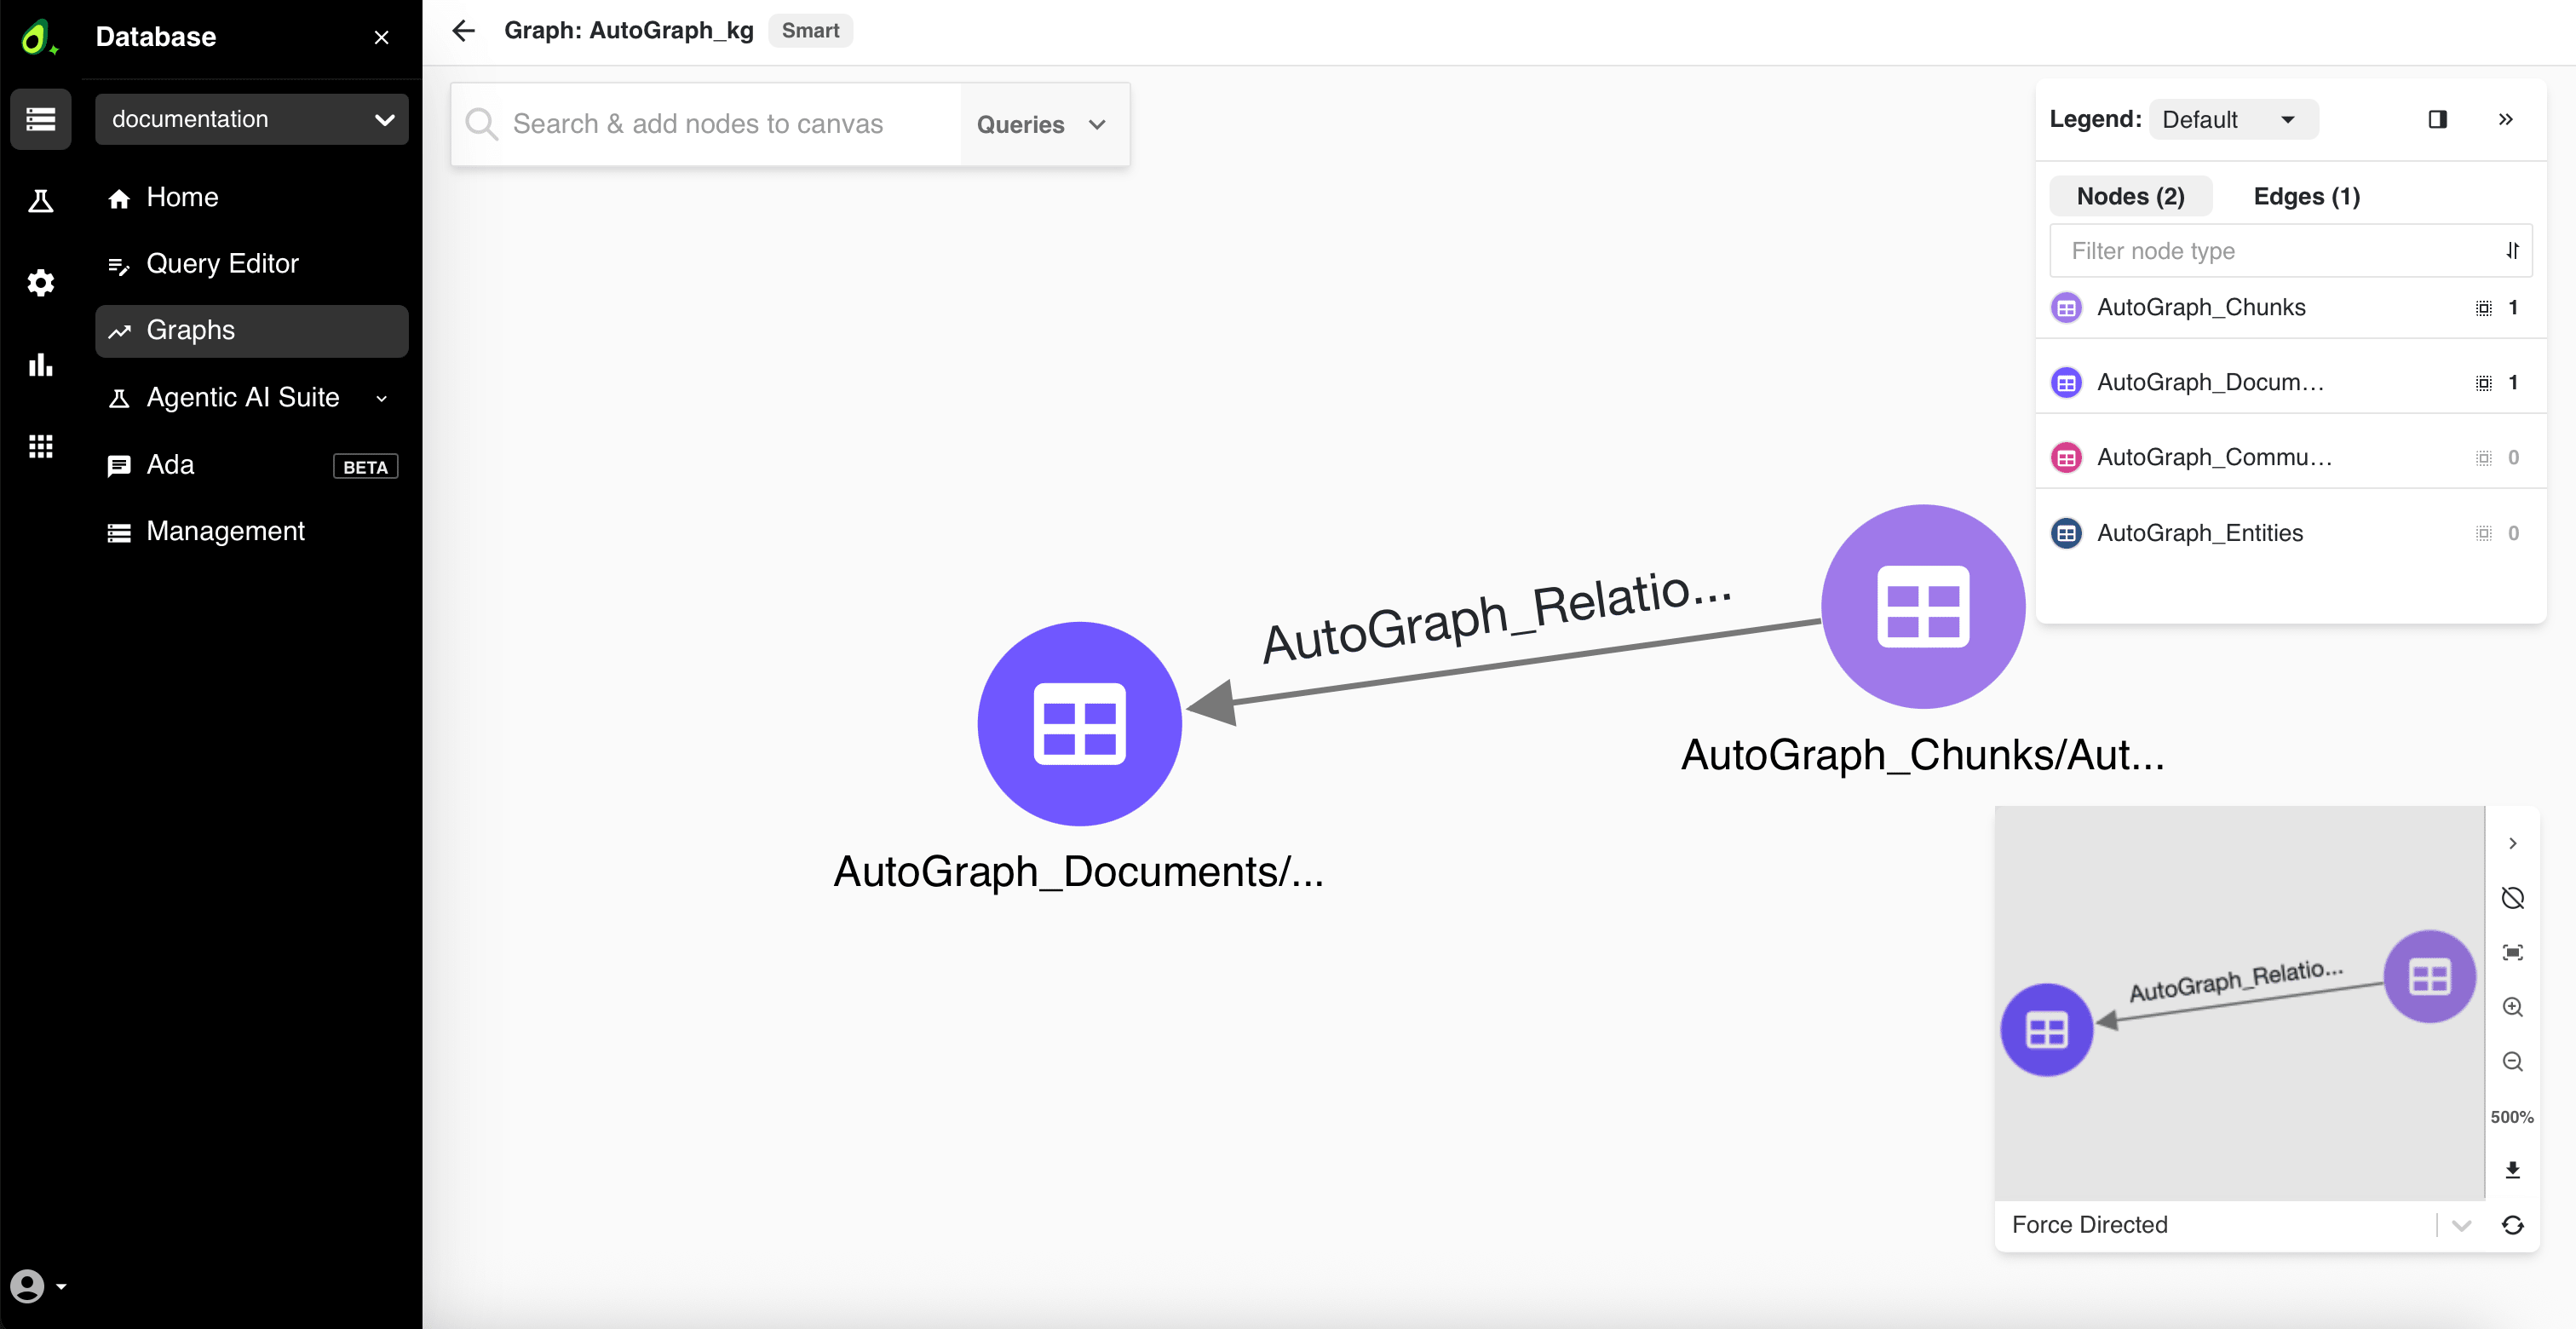
When the import finishes, Knowledge Graph built is displayed. Click Go to overview to return to the project, where the Knowledge Graph card now shows the graph as built.
Change the provider or key
The Model & credentials card lists the Provider, Chat model, Embedding model, and Multimodal model of your project.
- In the Model & credentials section of the project overview, click Change provider or key.
- In the dialog, select a different chat Provider or Model, or pick another saved API key to rotate the key in use. Keys are managed in the Secrets Manager.
- Confirm the change.
Changes apply to the running service right away and only affect future builds and queries, as the dialog states. Your existing Corpus Graph and Knowledge Graph are kept as they were built.
Deploy an AutoRAG retriever
Retrievers let your agents and applications ask questions against your Context Graph. You can deploy one or as many as you wish.
Open the Retrievers panel from the document icon in the project sidebar, or click Deploy a retriever in the AutoRAG section of the project overview.
In the Retriever services list, click + Deploy. Until you deploy one, the panel reports No retriever services yet and offers a Deploy retriever button as well.
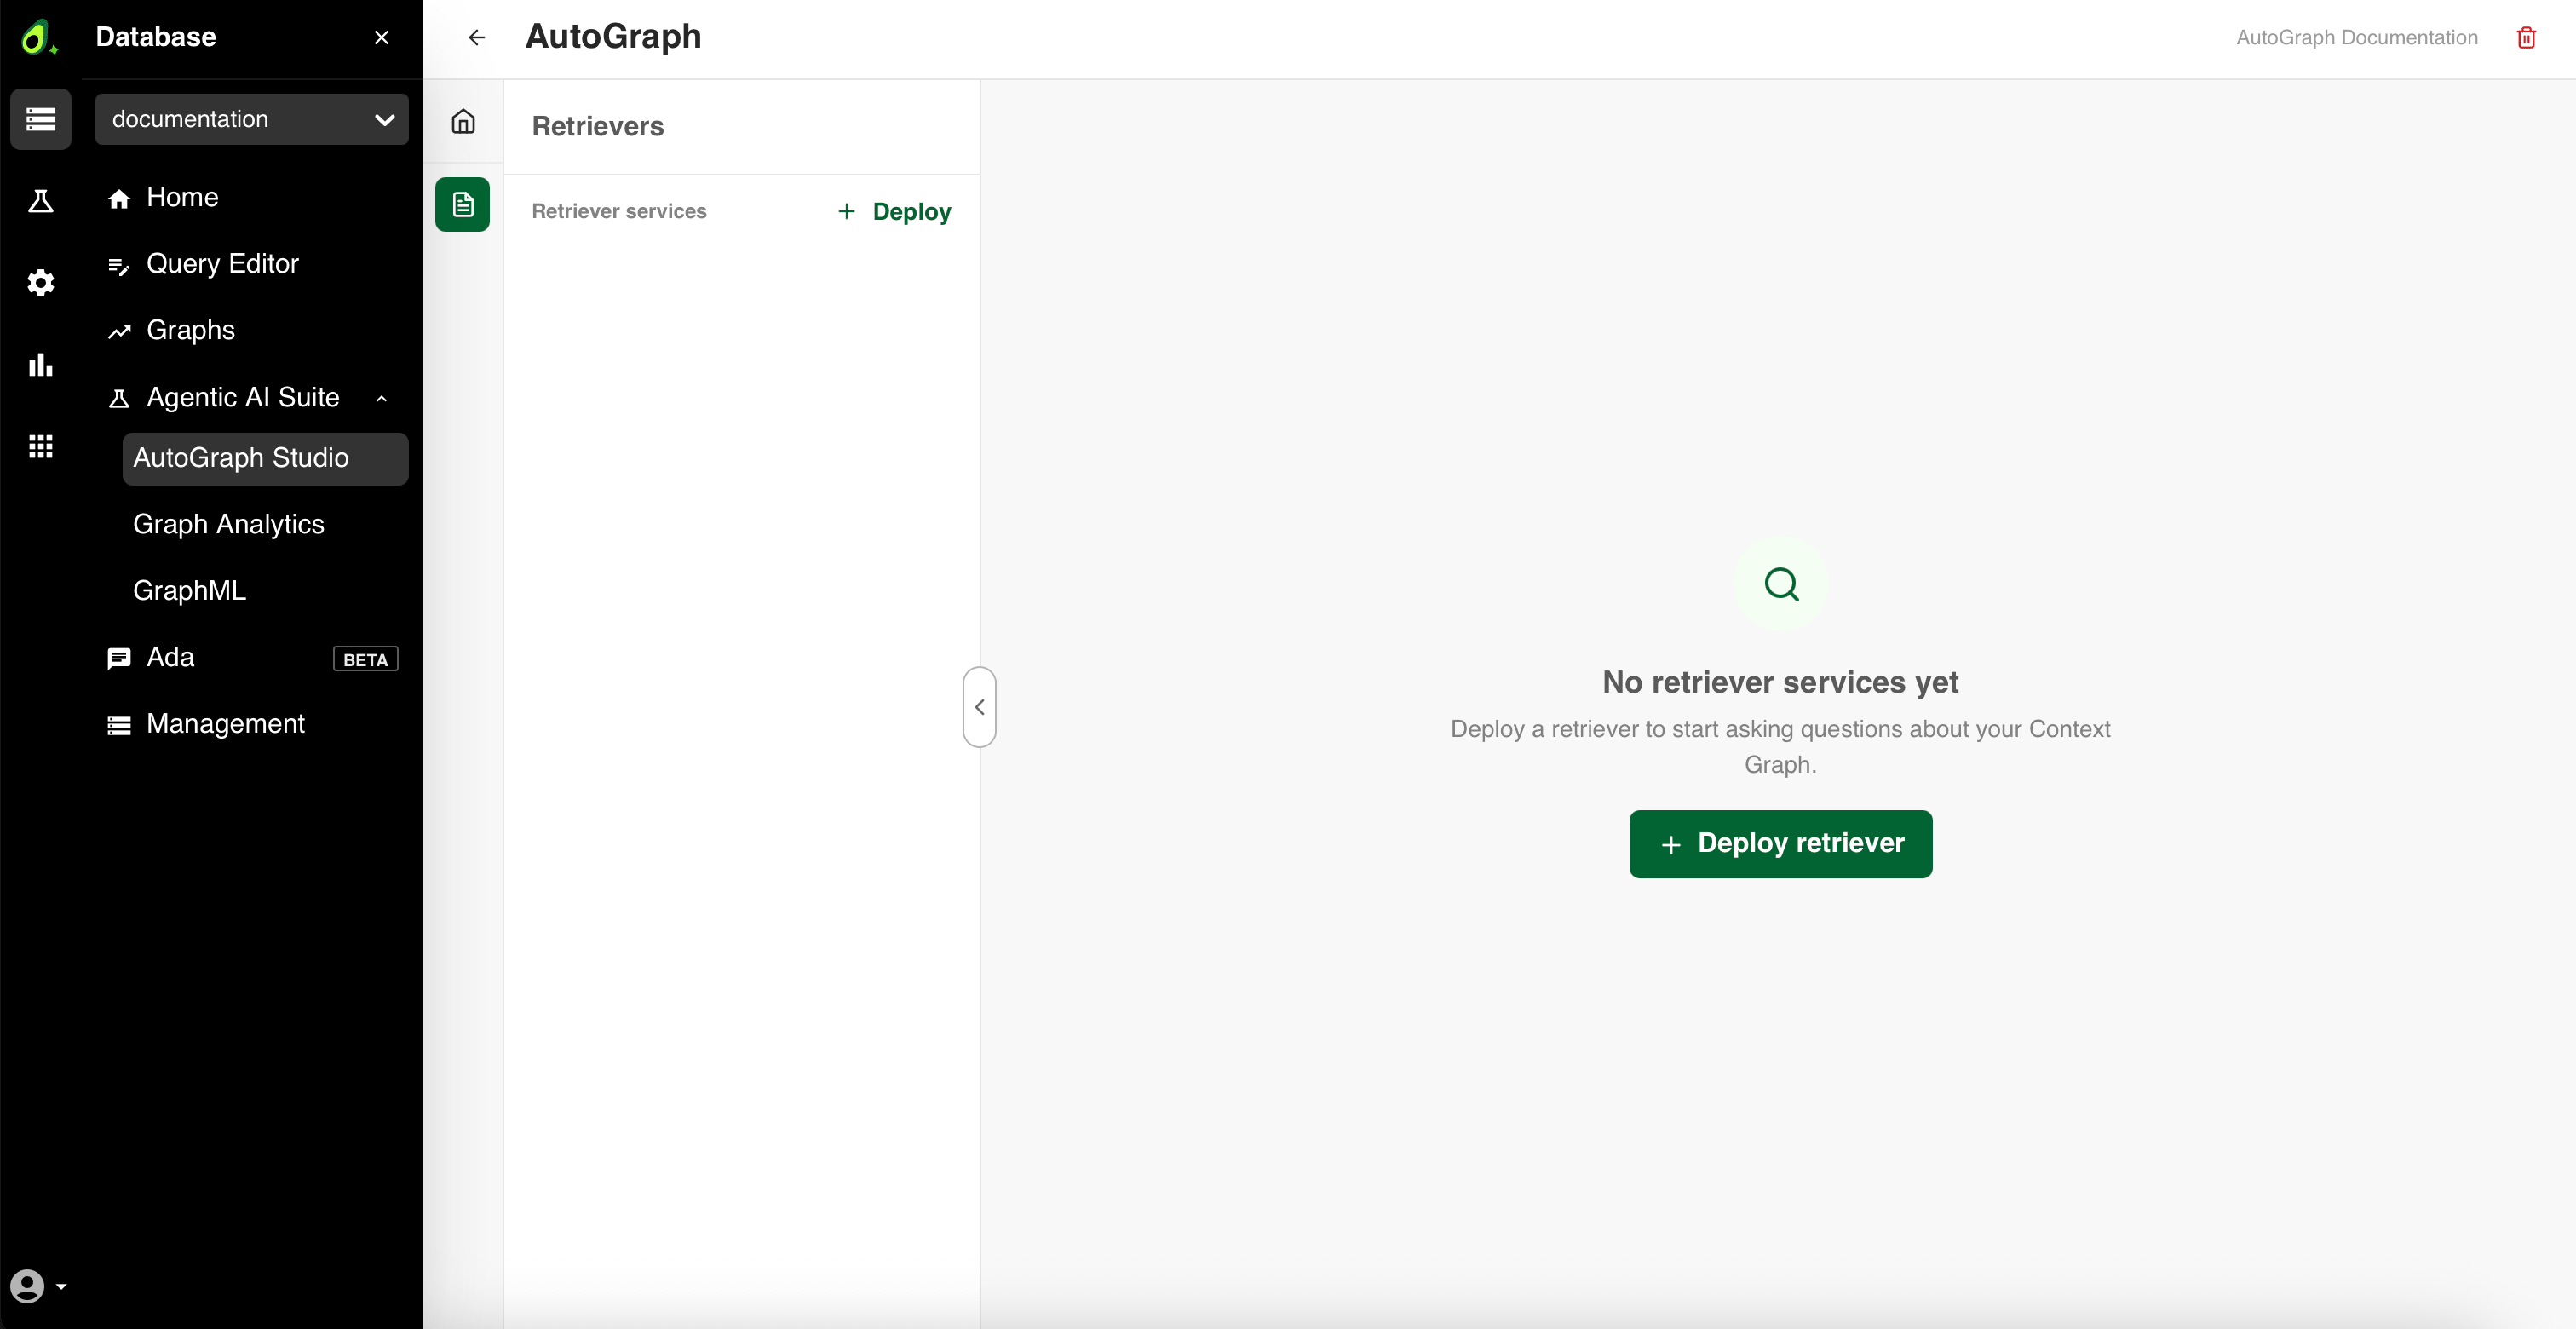
In the Deploy retriever form, configure the following:
- CHAT LLM: The Provider (for example OpenAI), the Chat model (for example GPT-5.4 Nano), and the Chat API key.
- EMBEDDING: The Provider and Embedding model — and the URL for a custom provider — are locked to your corpus build, because the retriever must embed queries with the same provider and model that the import used. The Embedding API key stays editable — the corpus pins the endpoint, not the credential for it, as the hint states: Only its key can be changed.
- Both key fields are required and independent of each other. Select a saved key or add a new one for each. Keys are managed in the Secrets Manager.
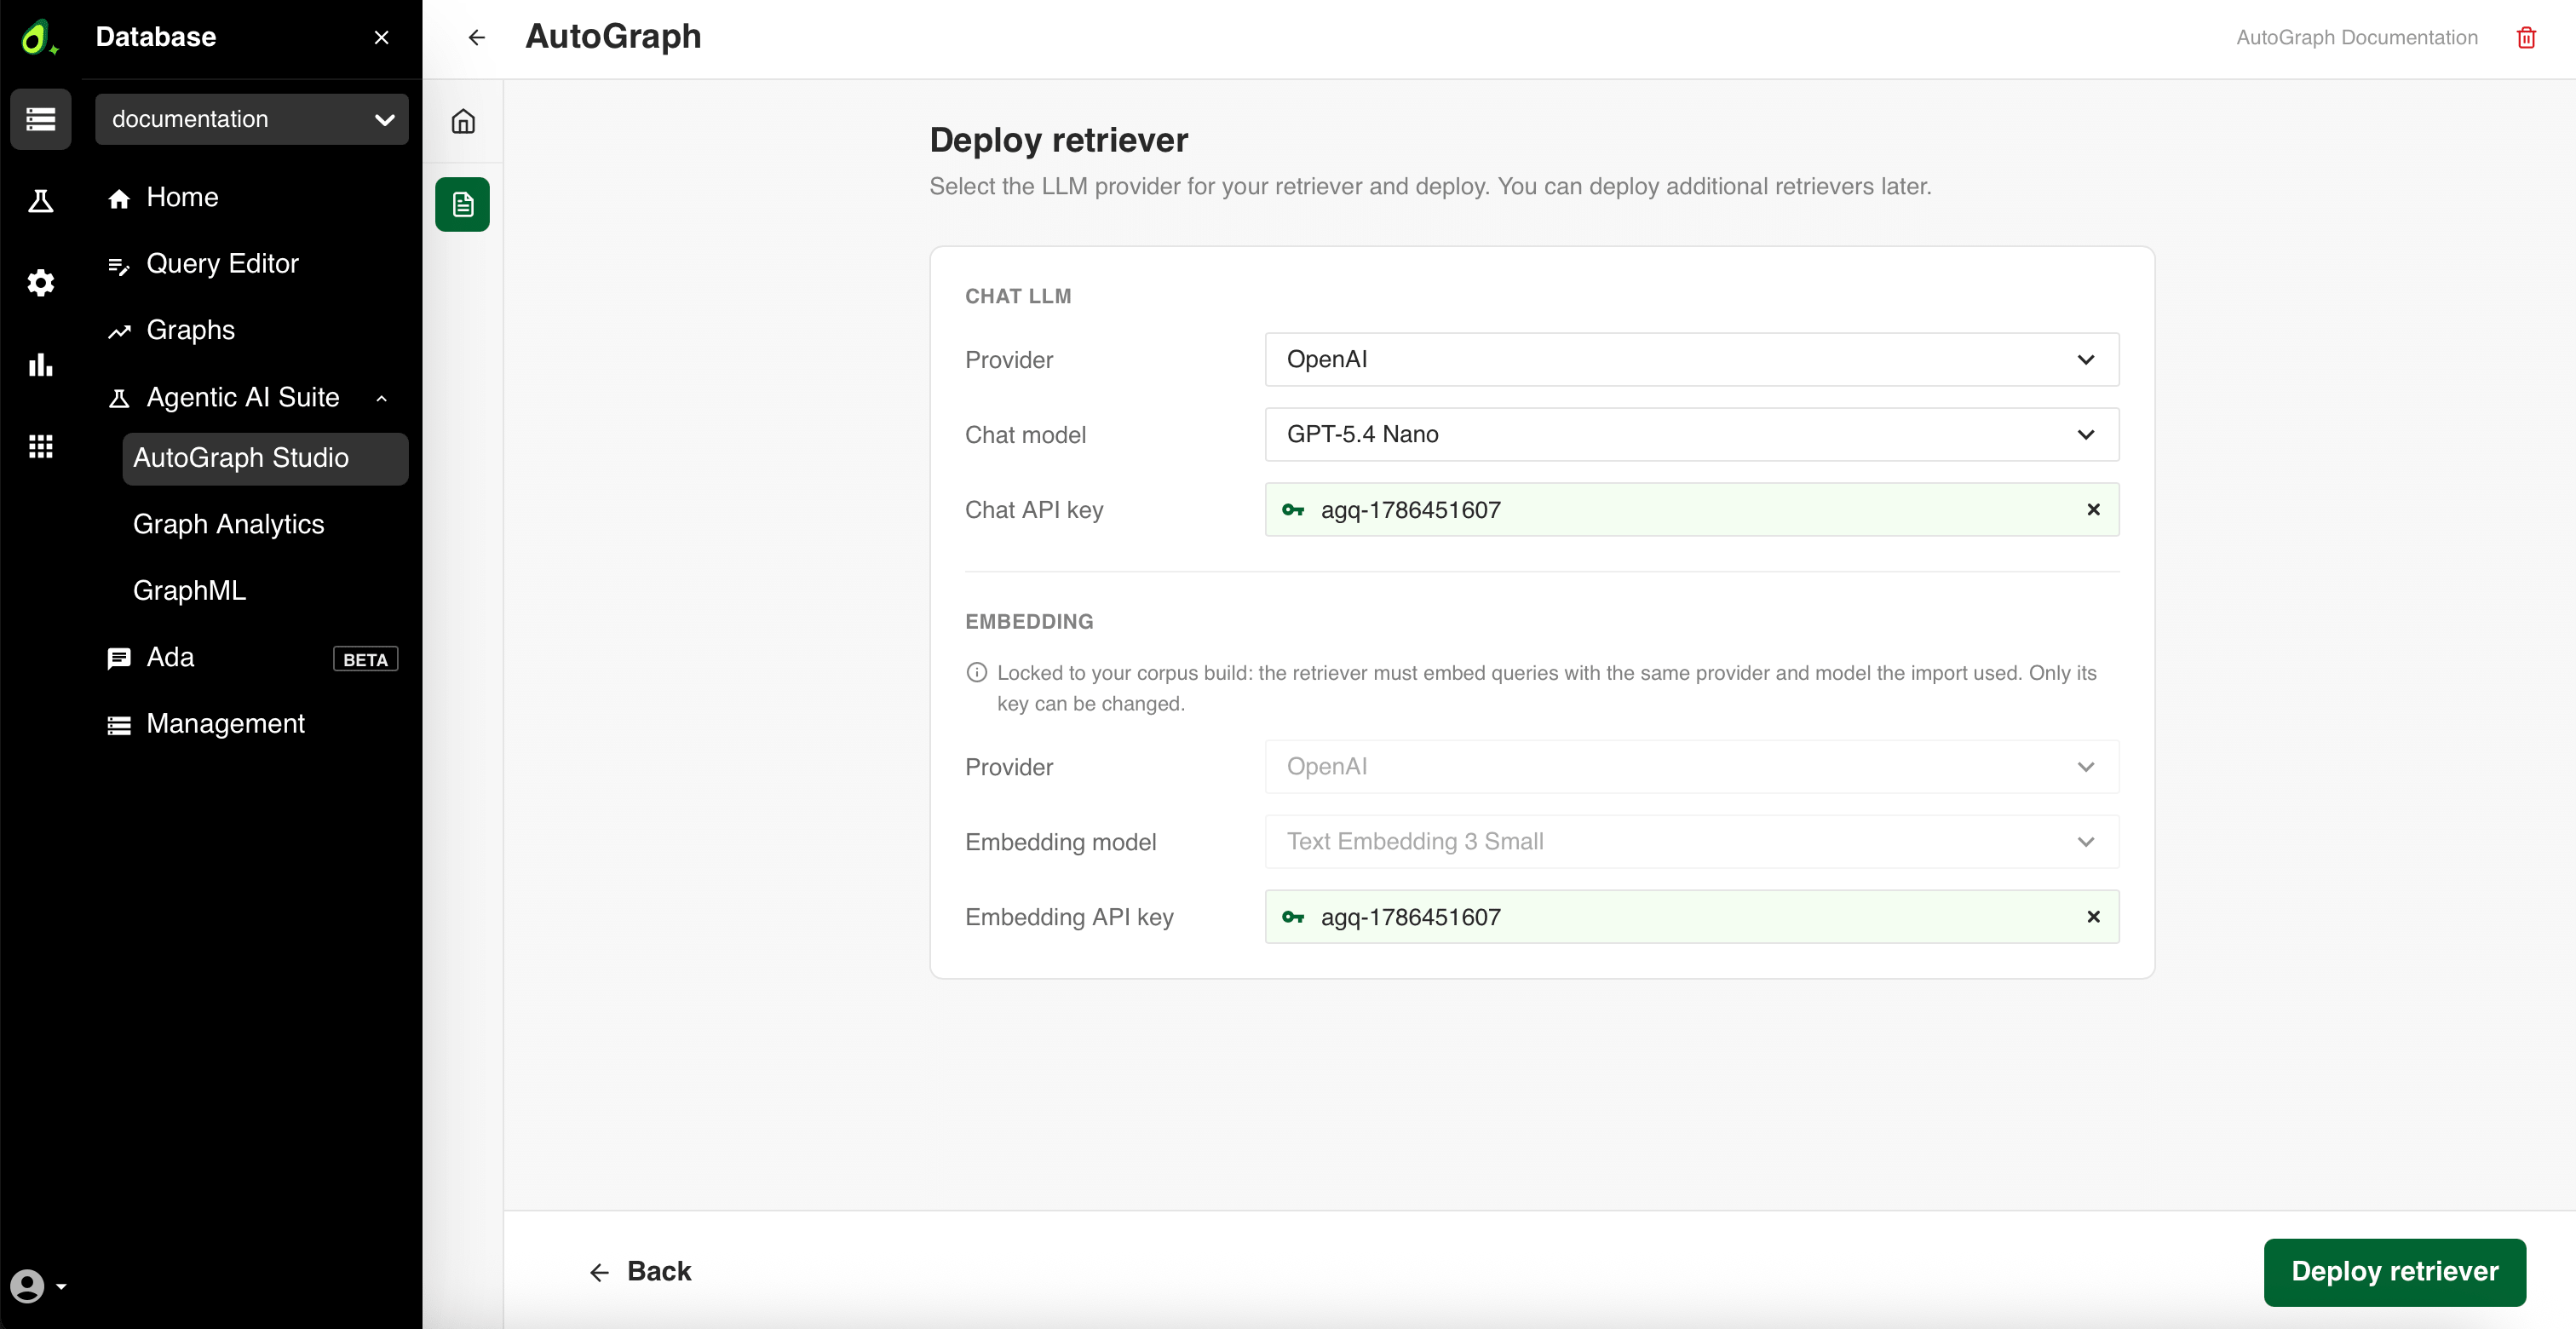
Click Deploy retriever.
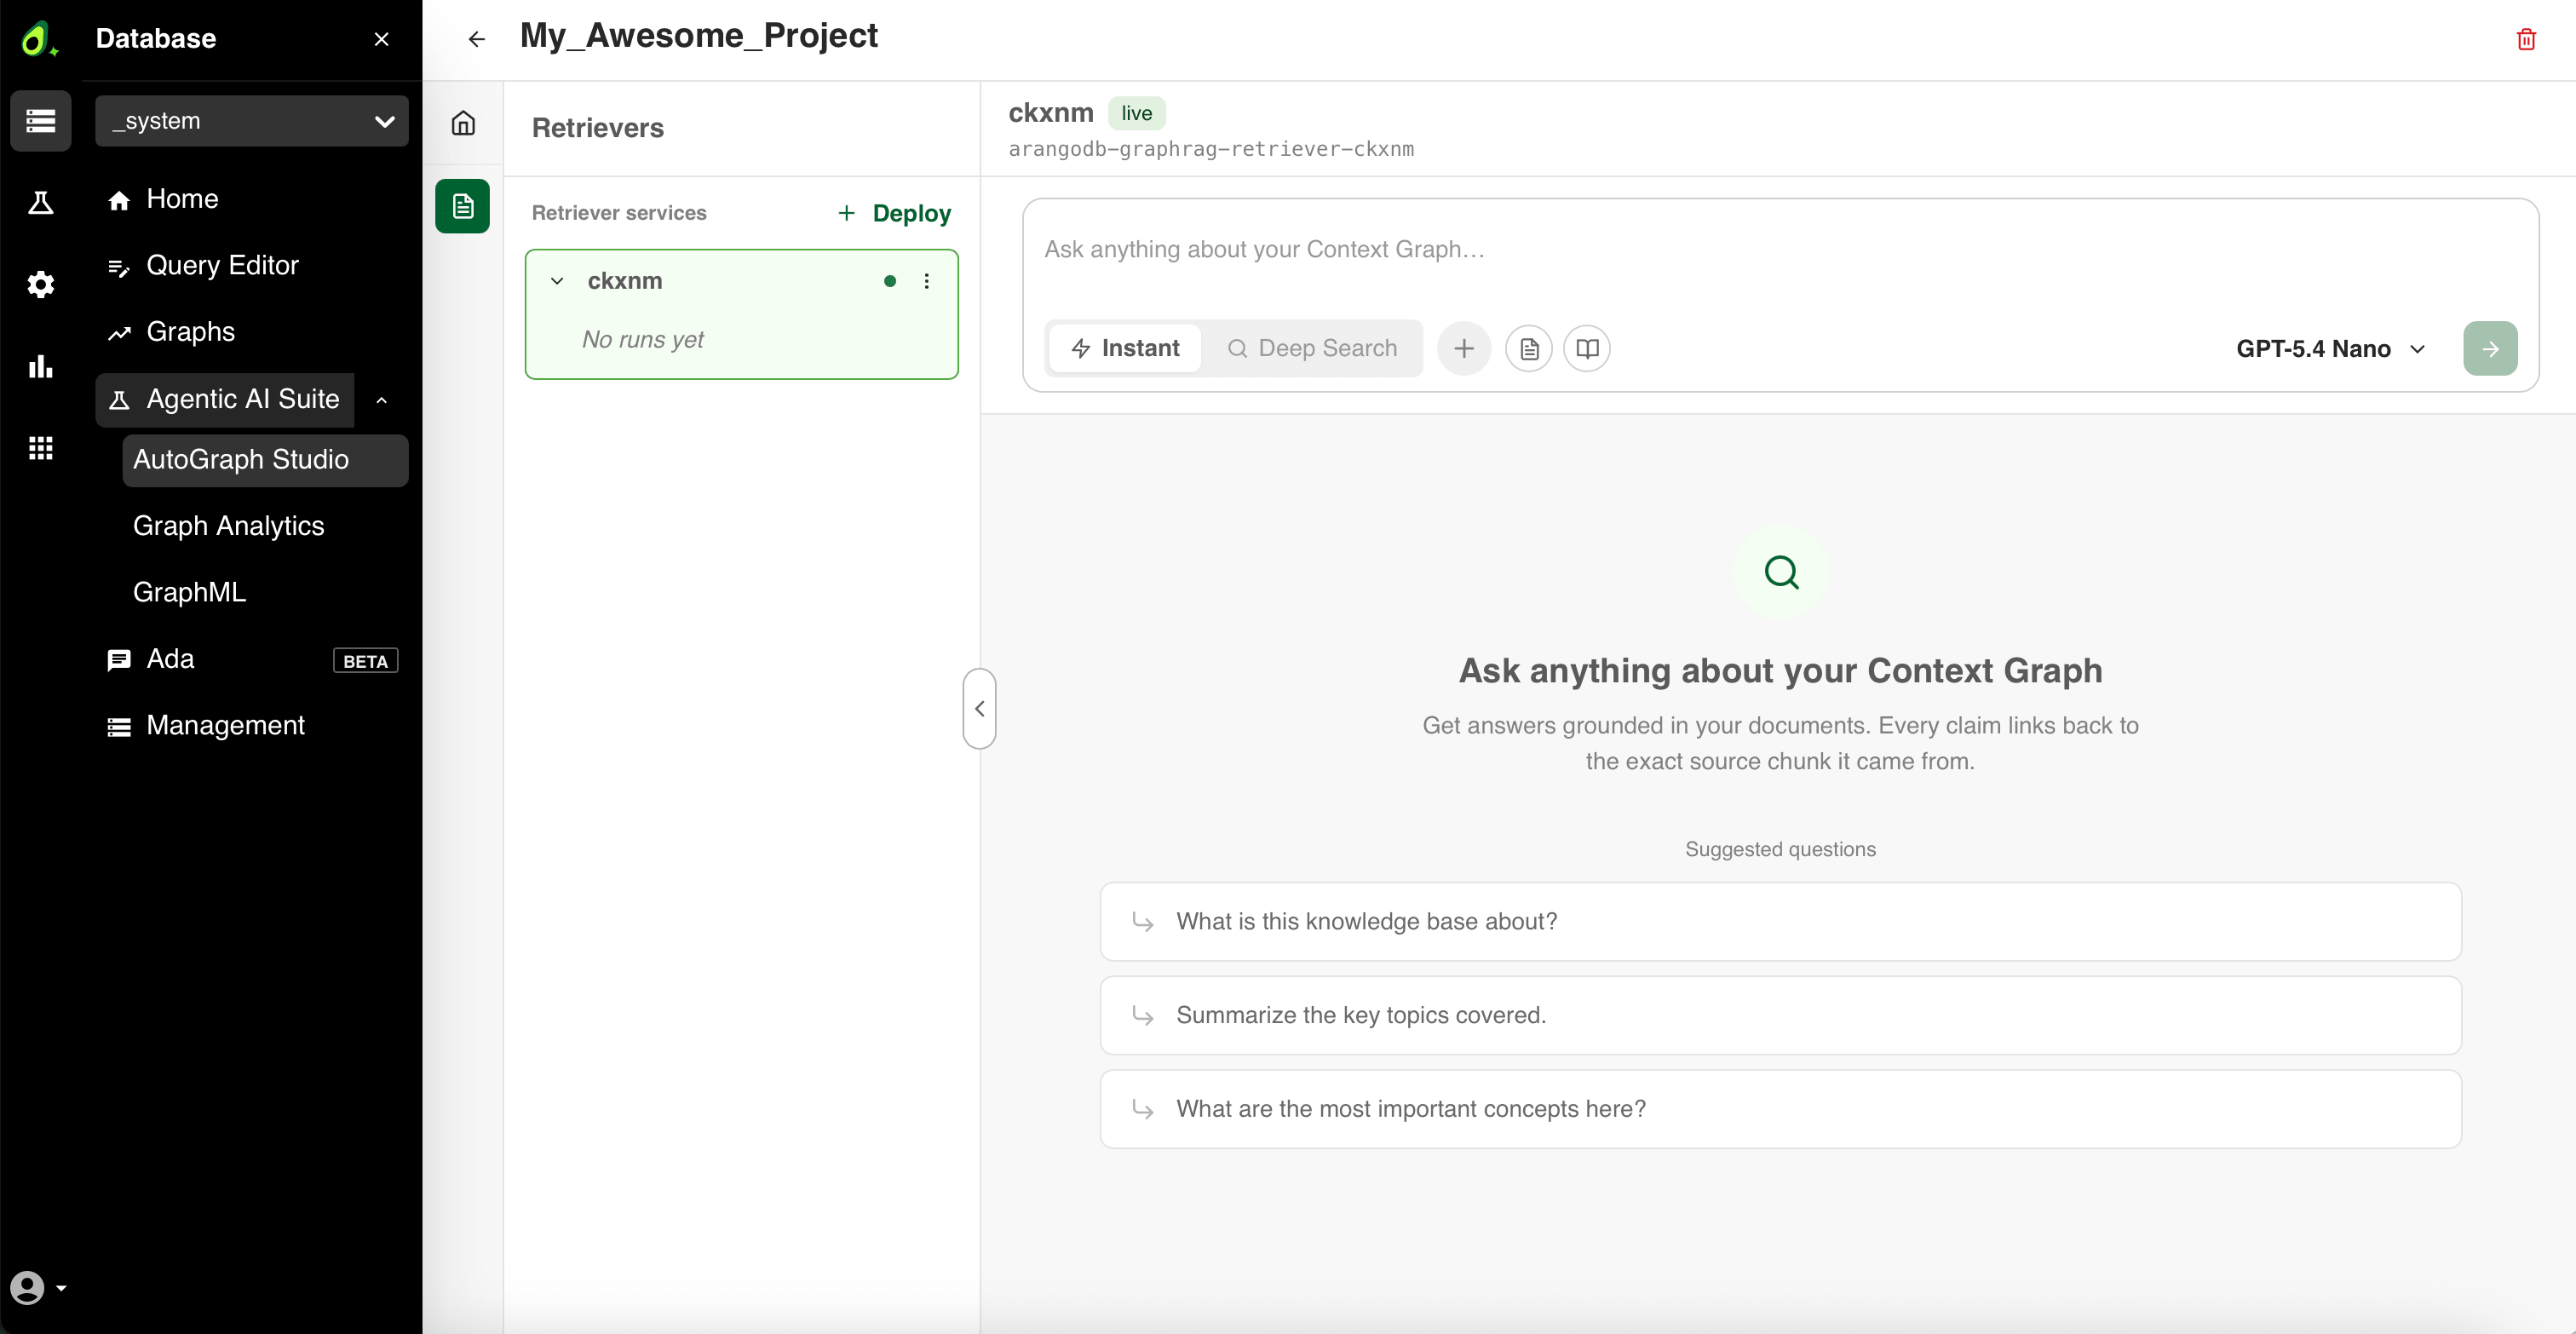
The retriever appears in the Retriever services list. Retrievers have no name
of their own, so each is listed by its service ID with the
graphrag-retriever- prefix stripped, next to a colored status dot. Hover over
the dot for the status:
| Dot | Status | Meaning |
|---|---|---|
| Green | Live | Ready to answer. |
| Yellow | Deploying | Starting up. This usually takes about a minute. |
| Red | Failed to start | Deployed, but not answering its health check. |
| Red | Failed to deploy | The service never came up. |
Select the retriever to see its full service ID and an initializing to live status in the playground header.
Ask questions against your Context Graph
Select a retriever from the list to open its question composer and its past questions, then click New question. A retriever that has not answered anything yet is listed as No runs yet. Past questions are marked with the mode they ran in.
- Choose a search mode:
- Instant: Single-pass retrieval that combines semantic and lexical search with graph expansion. Lower latency, narrower coverage.
- Deep Search: Multi-hop, LLM-planned retrieval. Higher latency, broader coverage.
- Optionally, use the buttons next to the mode chips to shape the request.
Active toggles show a cross that clears them again. For the underlying
settings, see the retriever parameters.
- Add to query (
+): Attach extra context to the question you are asking. Once you change any option, the menu also offers Reset to defaults. - Include metadata (document icon): Return the retrieval metadata alongside the answer.
- Show citations (book icon): Include inline citations in the answer. Citations are built from the retrieval metadata, so this toggle is disabled while Include metadata is off, and turning Include metadata off clears it.
- Use cache: Answer from the retriever’s cache when a similar question has been asked before, and store this answer for later questions. This saves an LLM round trip on repeated questions, but a cached answer reflects your Context Graph as it was when the answer was first generated. It is off by default.
- Response instruction: Tell the model how to shape the answer, for
example
Concise answer in 2-3 sentencesorProvide detailed analysis with examples. Without one, the default instruction for the search mode applies — Instant Search, for instance, aims for 60 words.
- Add to query (
- Select the chat model for the answer from the model dropdown menu, for example GPT-5.4 Nano.
- Enter your question in the Ask anything about your Context Graph field and submit it, or click one of the Suggested questions.
Every claim in the answer links back to the exact source chunk it came from.
See where an answer came from
Next to the answer itself, the Provenance tab shows the evidence the retriever used to produce it, so you can verify a claim instead of taking it on trust. It has the following views:
Citations: The source passages the answer is built from, numbered to match the inline
[1],[2]markers in the text, for both search modes. Each entry names the document the passage comes from and shows the retrieved chunk itself, so you can compare a claim against the original wording. Documents imported with a canonical URL link out to it — seecitable_url. Each entry also offers Open document in database.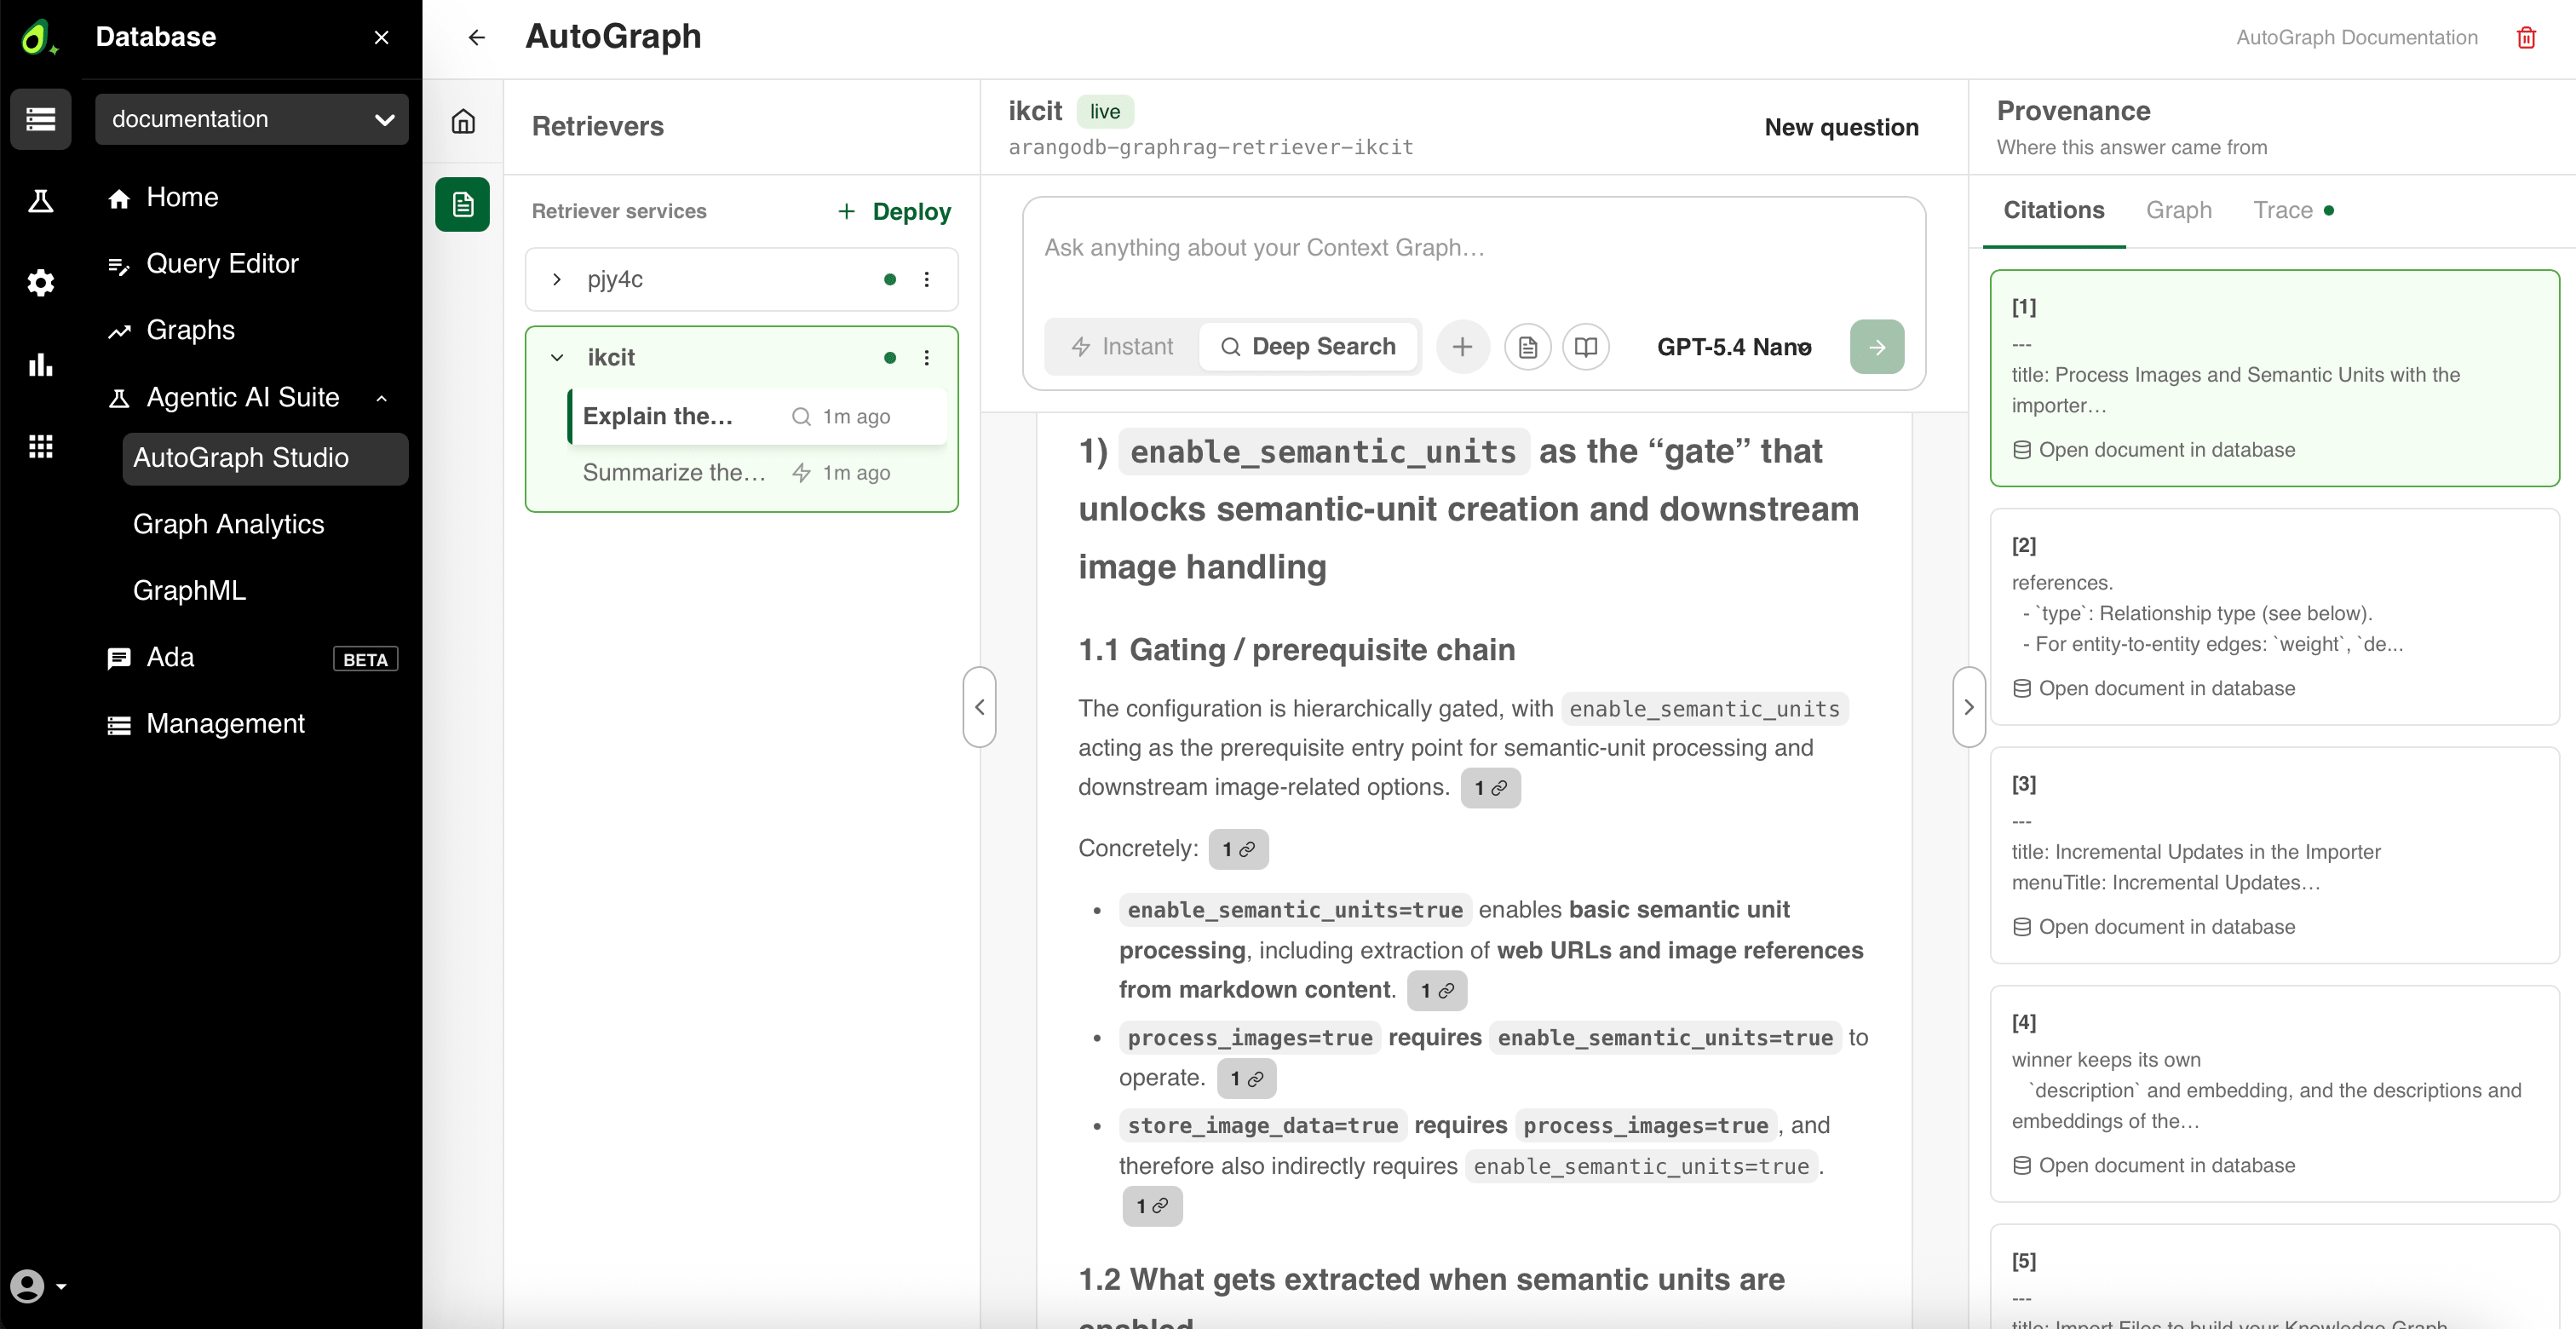
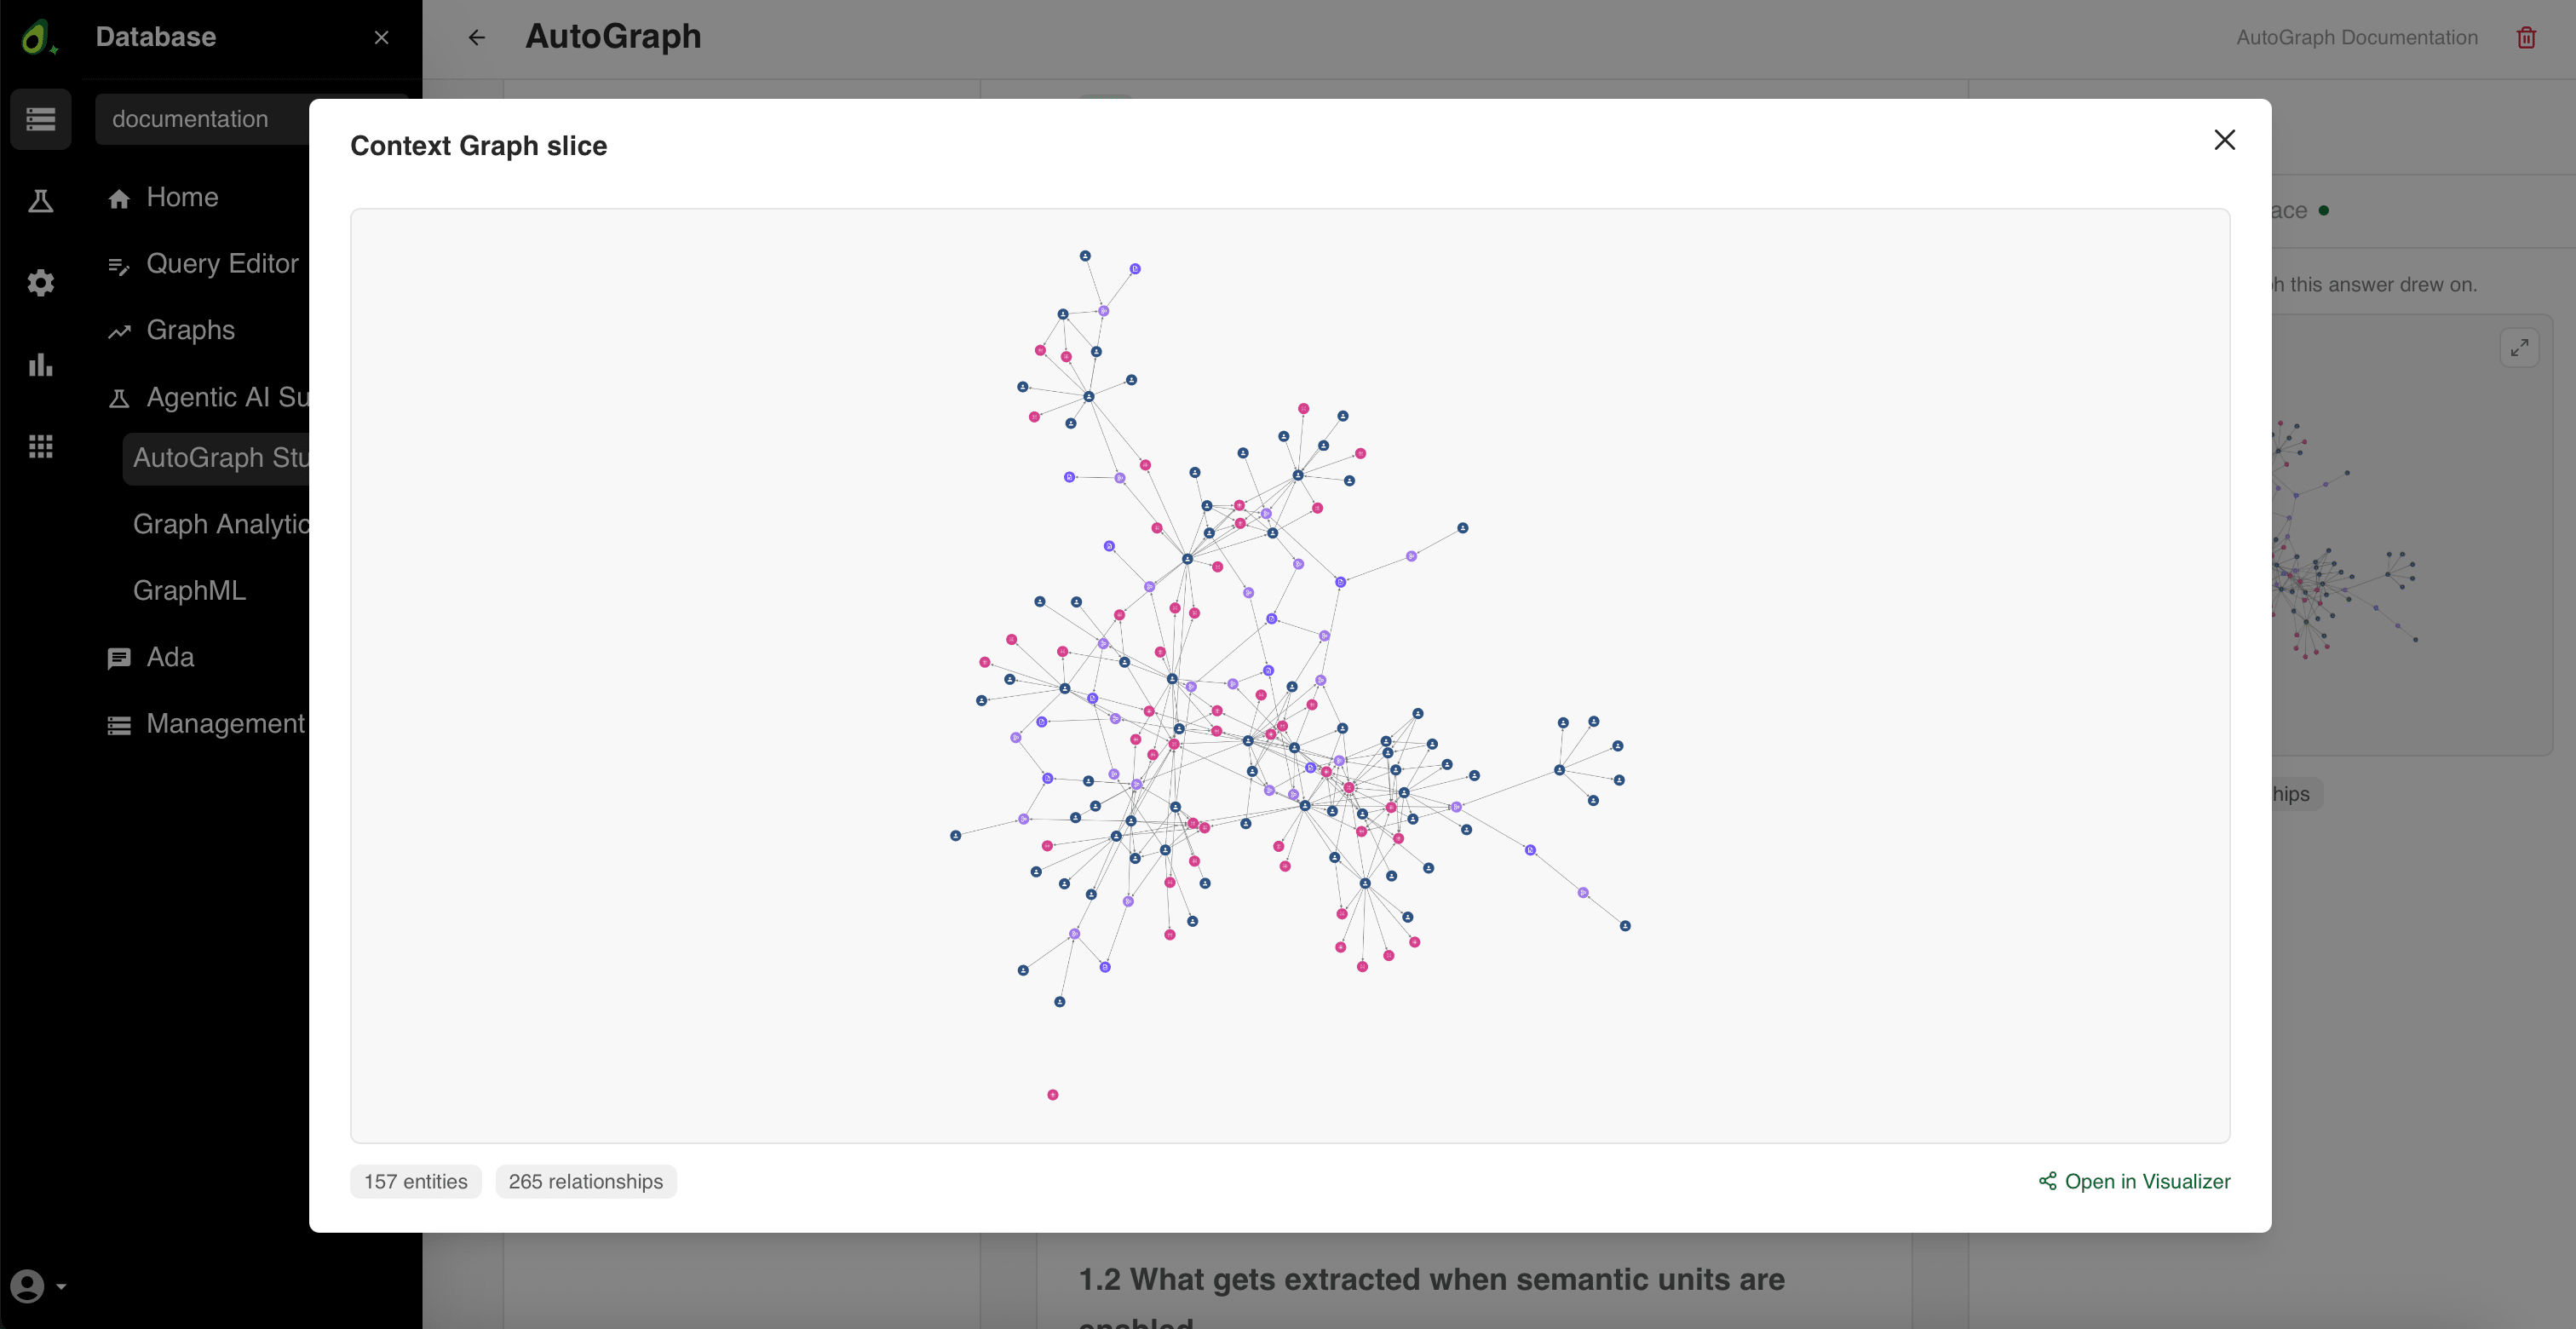
Graph: The part of your Context Graph the answer was drawn from — the entities and relationships the retriever traversed to assemble it. This is where a GraphRAG answer differs from a plain vector search: you see the connections that produced the answer, not just the matching text. The view counts what it holds, for example 157 entities and 265 relationships.
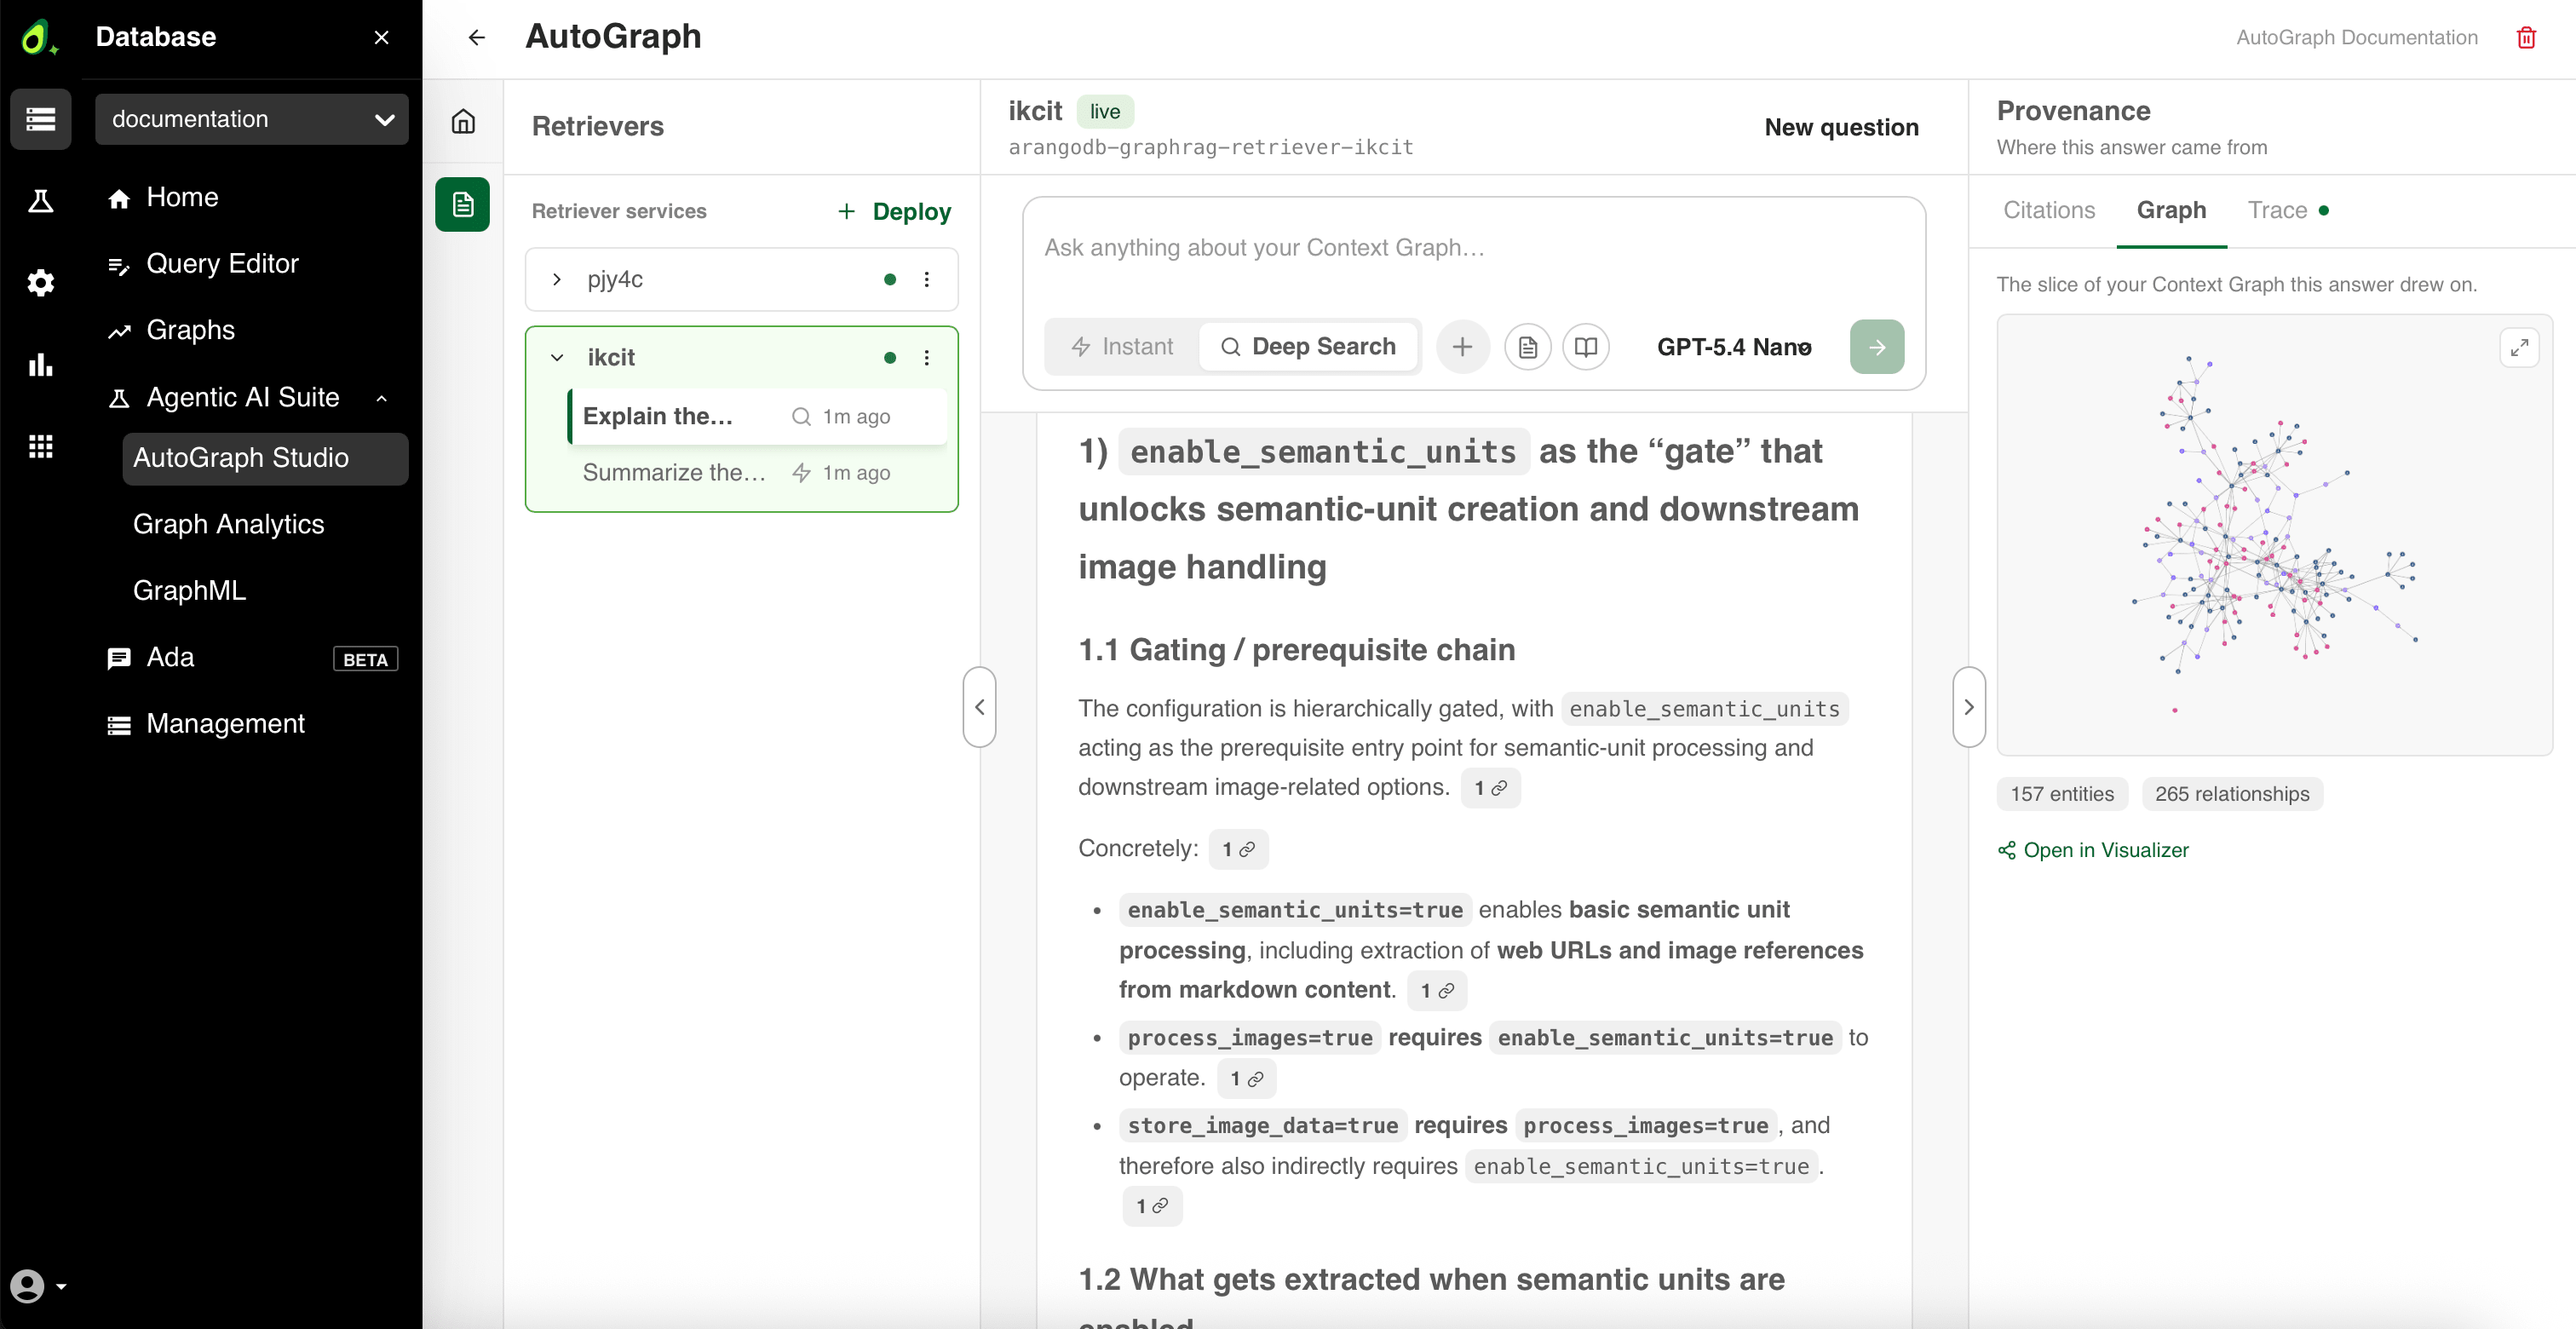
Use the expand icon to open the slice as a Context Graph slice dialog, or Open in Visualizer to explore it in the Graph Visualizer.
Trace: Only shown for Deep Search answers. Deep Search splits your question into sub-questions and runs each step with the tool it selected for it, and the trace reports that work. Its header counts the steps and the tools involved, including the ones that failed, for example 5 steps · 4 of 6 tools used · 1 failed. Tools come from the
Toolscollection and are defined manually; see Tool configuration.
Each view needs the data it displays, so the tabs are only there if the answer carries it: Graph and Trace require Include metadata, and Citations requires Include metadata together with Show citations. Both toggles are on by default. If you turn them off, the tabs disappear and the panel names the toggle to switch back on instead.
Manage retriever services
The Retriever services section of the Retrievers panel lists all deployed retrievers with their status and past questions.
- Click + Deploy to add another retriever with a different configuration.
- Use the menu next to a retriever for Edit retriever and Delete retriever. Both are only available while the service is live — a tooltip explains why they are disabled otherwise.
- Use the chevron between the list and the composer to collapse the list.
Edit retriever reopens the deploy form in edit mode, to update this retriever’s chat model, provider, or keys. Click Save changes to apply them to the running service — no redeployment is needed.
Each retriever can have different settings for search mode, response instructions, and other parameters, allowing you to create specialized retrievers optimized for different types of queries or use cases. For more details, see the AutoRAG reference documentation.